Step 2 — Define Agent
Provide the basic configuration details for the agent.
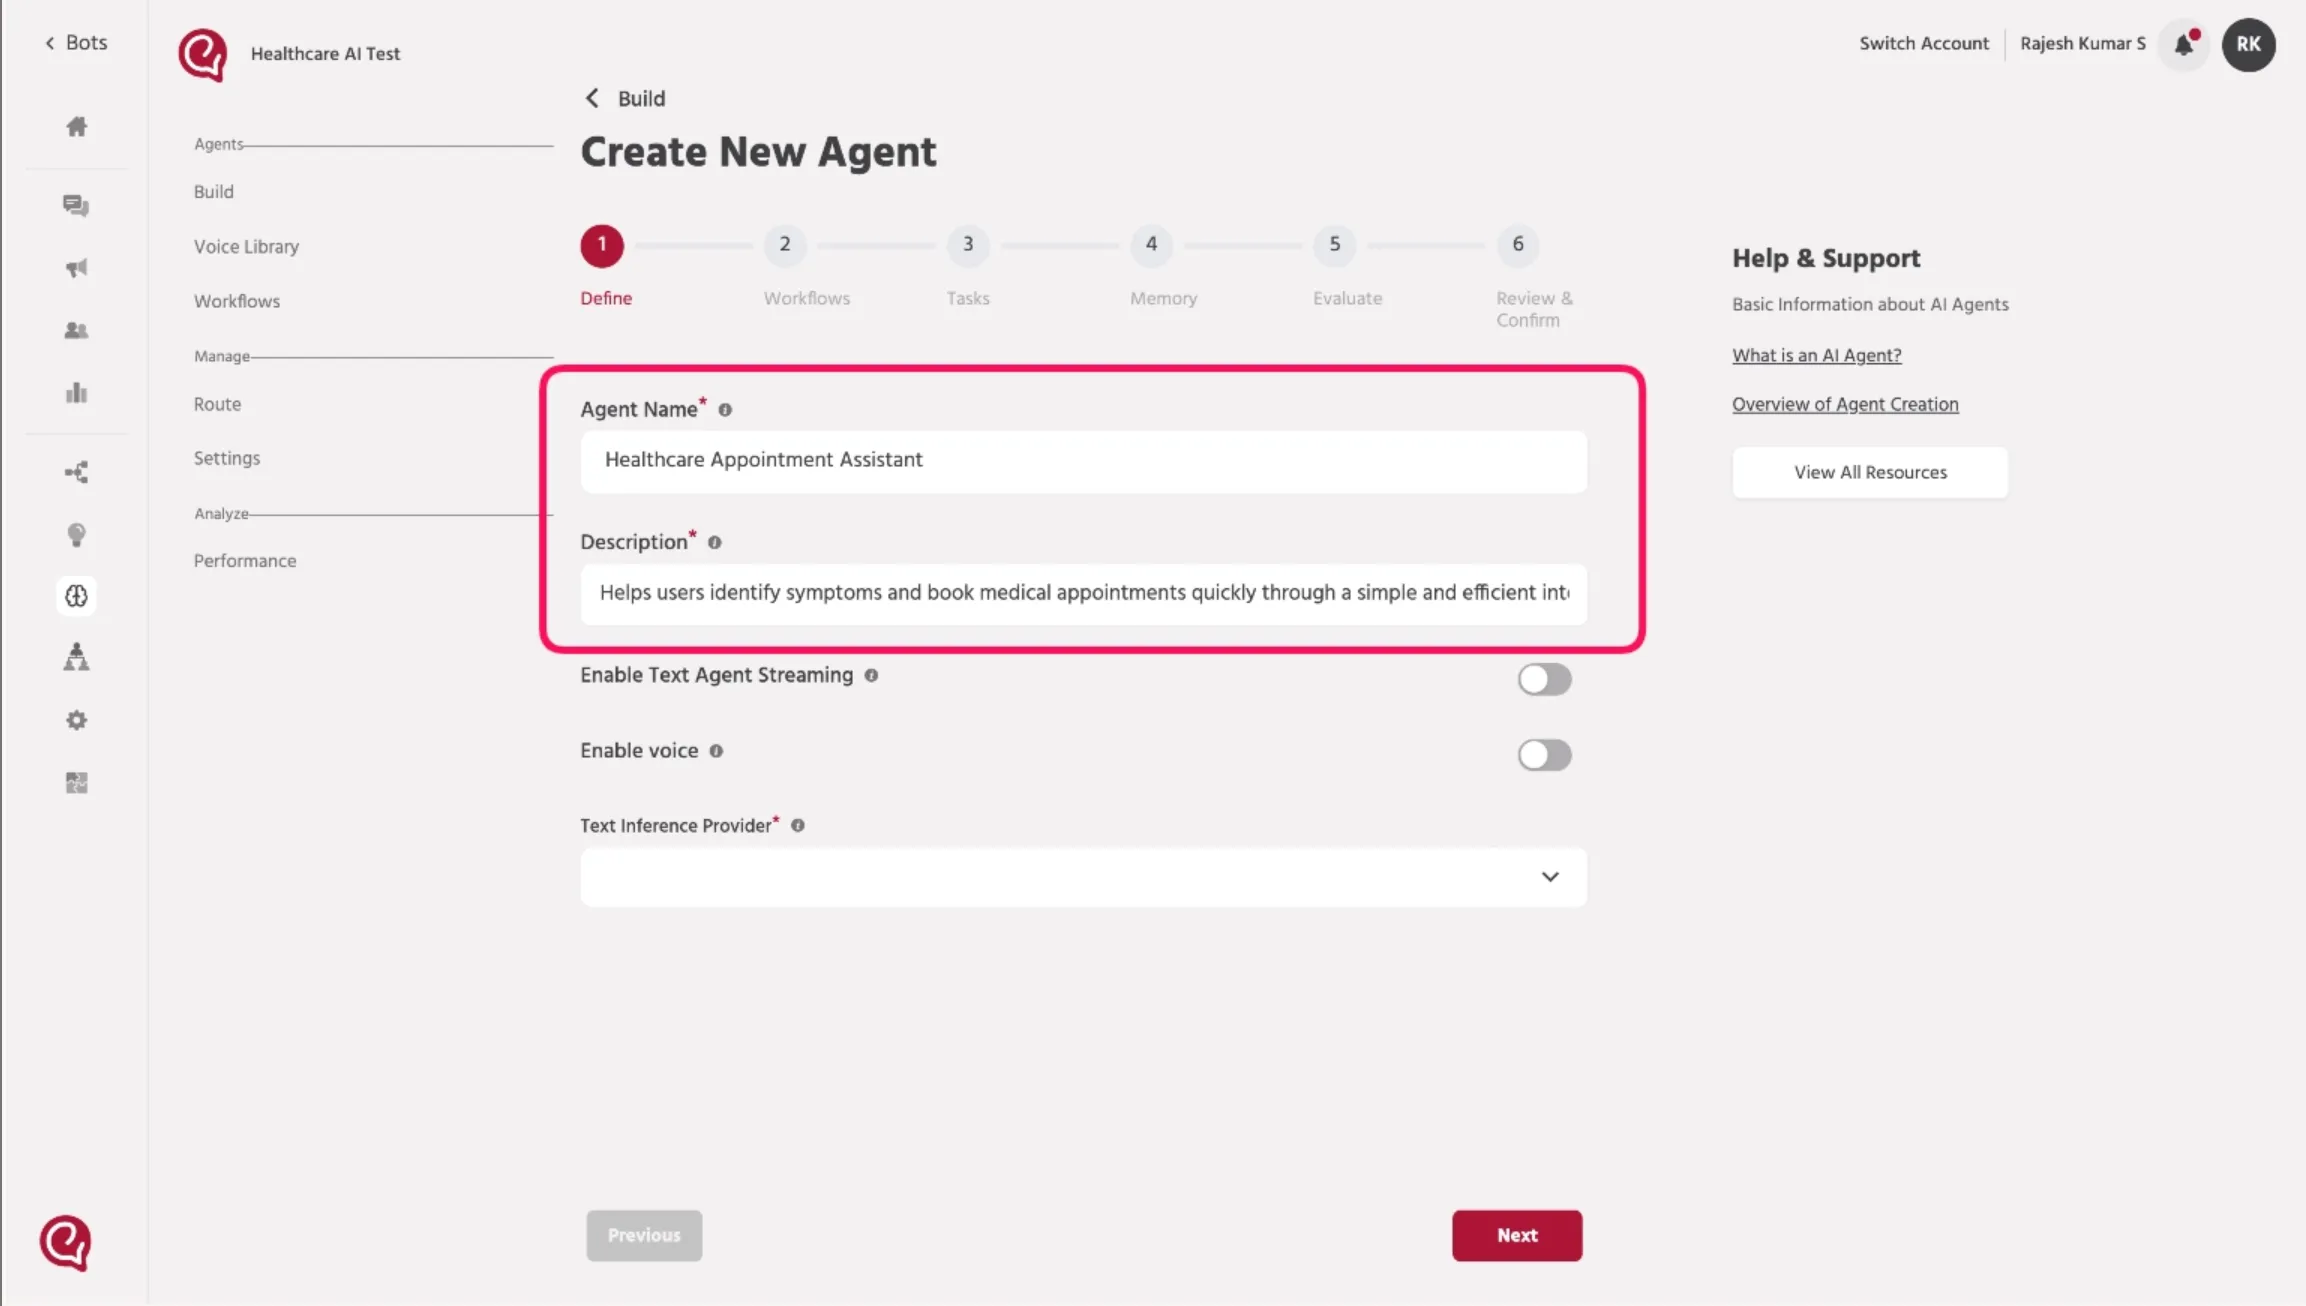
Agent Name
Enter a name that clearly identifies the purpose of the agent.
Example: Healthcare Appointment Assistant
Description
Provide a short description explaining what the agent does.
Example: Helps users identify symptoms and book medical appointments quickly through a simple and efficient interaction.
Enable Voice
Enable the Voice option to allow the agent to interact using voice.
Agent Initiates Conversation
Enable this option if the agent should start the conversation automatically when the interaction begins.
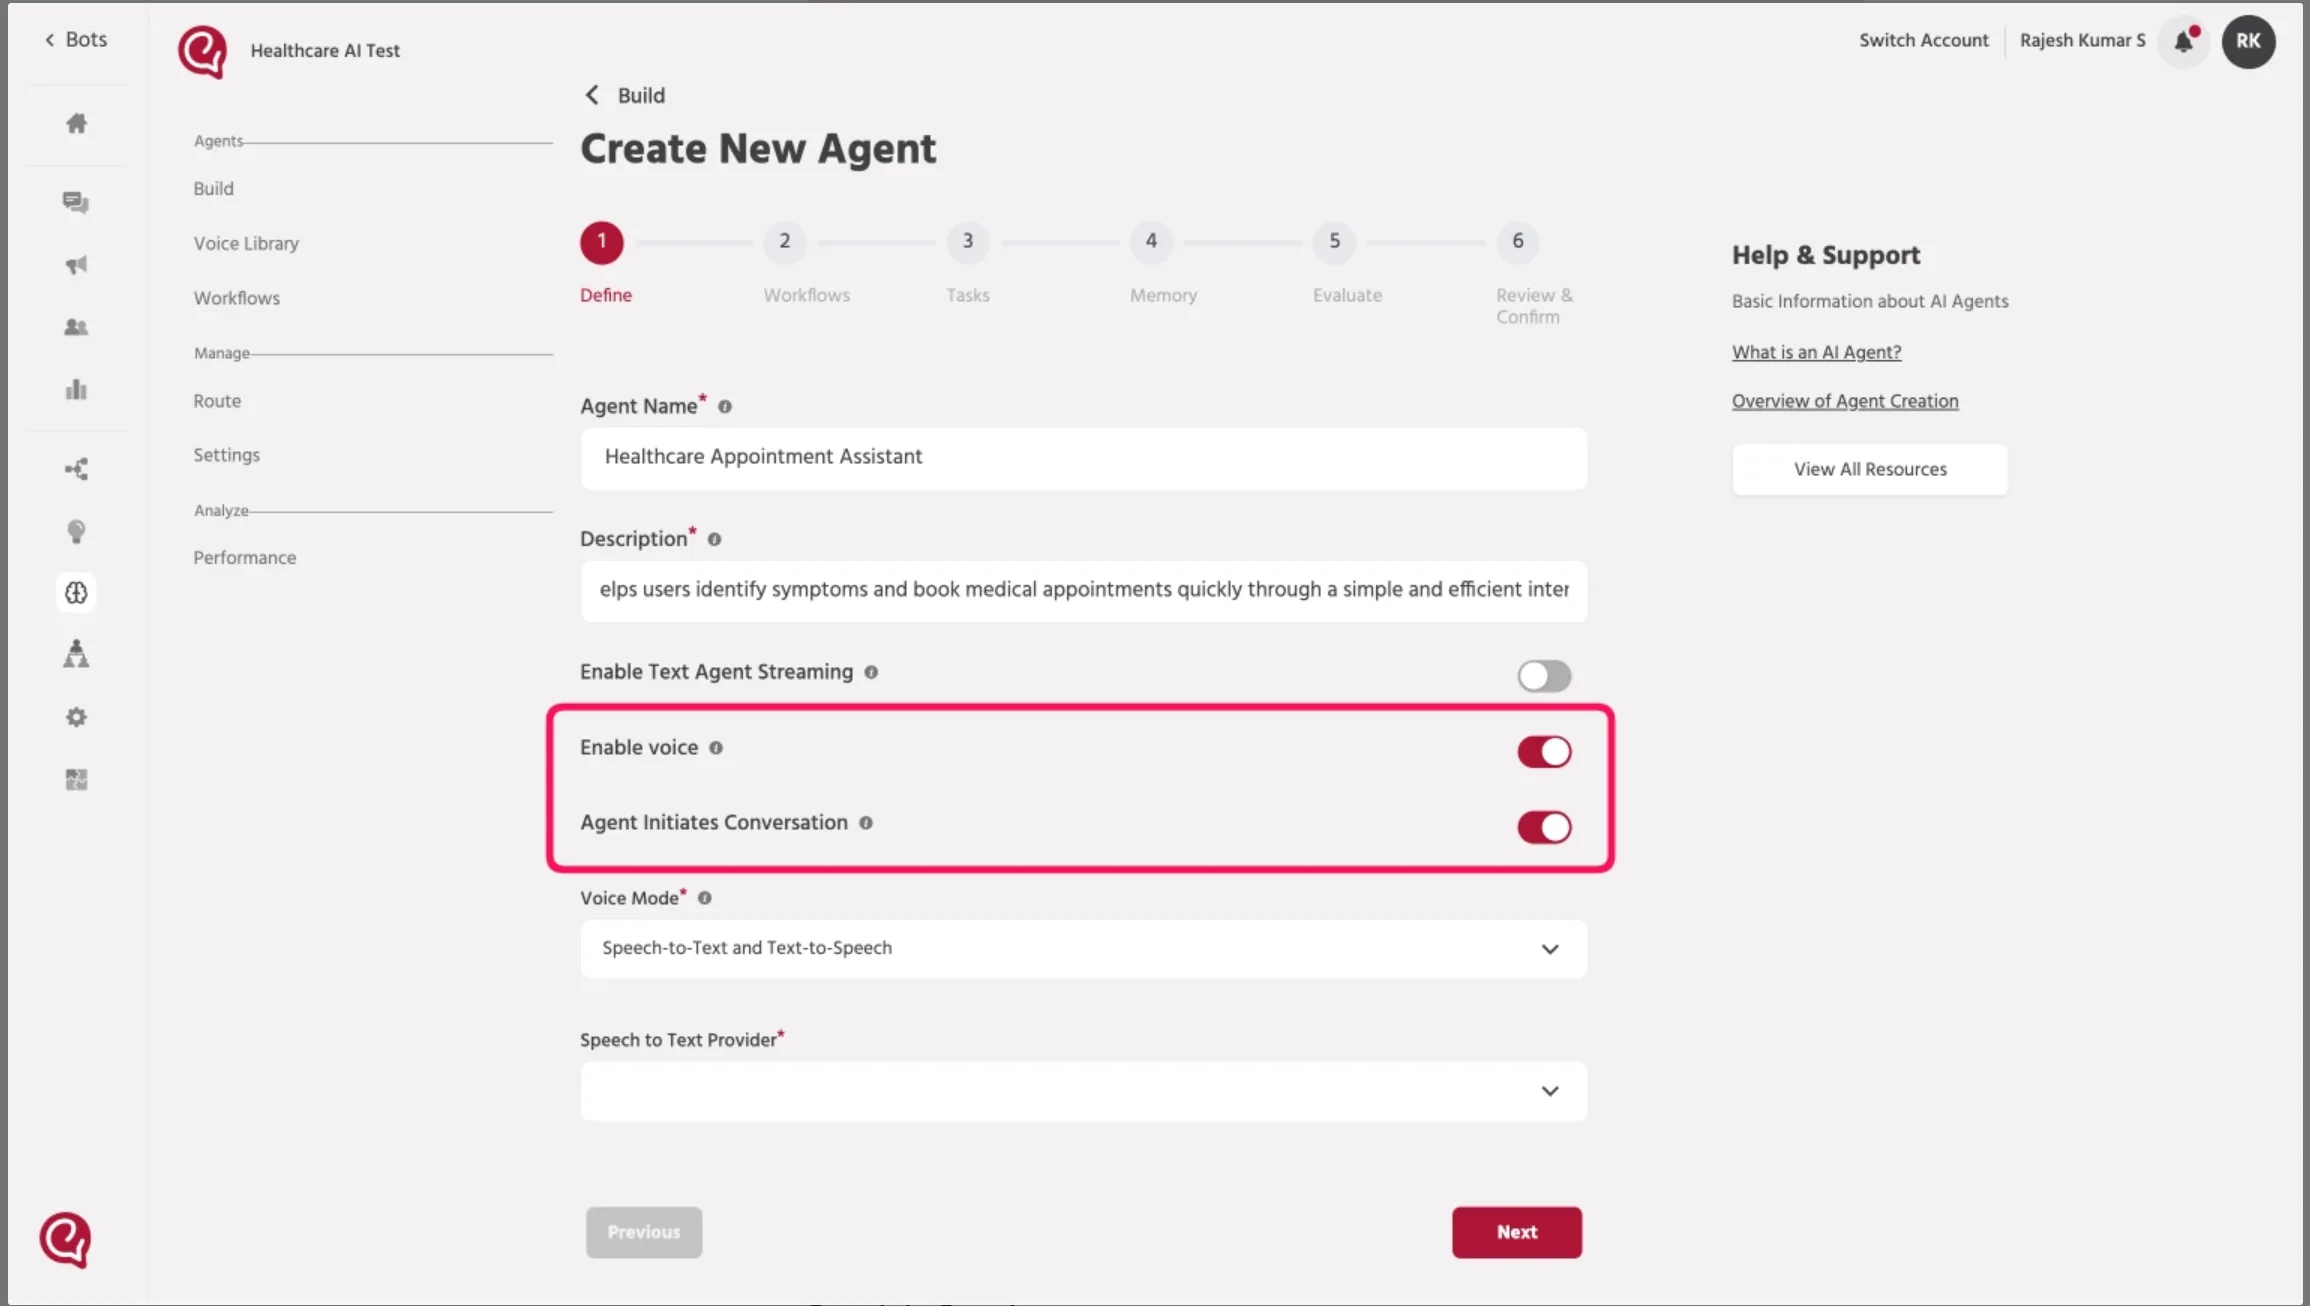
Voice Mode
Select how the voice interaction will be handled.
Available options may include:
Speech-to-Speech
The system processes speech input and returns speech output directly.
Speech-to-Text and Text-to-Speech
Speech is converted into text, processed by the AI model, and then converted back into speech.
RECOMMENDED: Speech-to-Text and Text-to-Speech
Speech-to-Text Provider
Select the provider responsible for converting user speech into text.
Example providers:
- Whisper
- Azure
- Sarvam
- Cartesia
RECOMMENDED: Sarvam
LLM Provider
Select the AI model provider that will generate responses.
Example providers:
- Groq
- Simplismart
- Gemini
RECOMMENDED: Gemini
Text-to-Speech Provider
Choose the provider used to convert text responses into voice output.
Example providers:
- Sarvam
- ElevenLabs
- Cartesia
RECOMMENDED: Cartesia
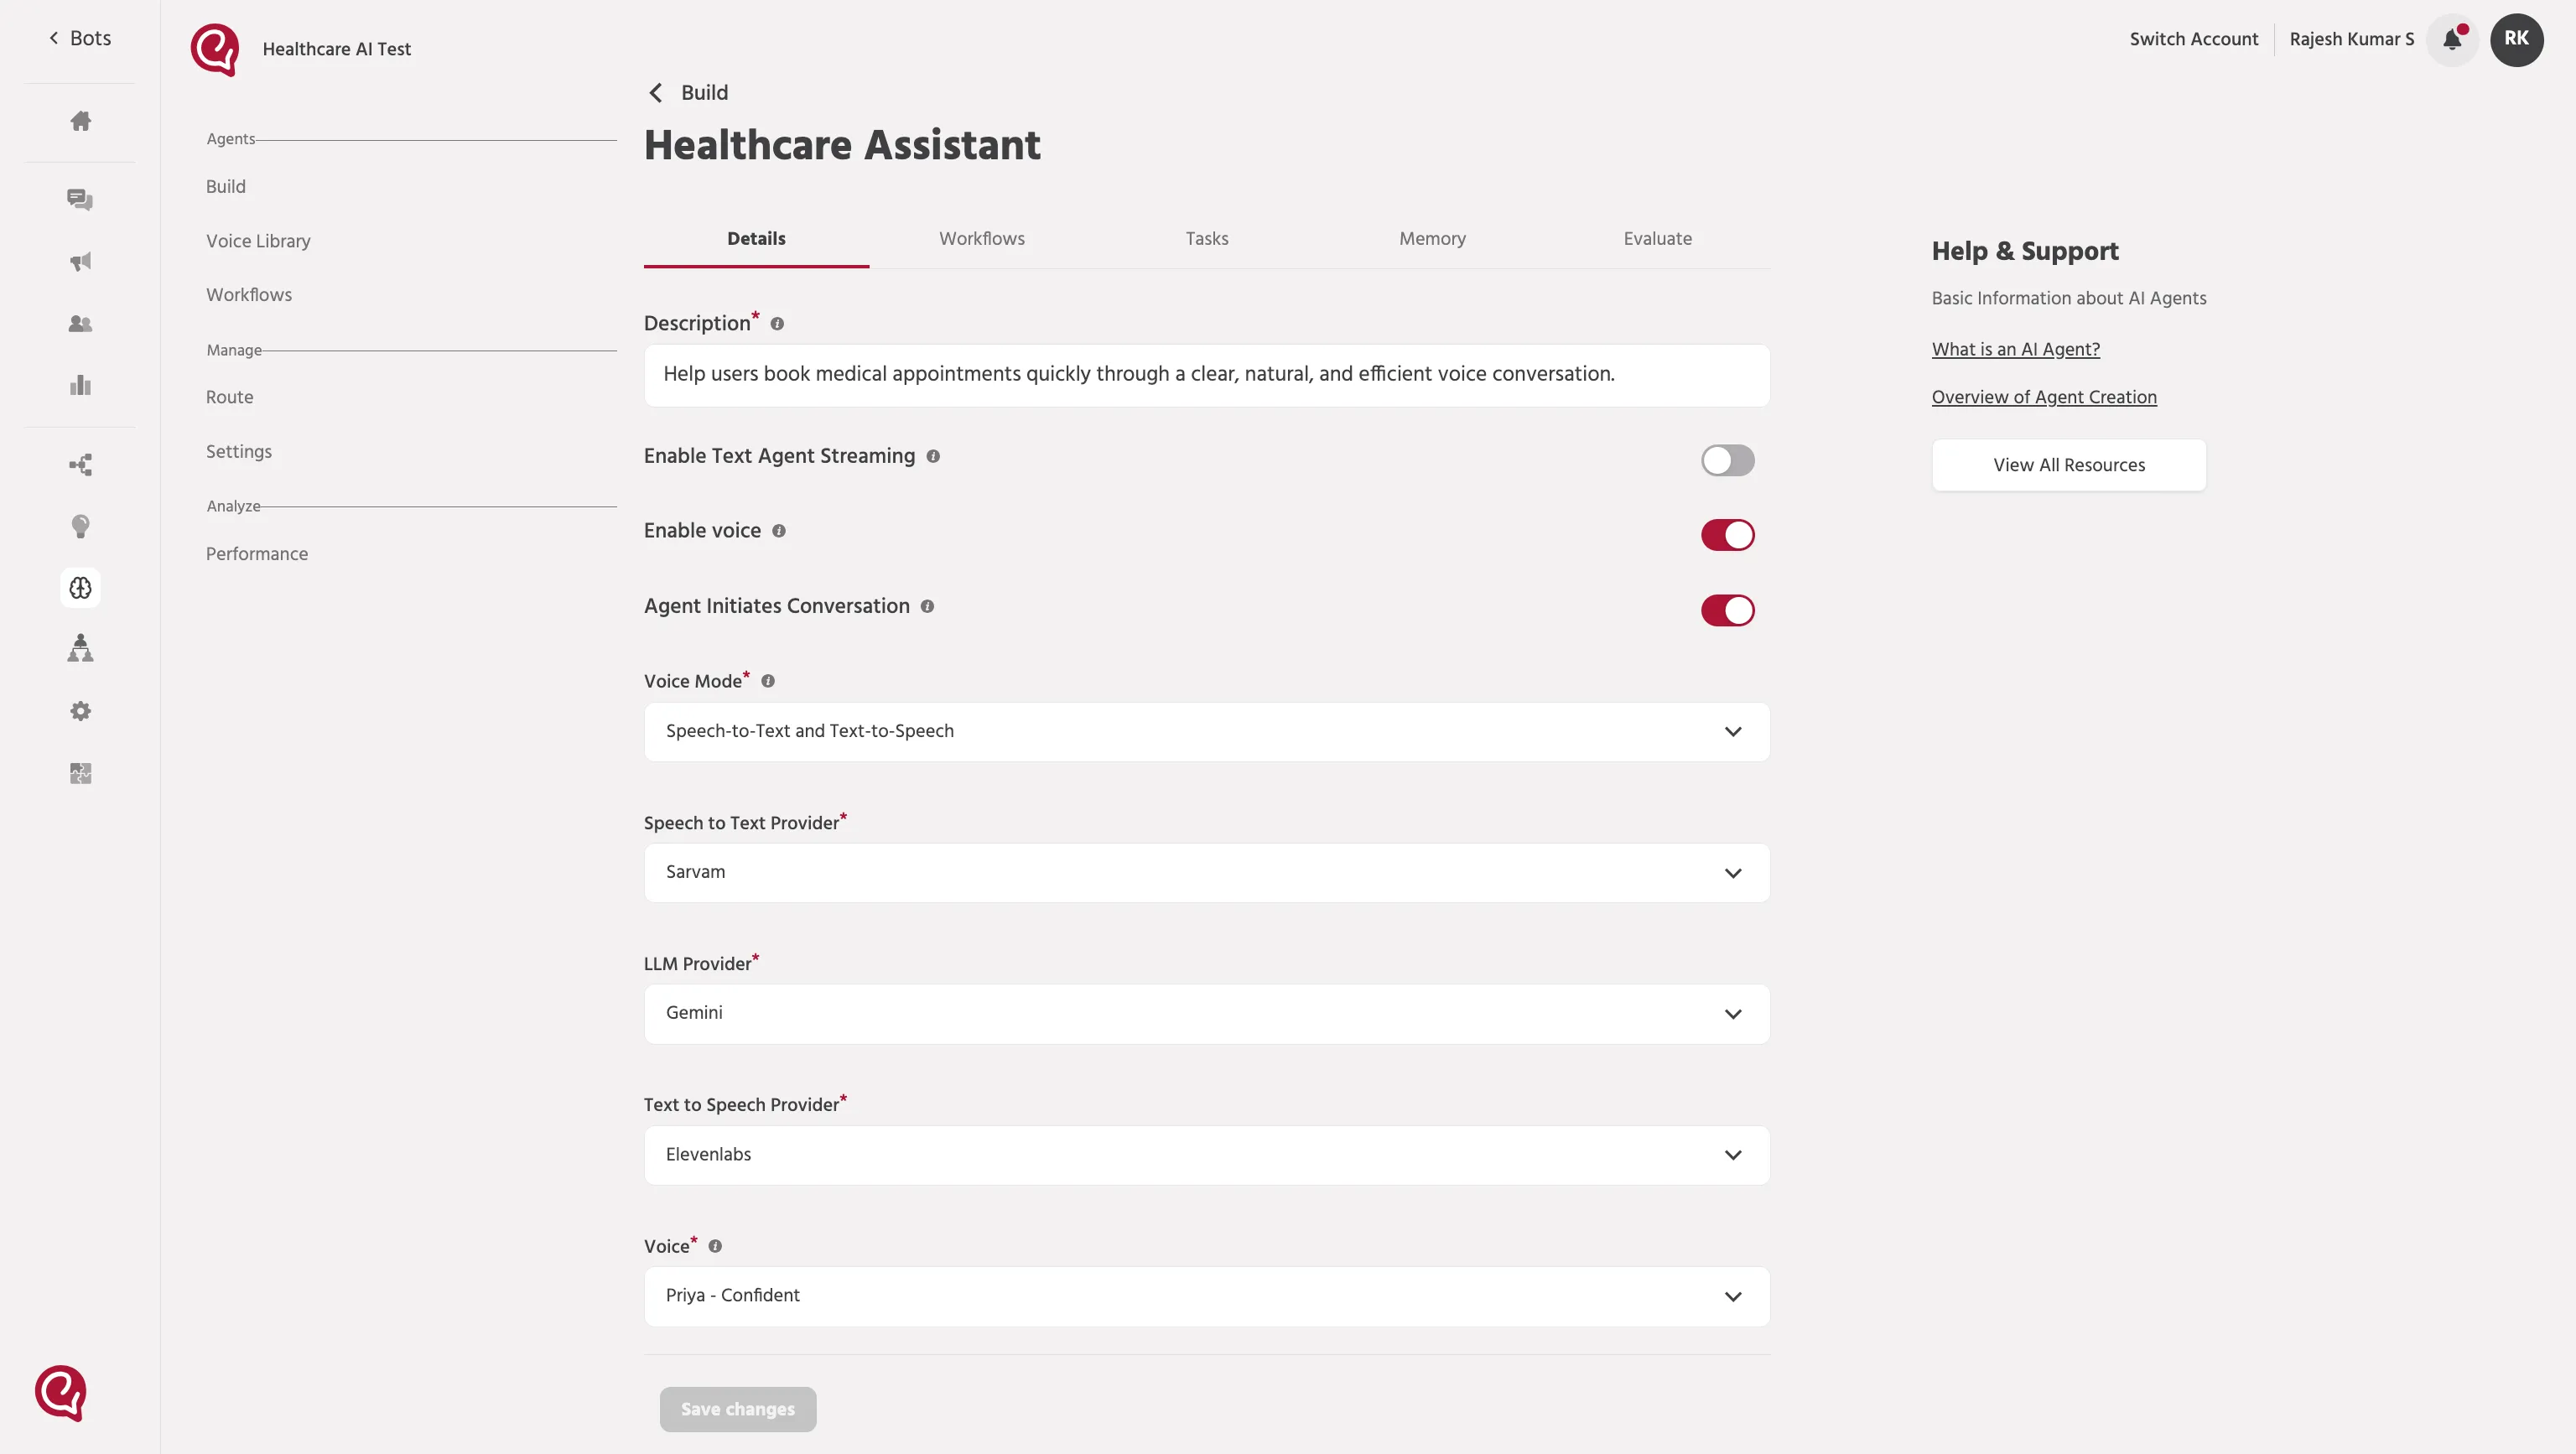
Voice Selection
Select a voice for your agent from the available options.
- Choose a voice based on tone and use case (e.g., confident, friendly, professional).
- Preview the available voices (both male and female) before selecting.
- Pick a voice that best matches your agent’s purpose and user experience.
After completing these settings, click Next to continue.
📚 Next Steps
Continue to: Step 3 — Workflow SetupStep 3 - Workflow Setup