Set Up Your Meta App as a Tech Provider
Introduction
Use this guide to set up your organization as a Meta Tech Provider with Engati as your BSP.
It covers the complete setup required to create and configure your Meta App, connect the Partner Solution, complete Business Verification and App Review, and configure Embedded Signup for customer onboarding.
What this guide covers
- Create or use a Meta Business Account
- Create and configure a Meta App
- Set up the Partner Solution with Engati
- Complete Meta Business Verification
- Request required permissions and complete App Review
- Configure Embedded Signup
- Complete the setup required to onboard customers
Before you start
Make sure you have:
- Meta Business Account access
- Meta Developer Account access
- Business verification/Admin details
- Privacy Policy URL
- Terms of Service URL
- Engati Partner App ID
Then continue with:
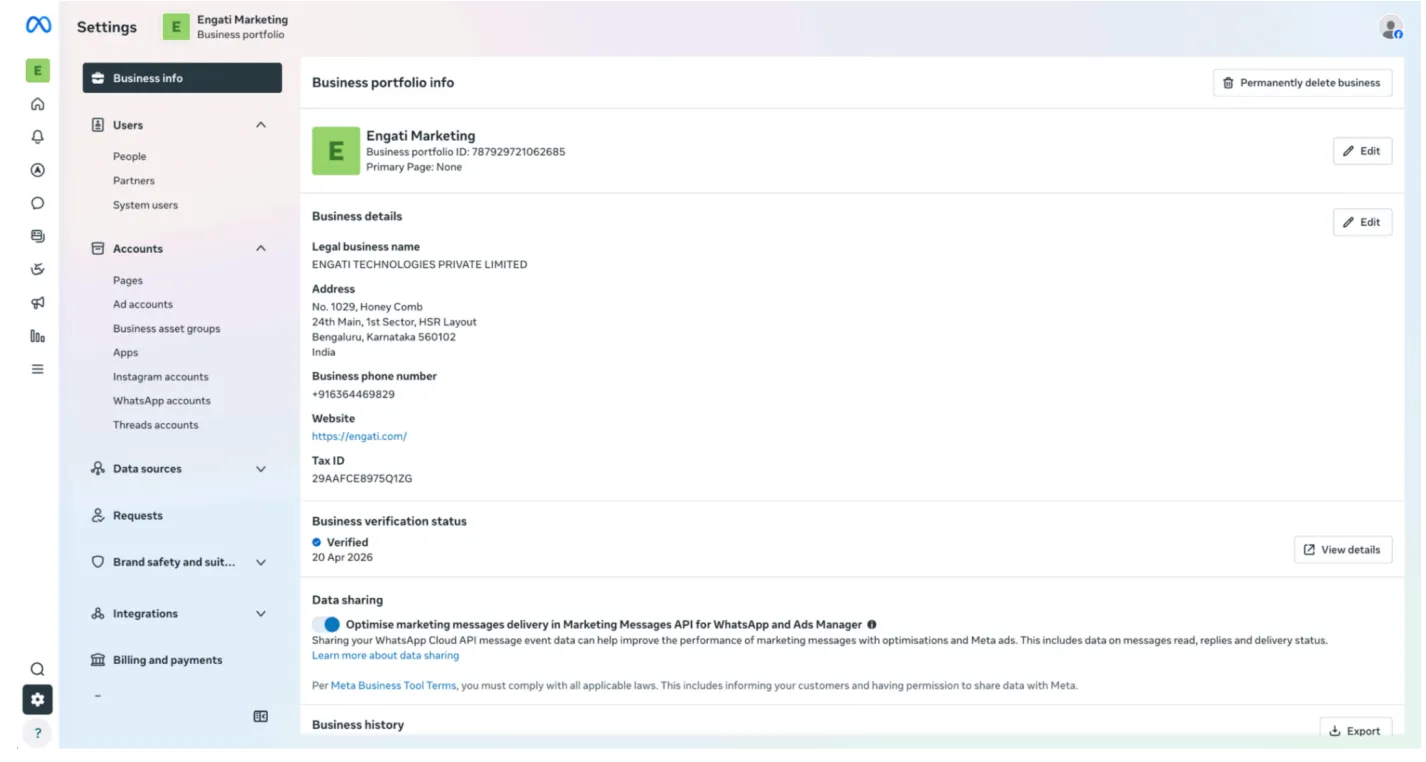
Step 1: Create a Meta Business Account
Create or use an existing Meta Business Account. (If you already have a Meta Business Account verified, you can skip this step and continue with creating the Meta App) Make sure all required business details are correctly added, such as:
- Business name
- Address
- Website
- Phone number
Your business account should be in good standing with Meta. Incorrect or incomplete details may cause rejection during business verification.
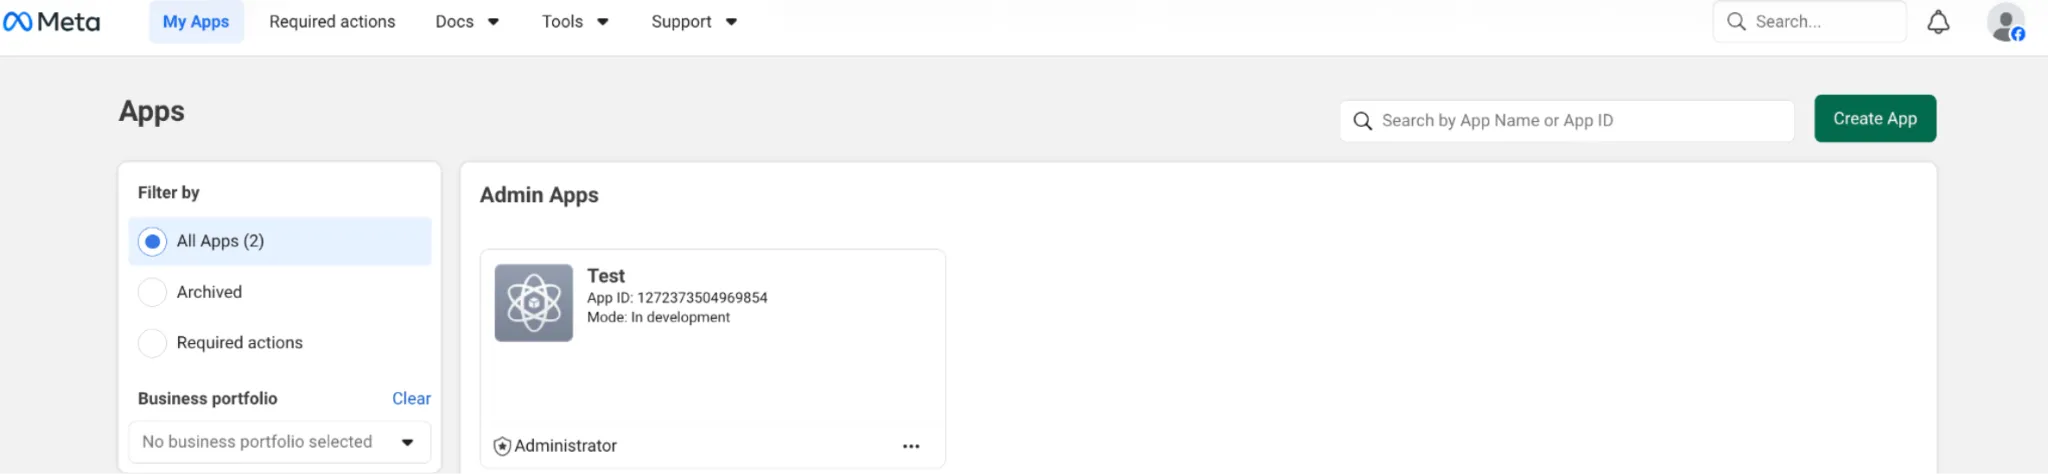
Go to Meta Developers -> My Apps https://developers.facebook.com/apps/
(If you already have an existing Meta App for this setup, you can skip creating a new app and continue with the next configuration steps)
Step 2.1 : Click -> Create App.
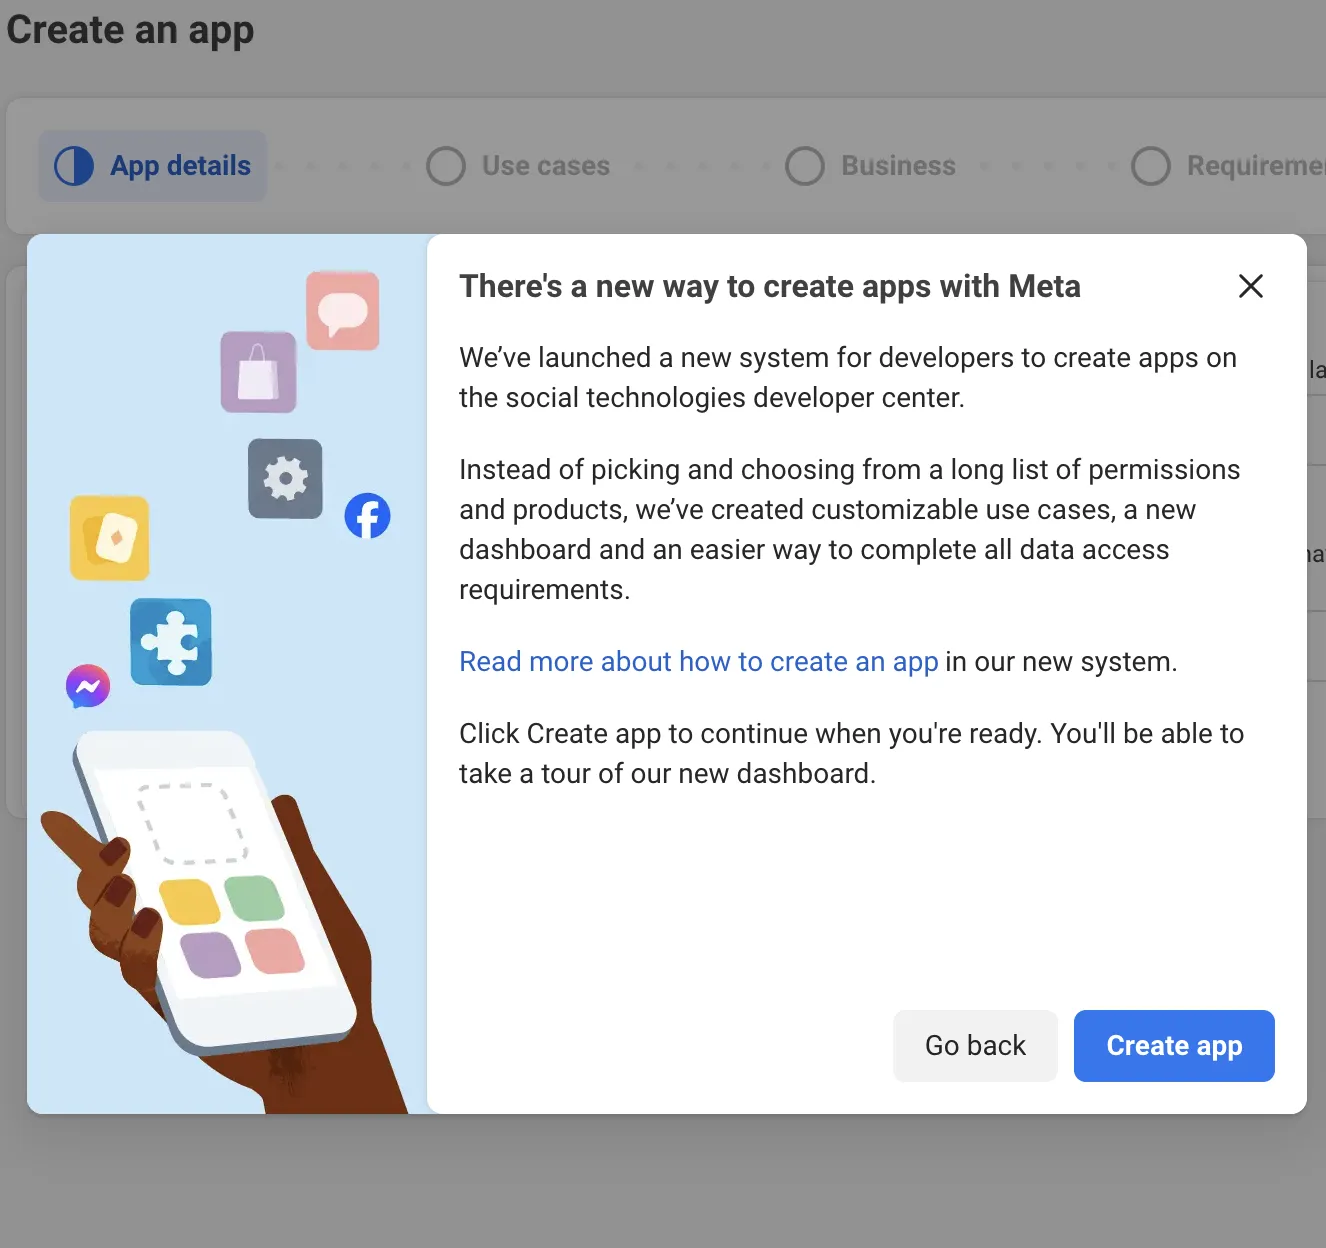
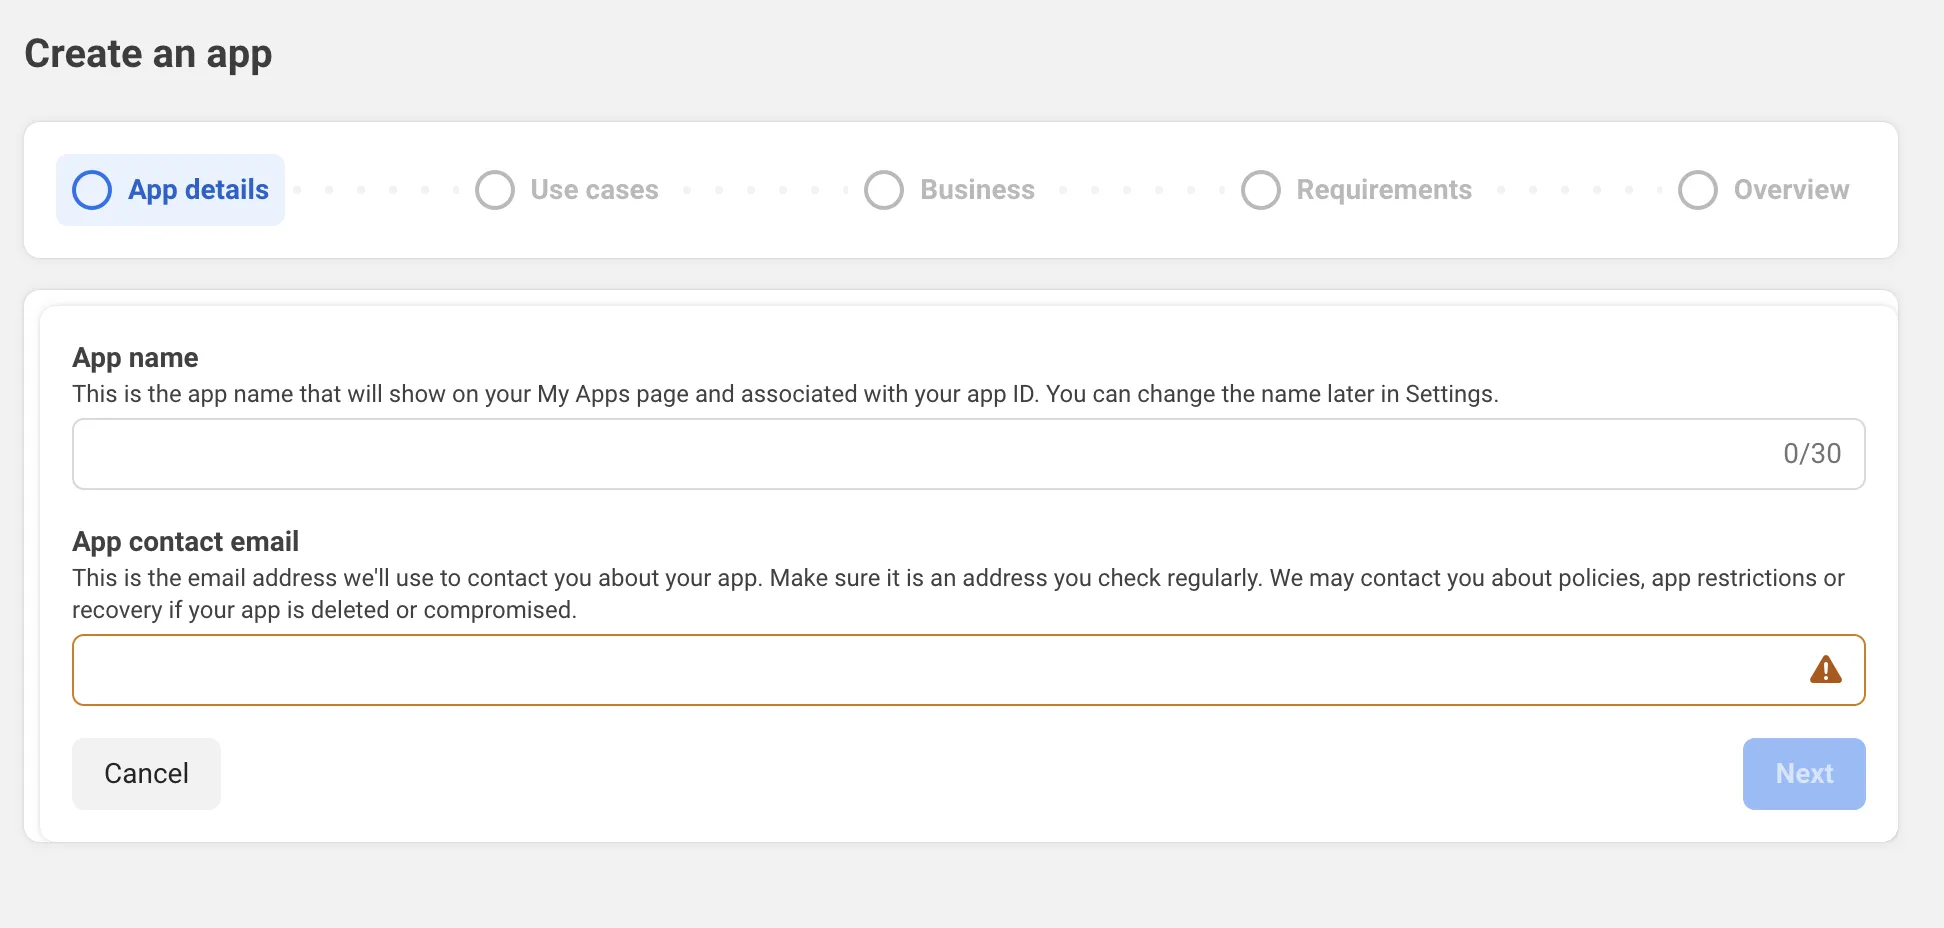
Step 2.2 Fill in the required app details and connect the app to the Meta Business Account.
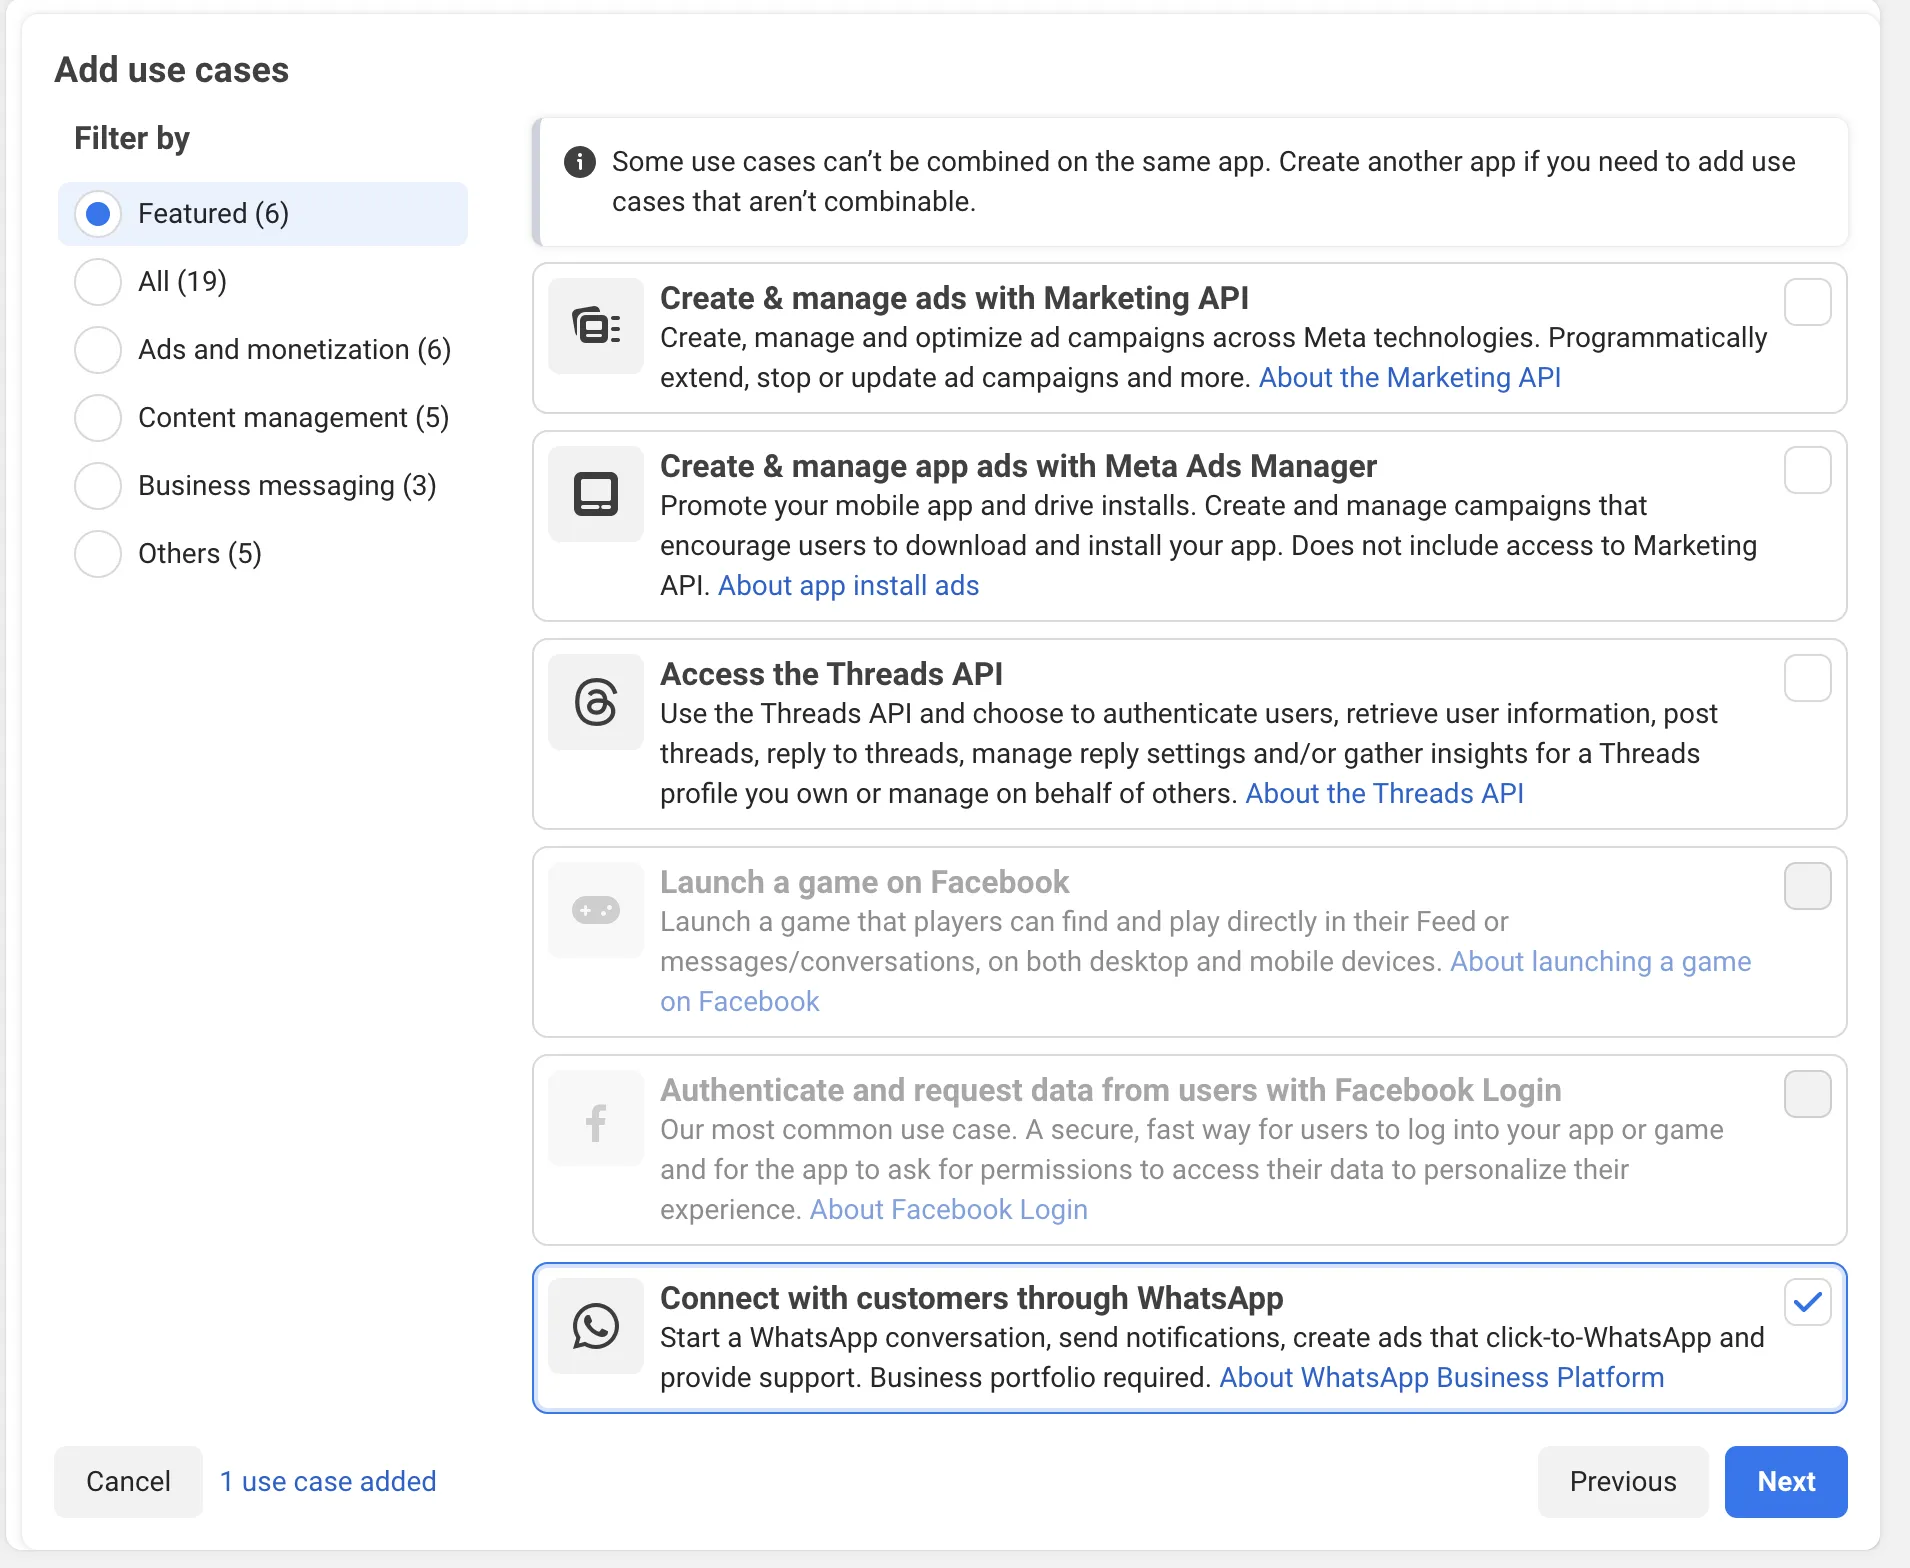
Step 2.3: Select the use case:
Connect with customers through WhatsApp
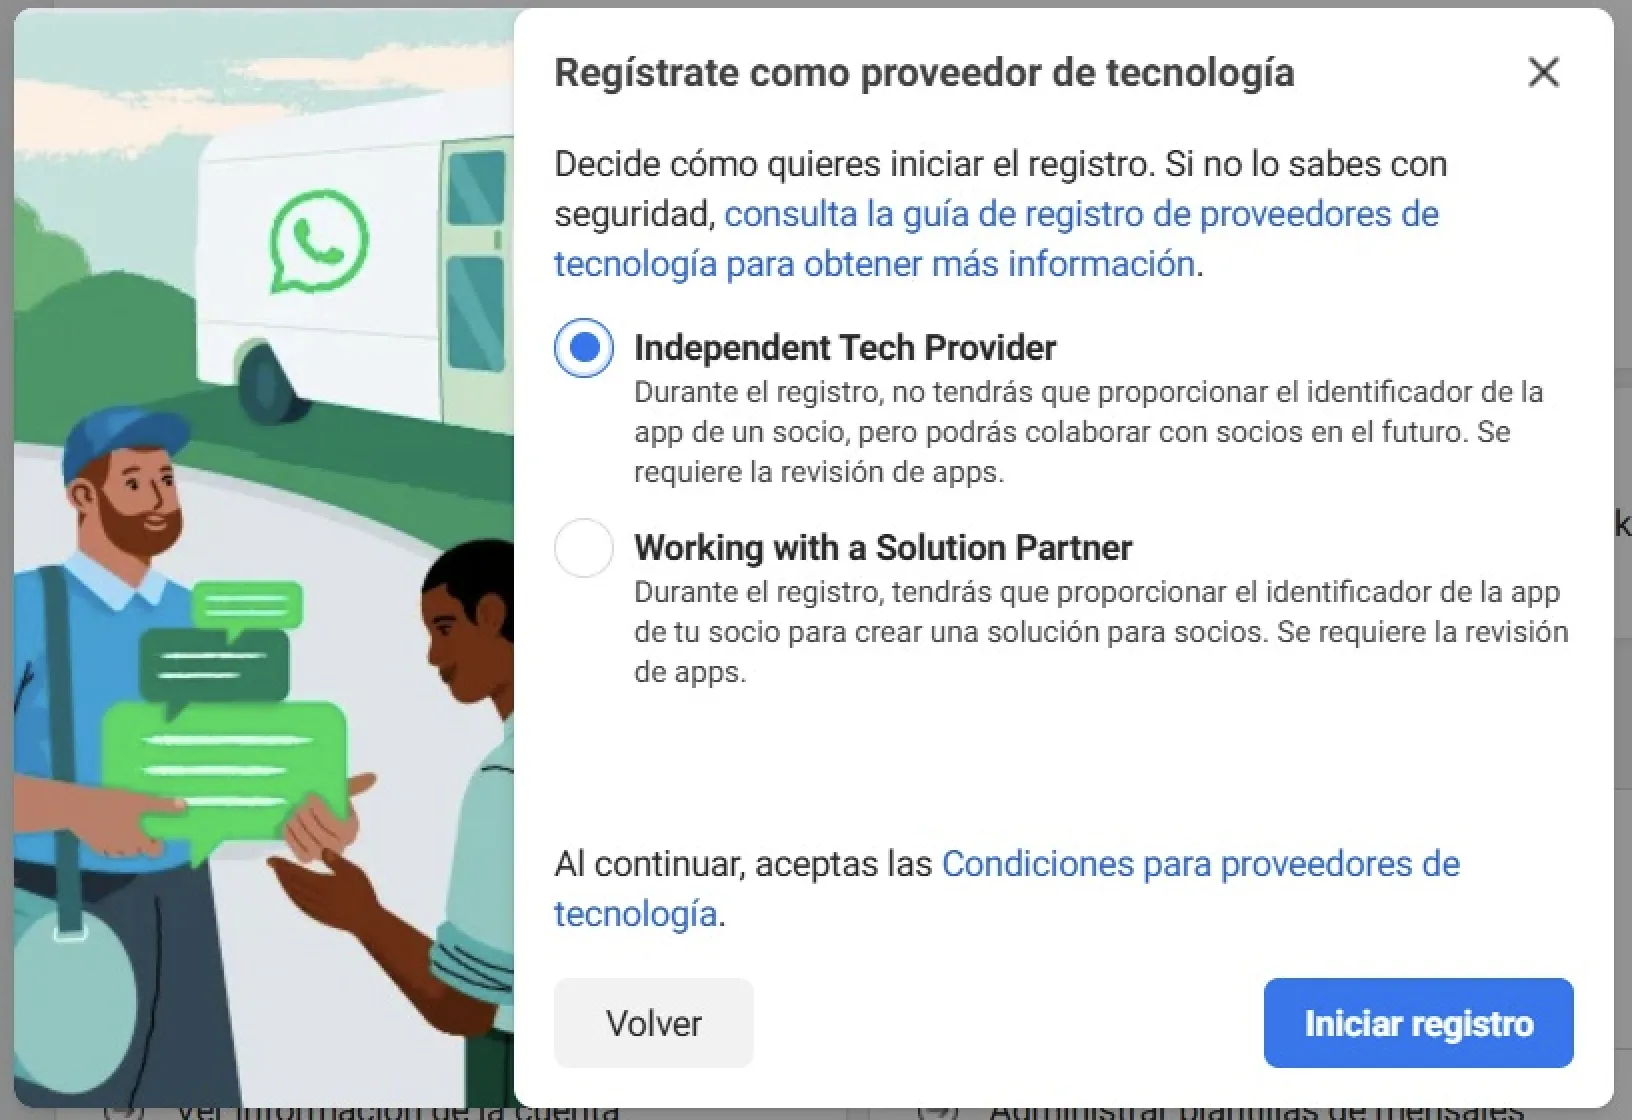
If Meta shows the option, select: “Working with a solution partner”
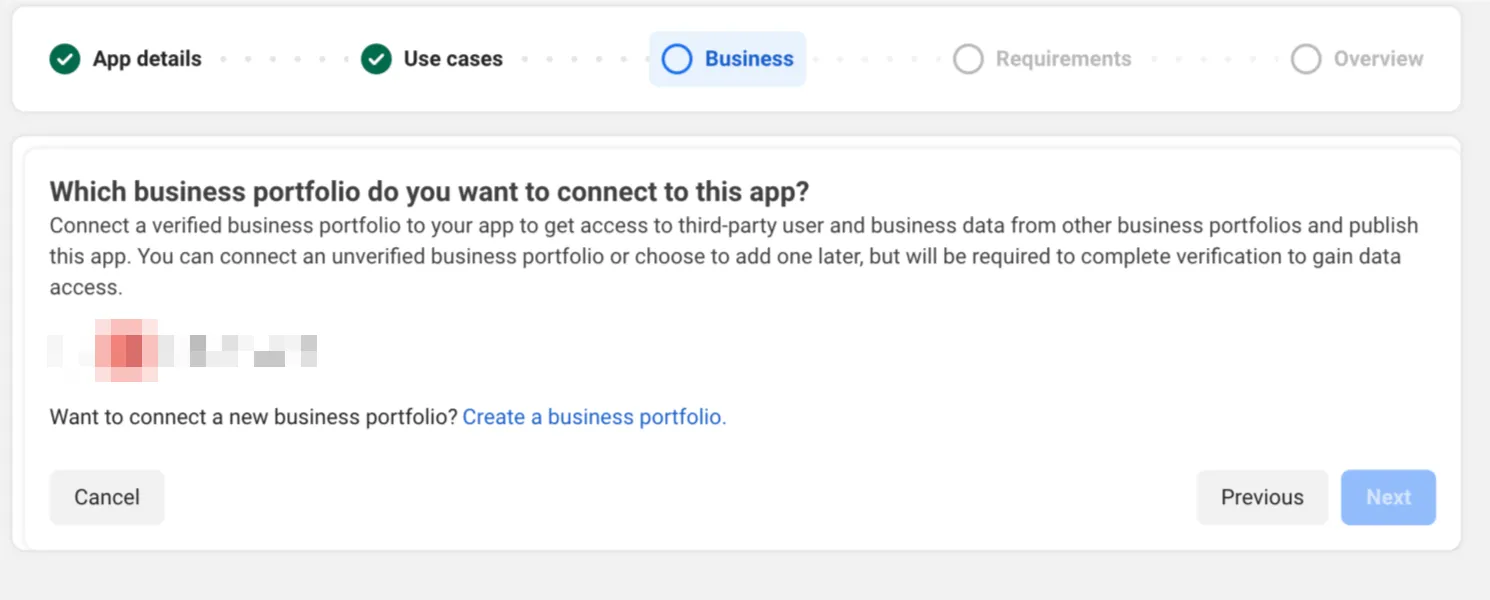
Step 2.4: Select the correct Business Portfolio, or create a new one if required.
Review the app publishing requirements and click Go to Dashboard.
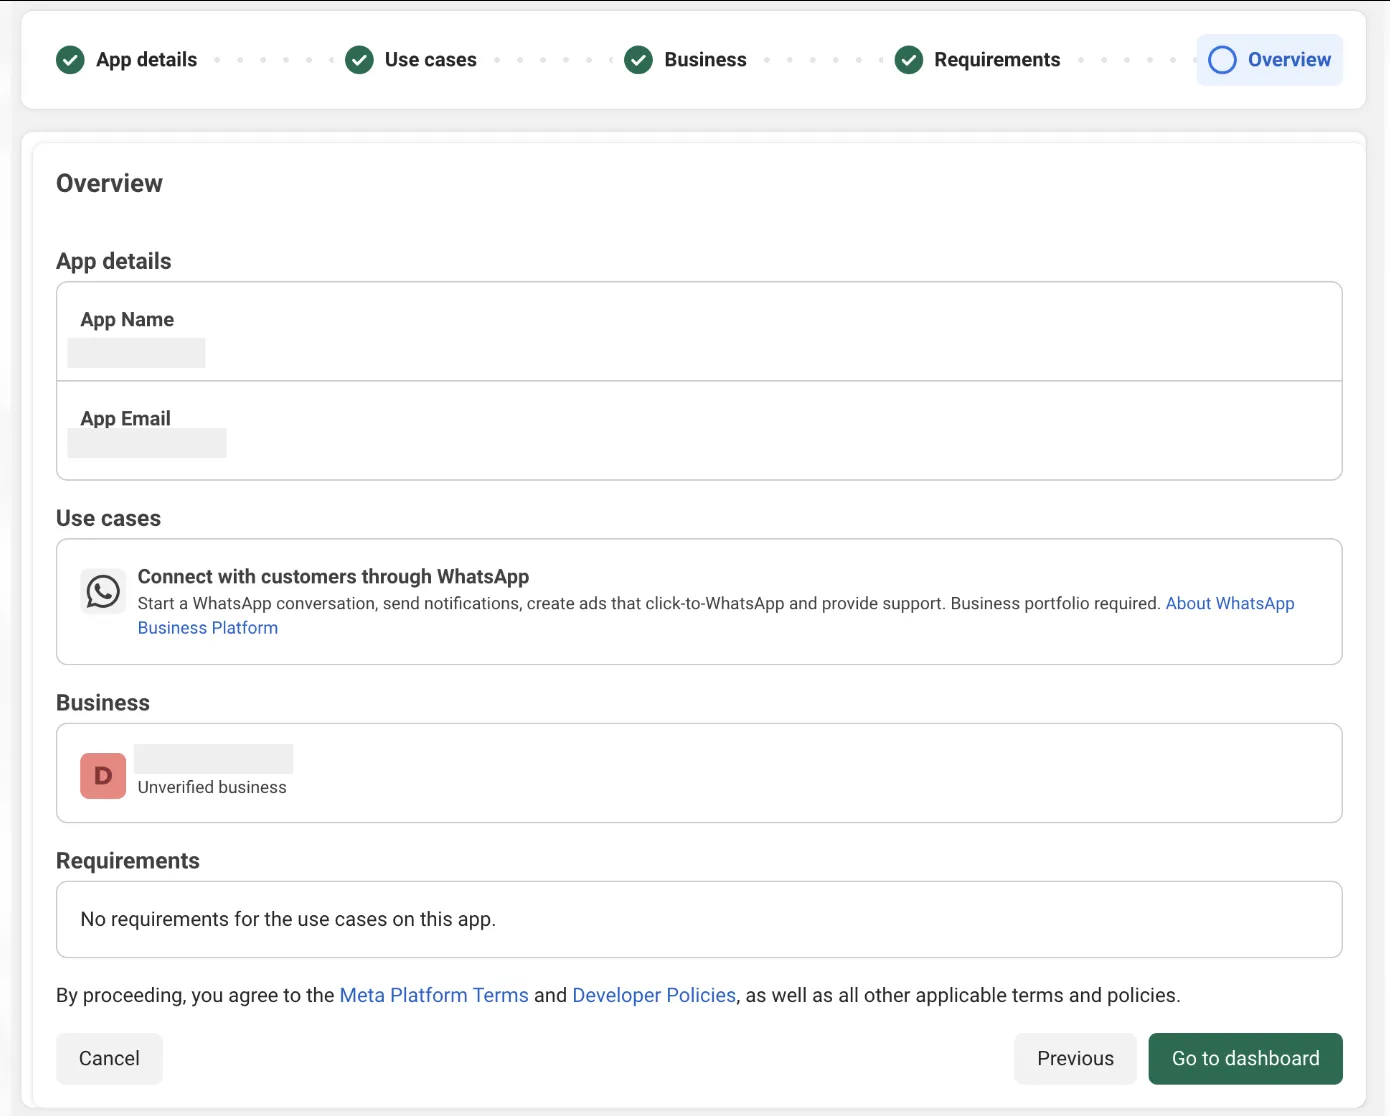
Your Meta app is now created.
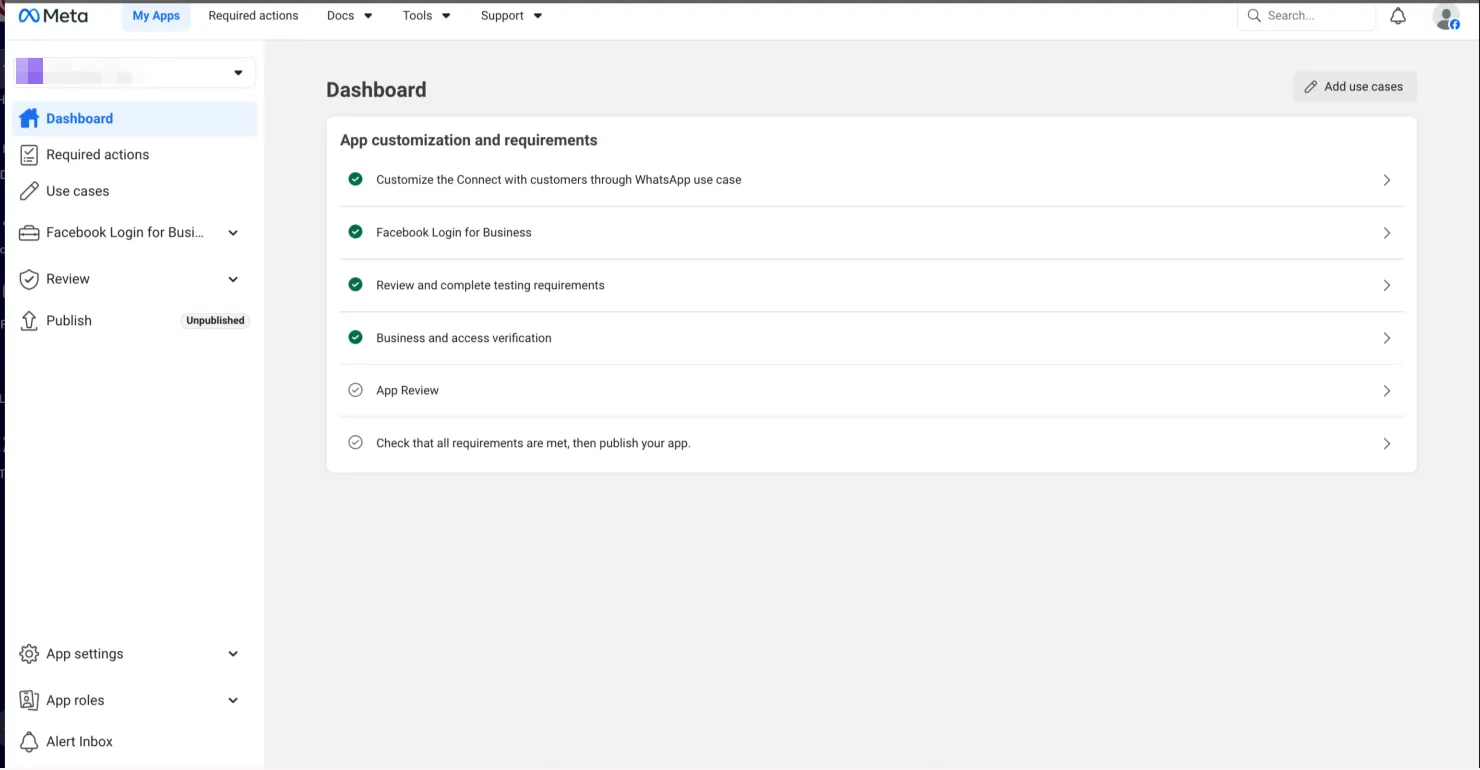
Step 3: Create Partner Solution
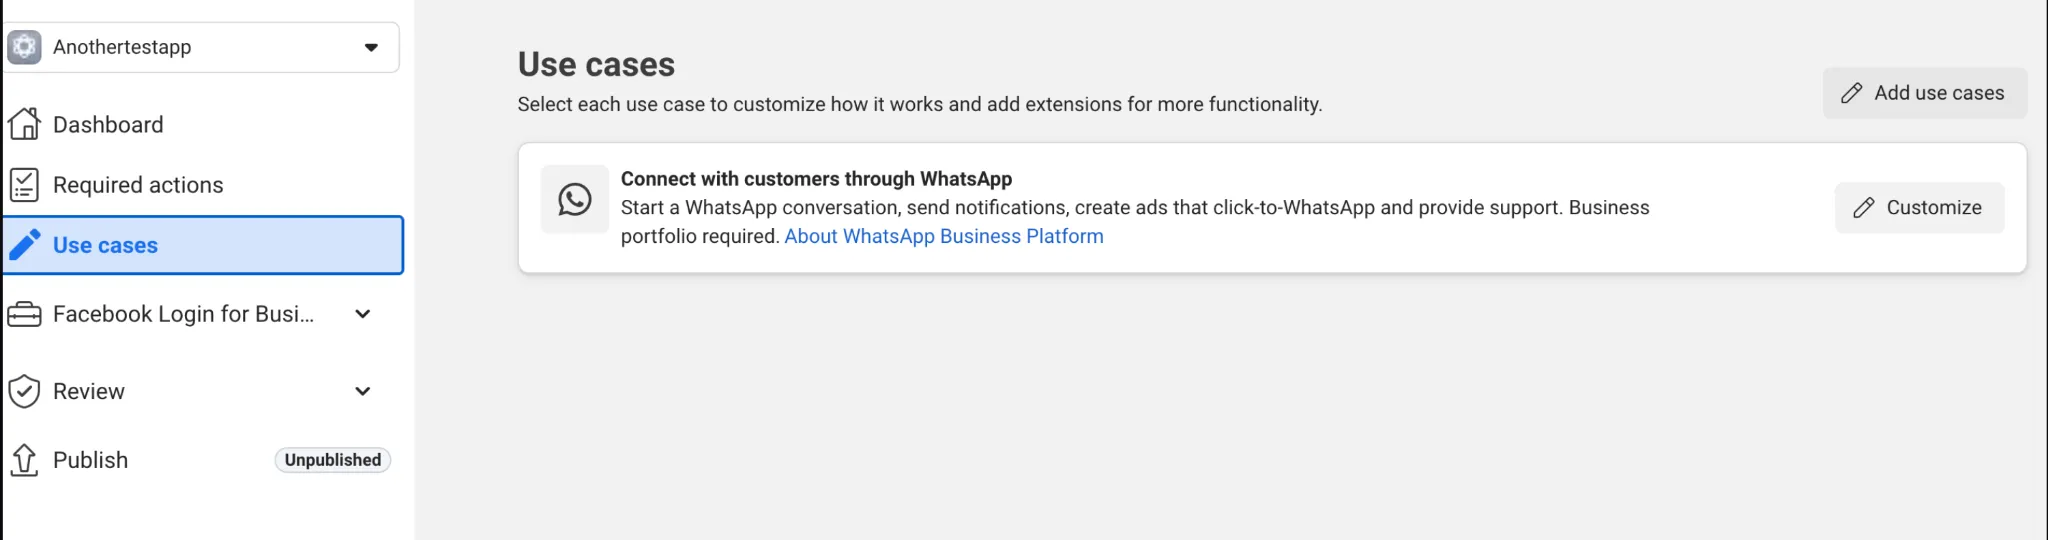
In the Meta App Dashboard, go to:
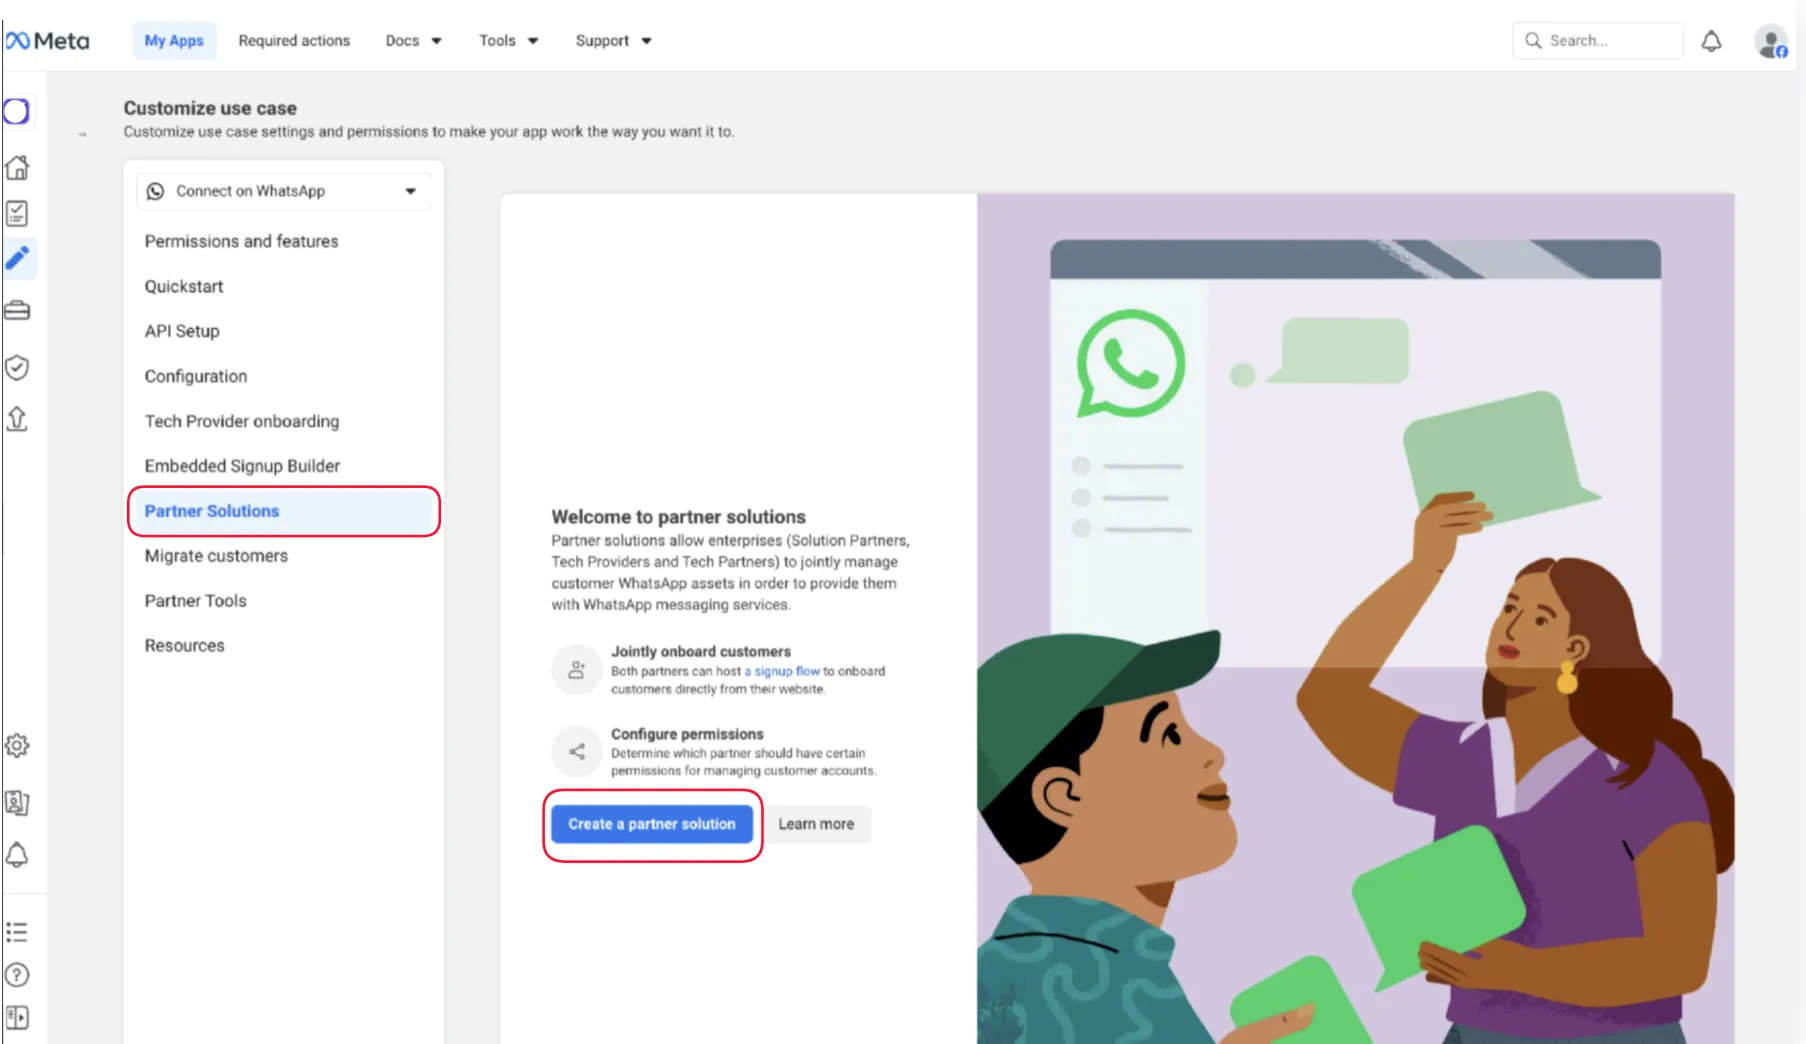
Use cases -> Customize -> Partner Solutions
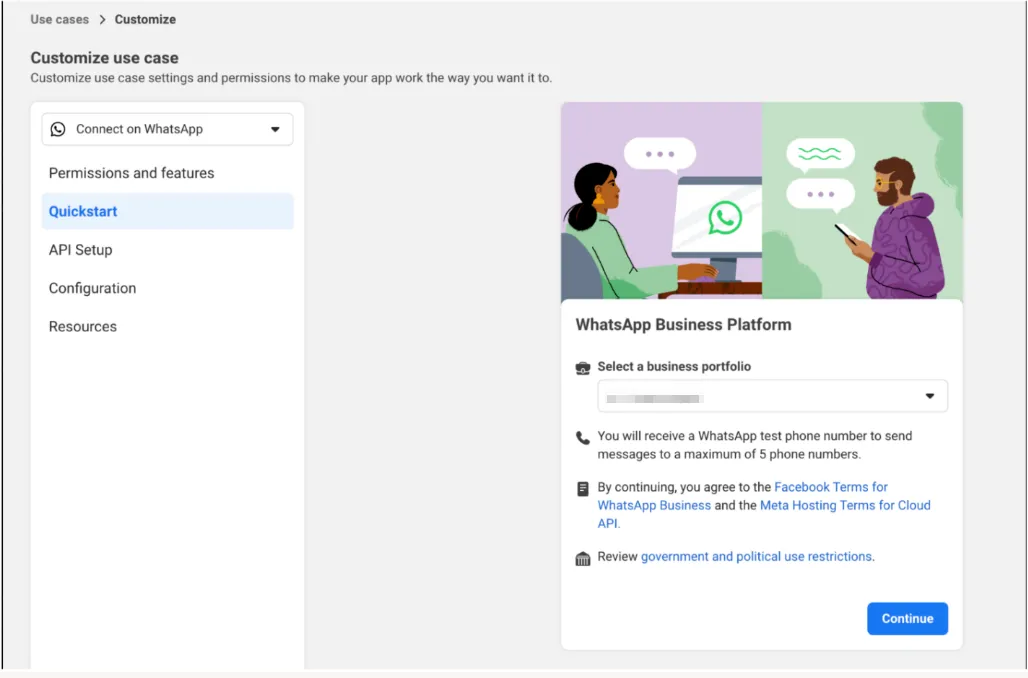
Click Continue.
Ensure you agree to Meta’s Tech Provider Terms of Service by clicking the Start Onboarding button
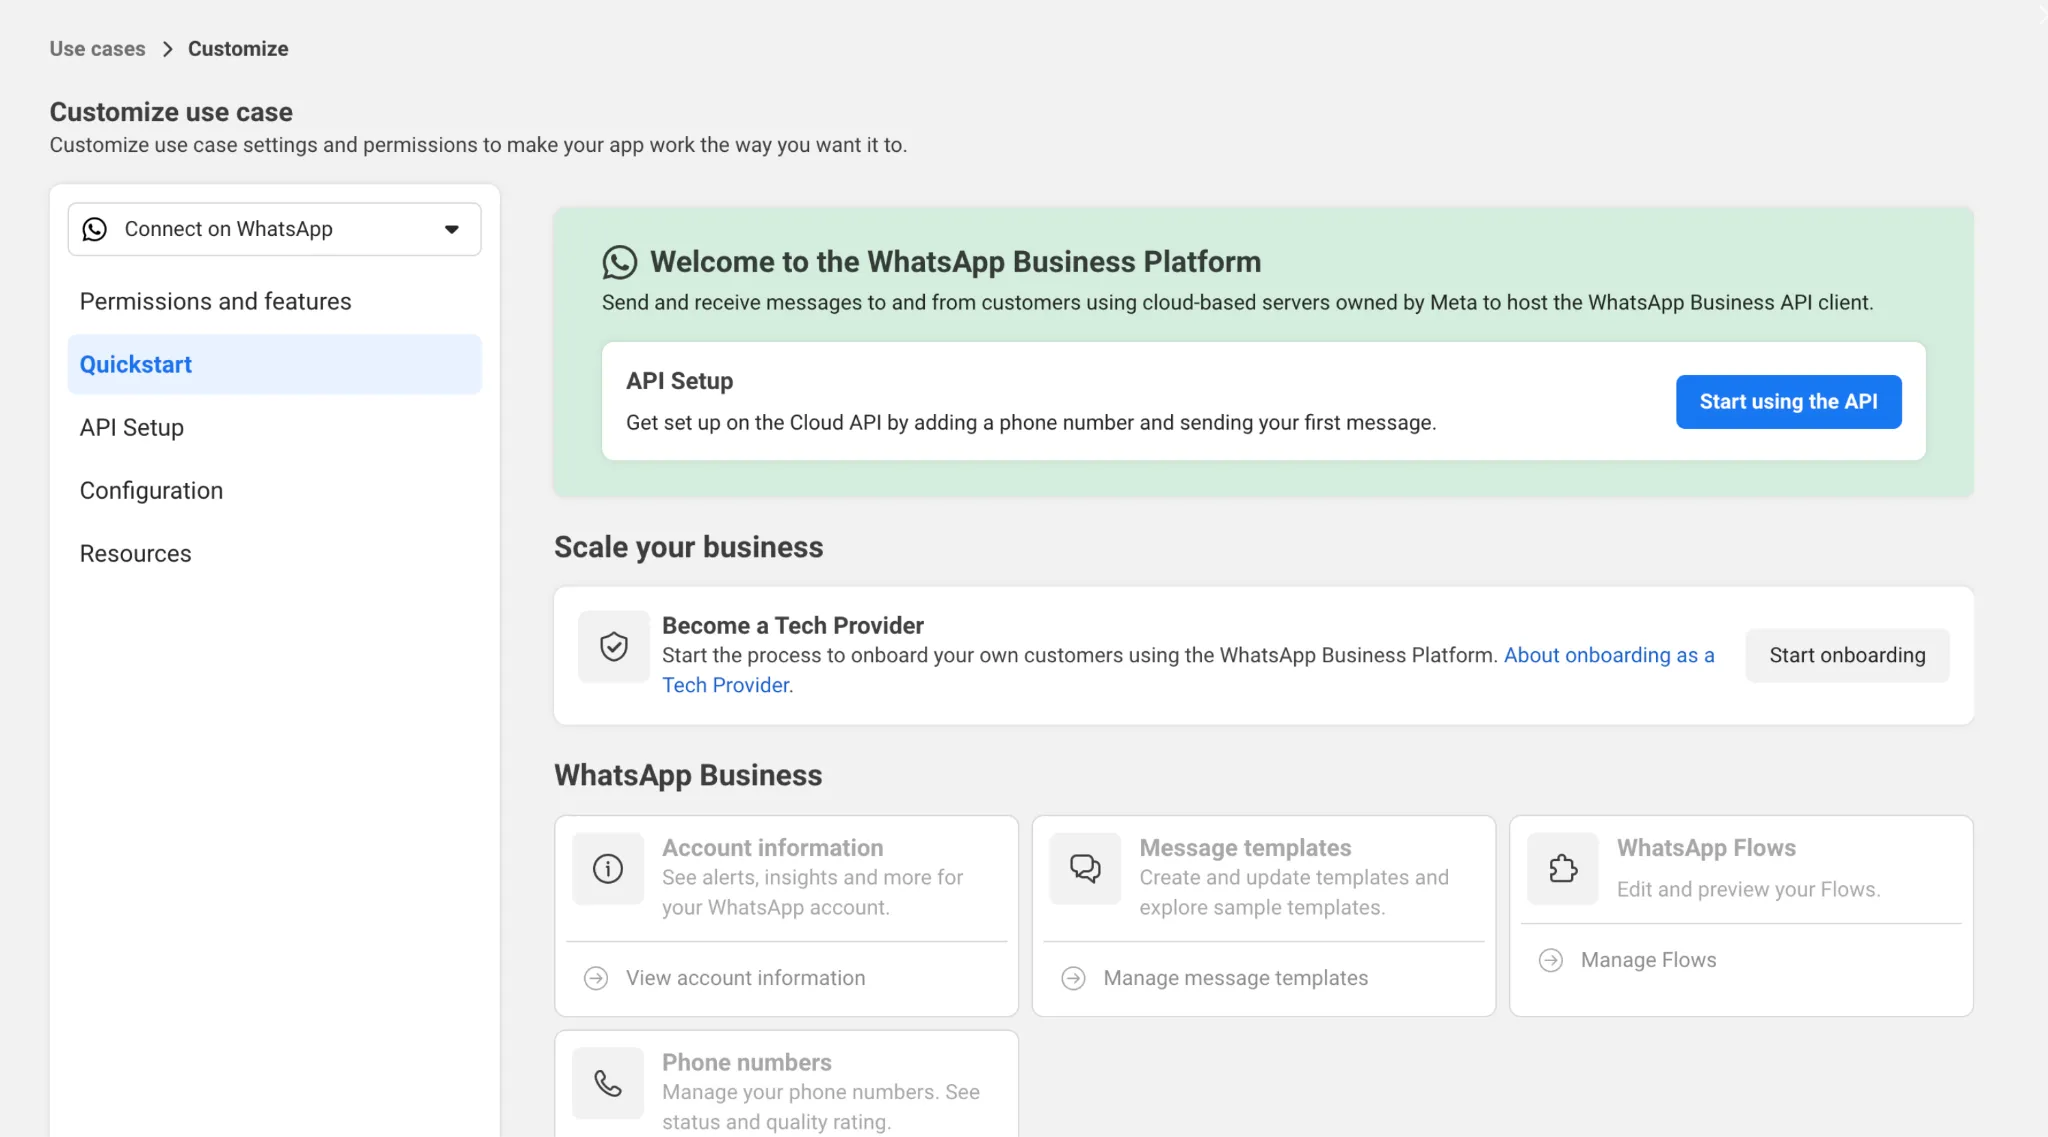
Click Create a partner solution.
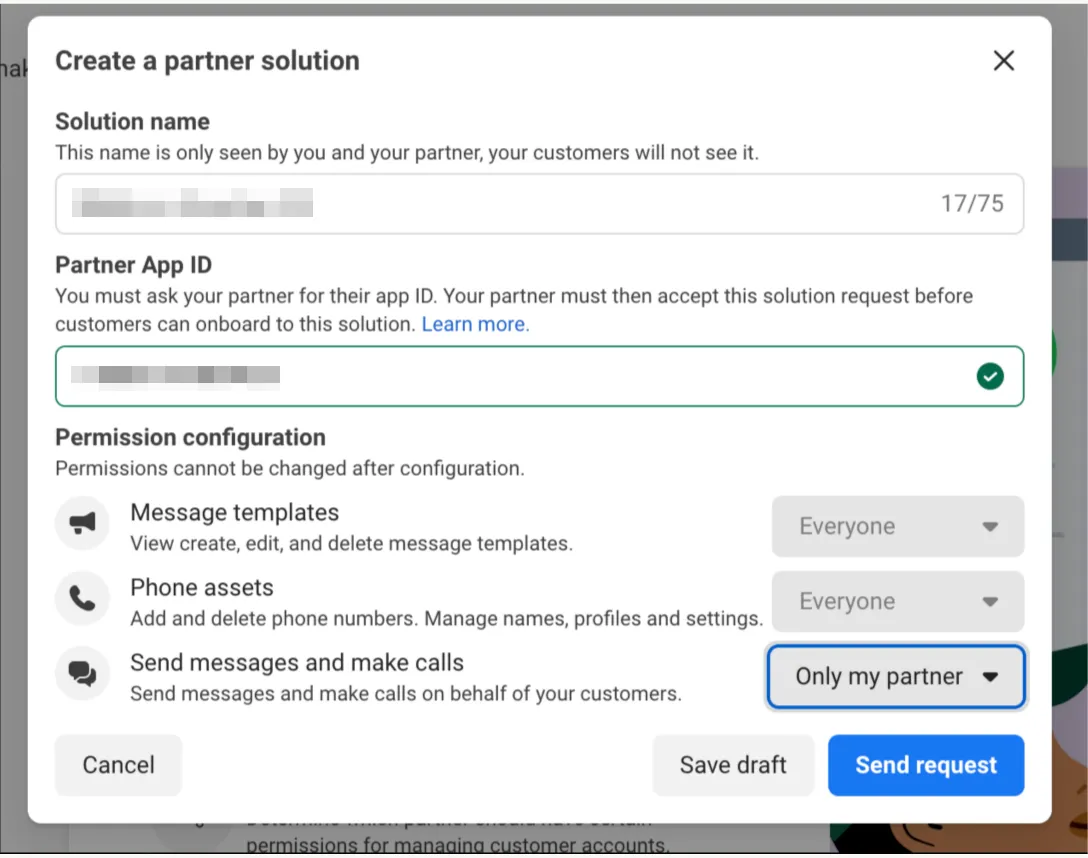
Enter the solution name in this format:
<PartnerName> Engati
Example:
Test Tech Engati (Do not use special characters in the solution name)
Enter the Engati Partner App ID: <Engati Partner App ID> (This App ID will be shared by the respective Engati POC)
Select the required permission ownership as advised by Engati and submit the request.
Important: If the wrong permission ownership is selected, it may not be editable later. In that case, a new Solution ID may be required.
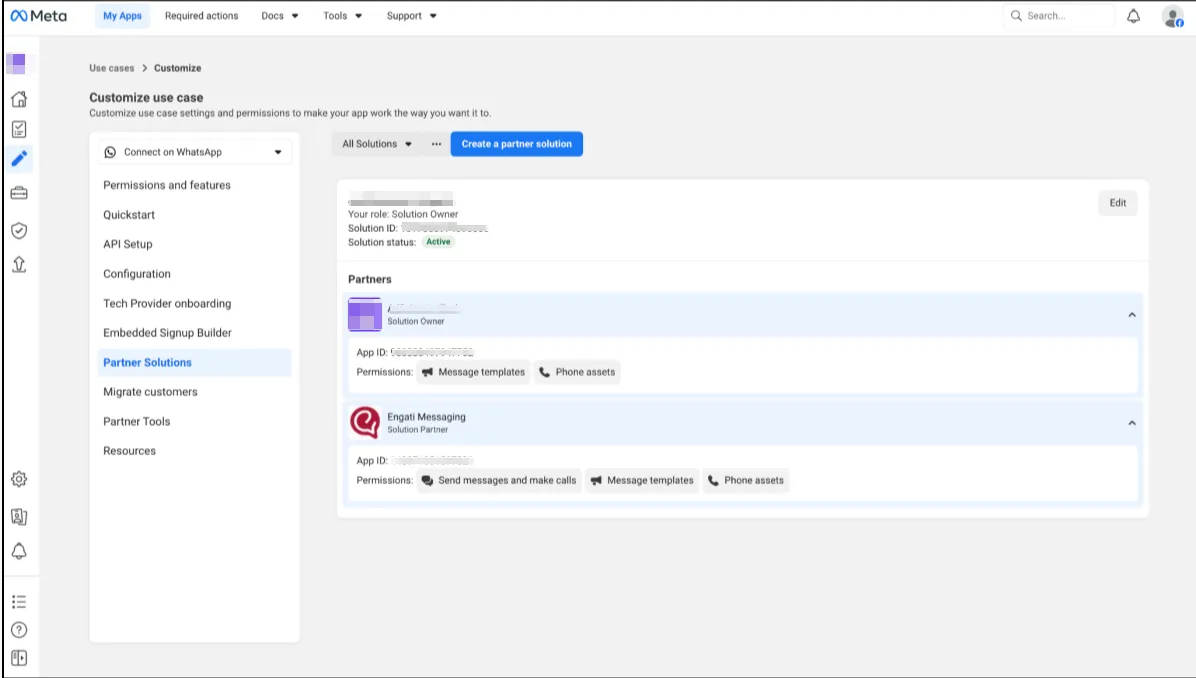
After submitting the Partner Solution request, notify the respective Engati POC. Engati will review and approve the request from our end. Once approved, the solution status will be visible as Active in the Partner Solutions page.
Step 4: Complete Business Verification
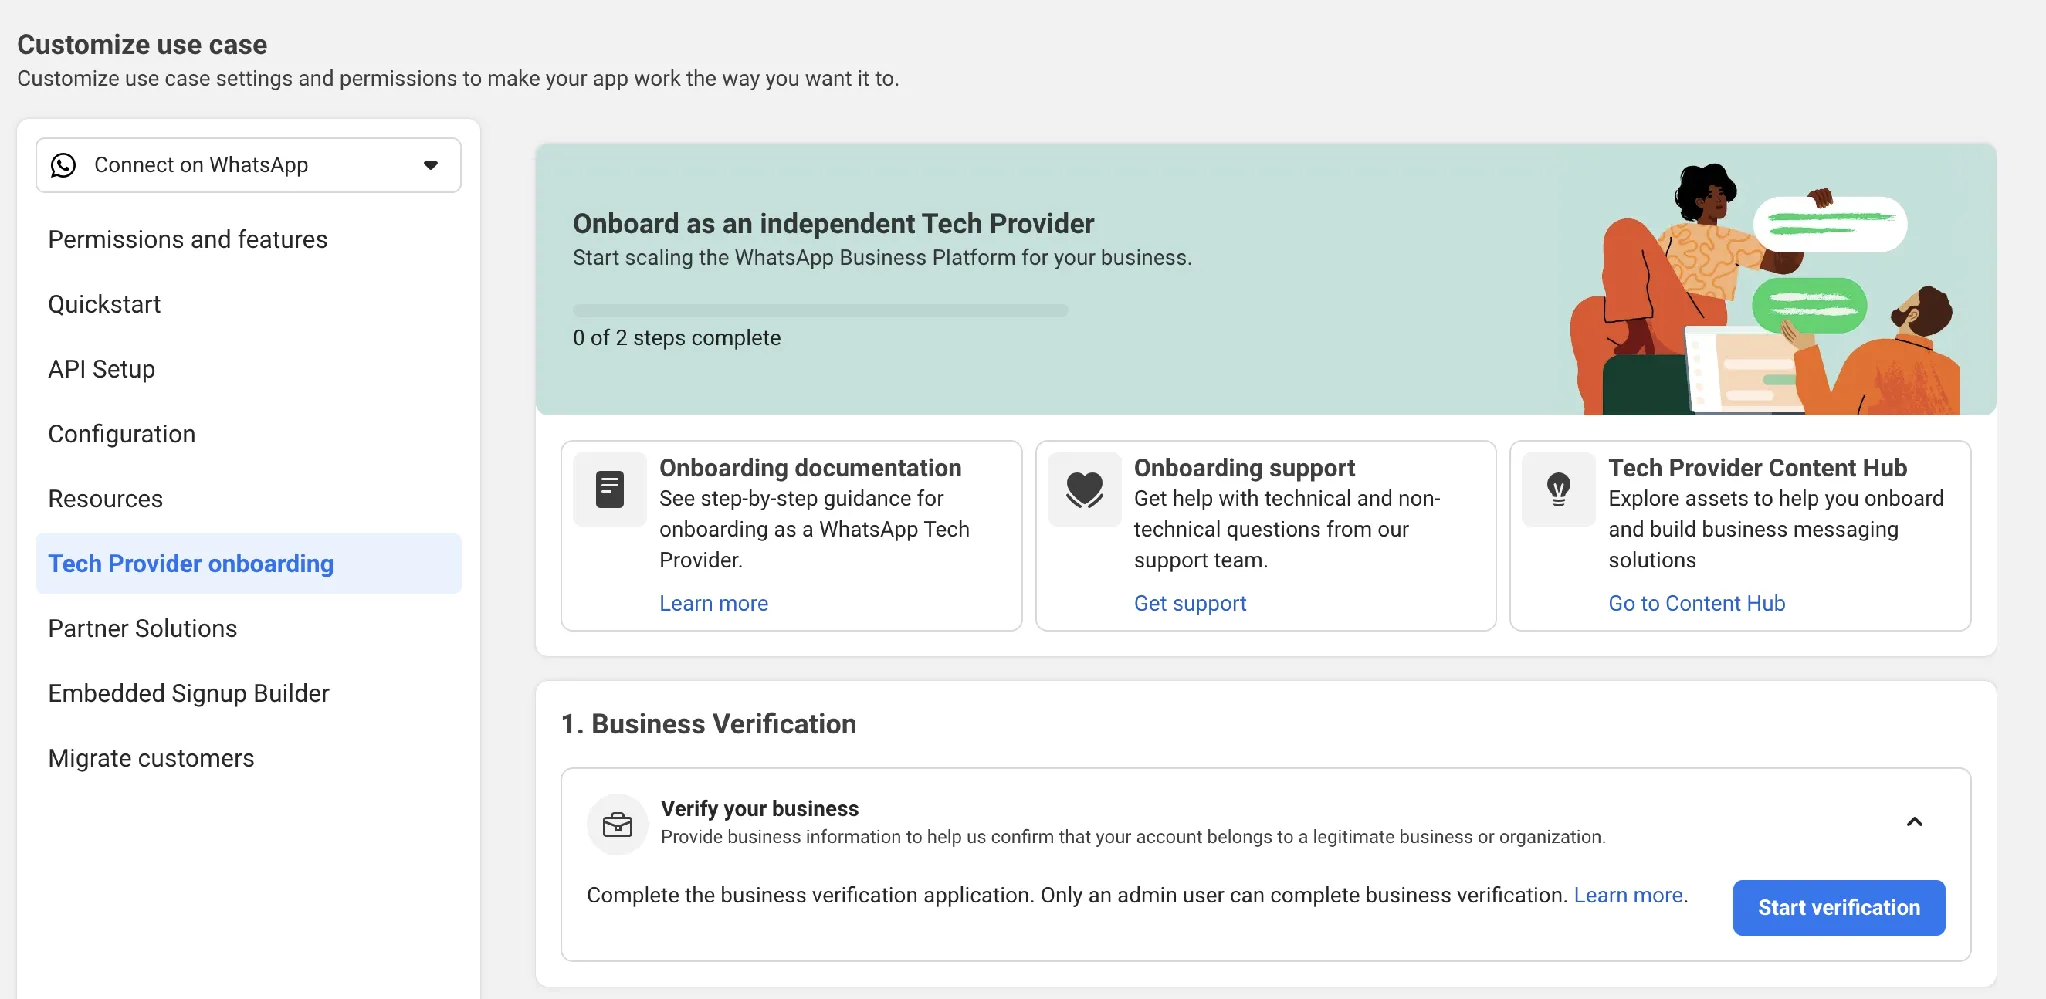
Complete Business Verification if it is not already completed.
Meta may ask you to:
- Verify business details
- Confirm your connection to the business
- Upload accepted documents
Business verification must be completed before App Review can be finished.
Step 5: Complete App Review
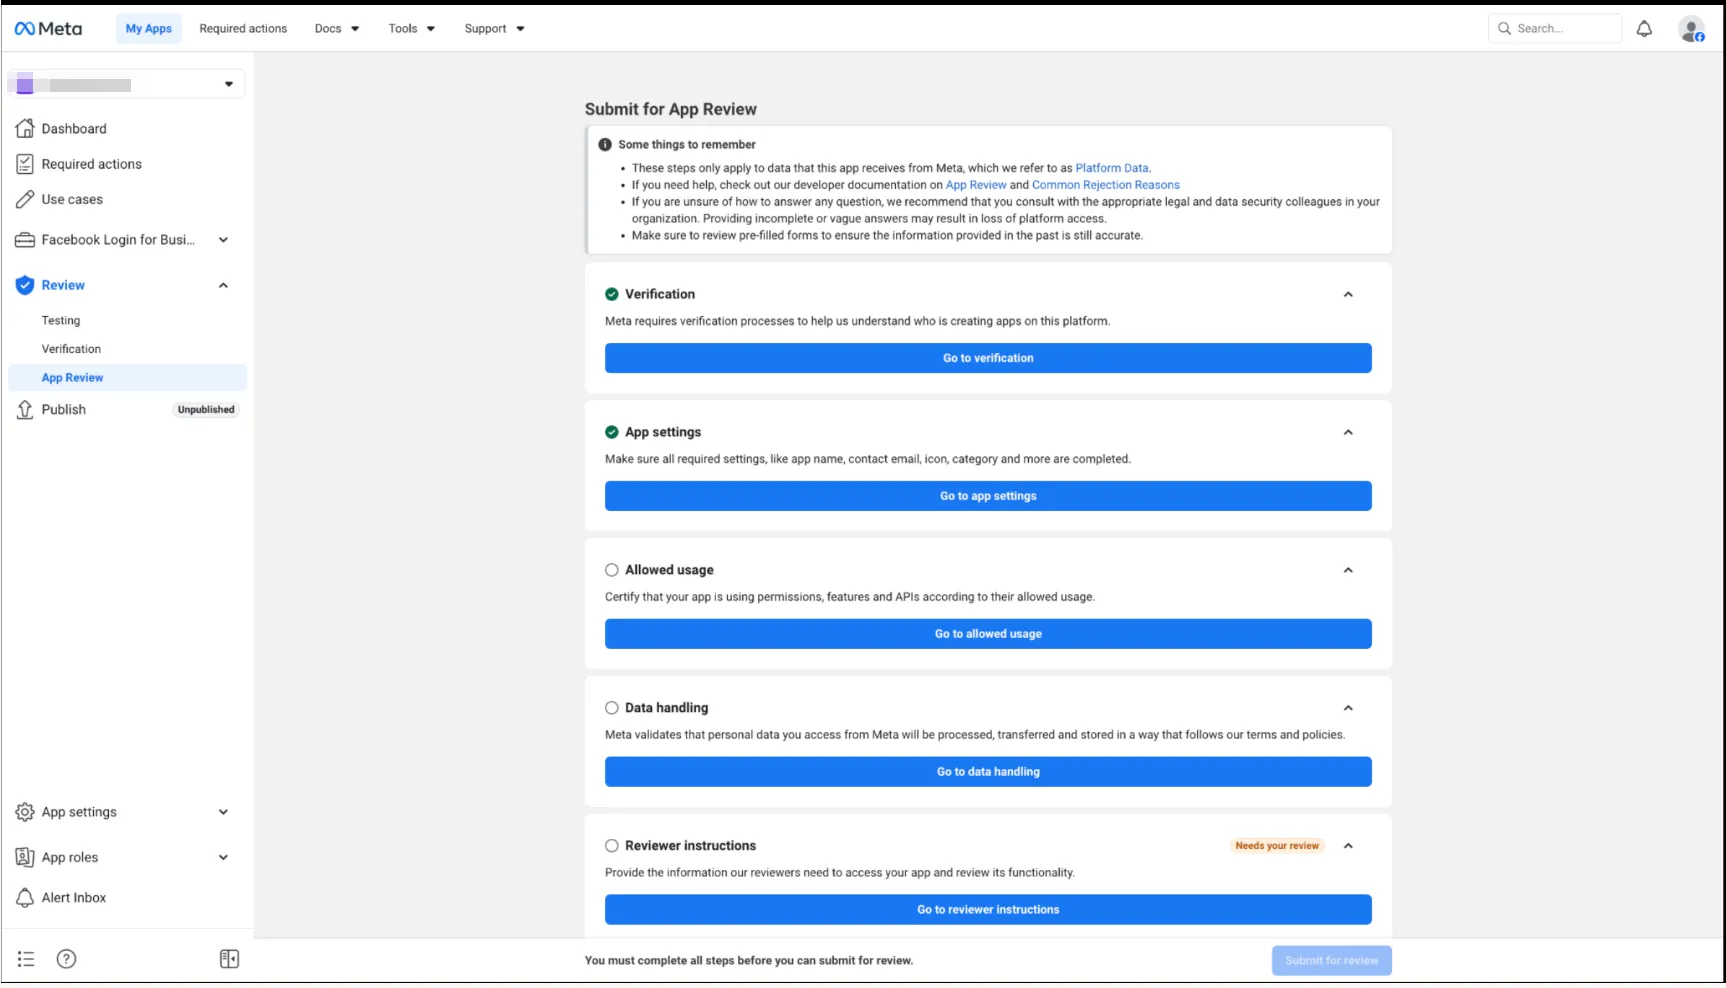
5.1 Review App Settings
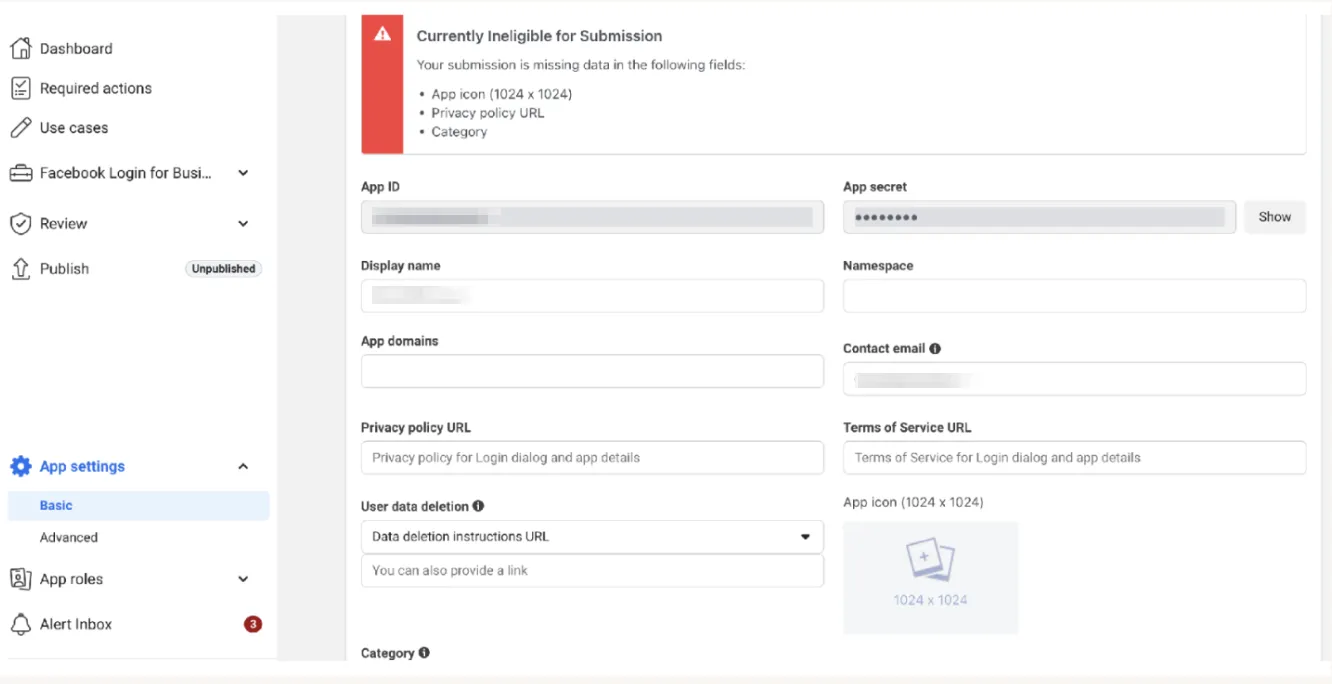
Go to App Settings and add:
- Privacy Policy URL
- Terms of Service URL
- App icon
- App category: Messaging
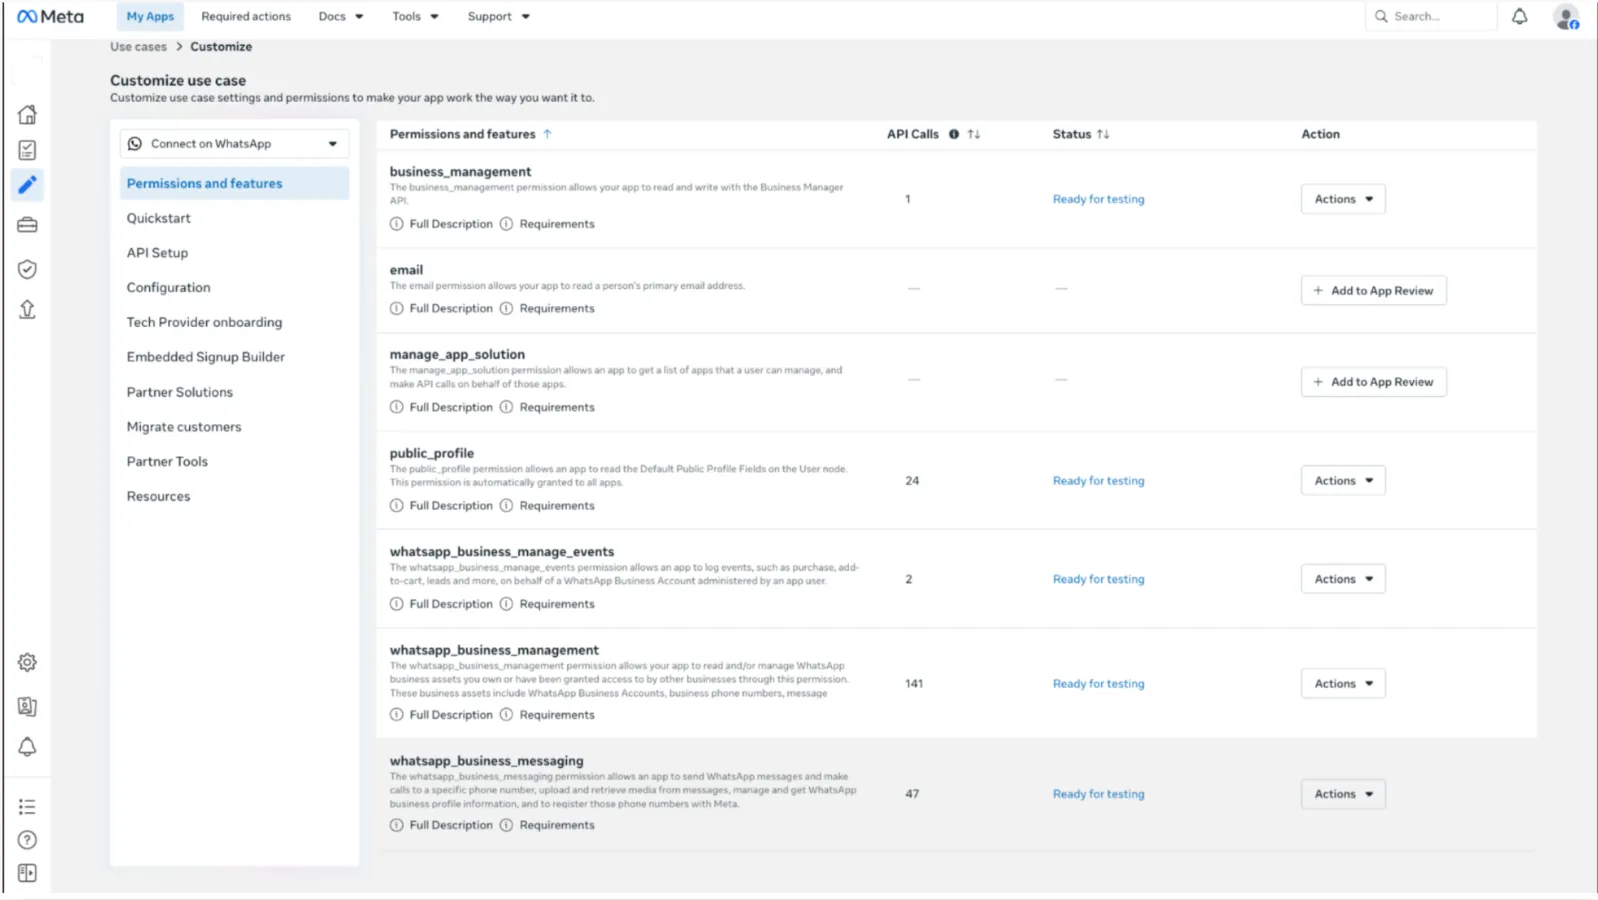
5.2 Add Required Permissions
Add the required permissions for App Review:
- public_profile
- whatsapp_business_messaging
- whatsapp_business_management
- business_management if required
- whatsapp_business_manage_events only if used
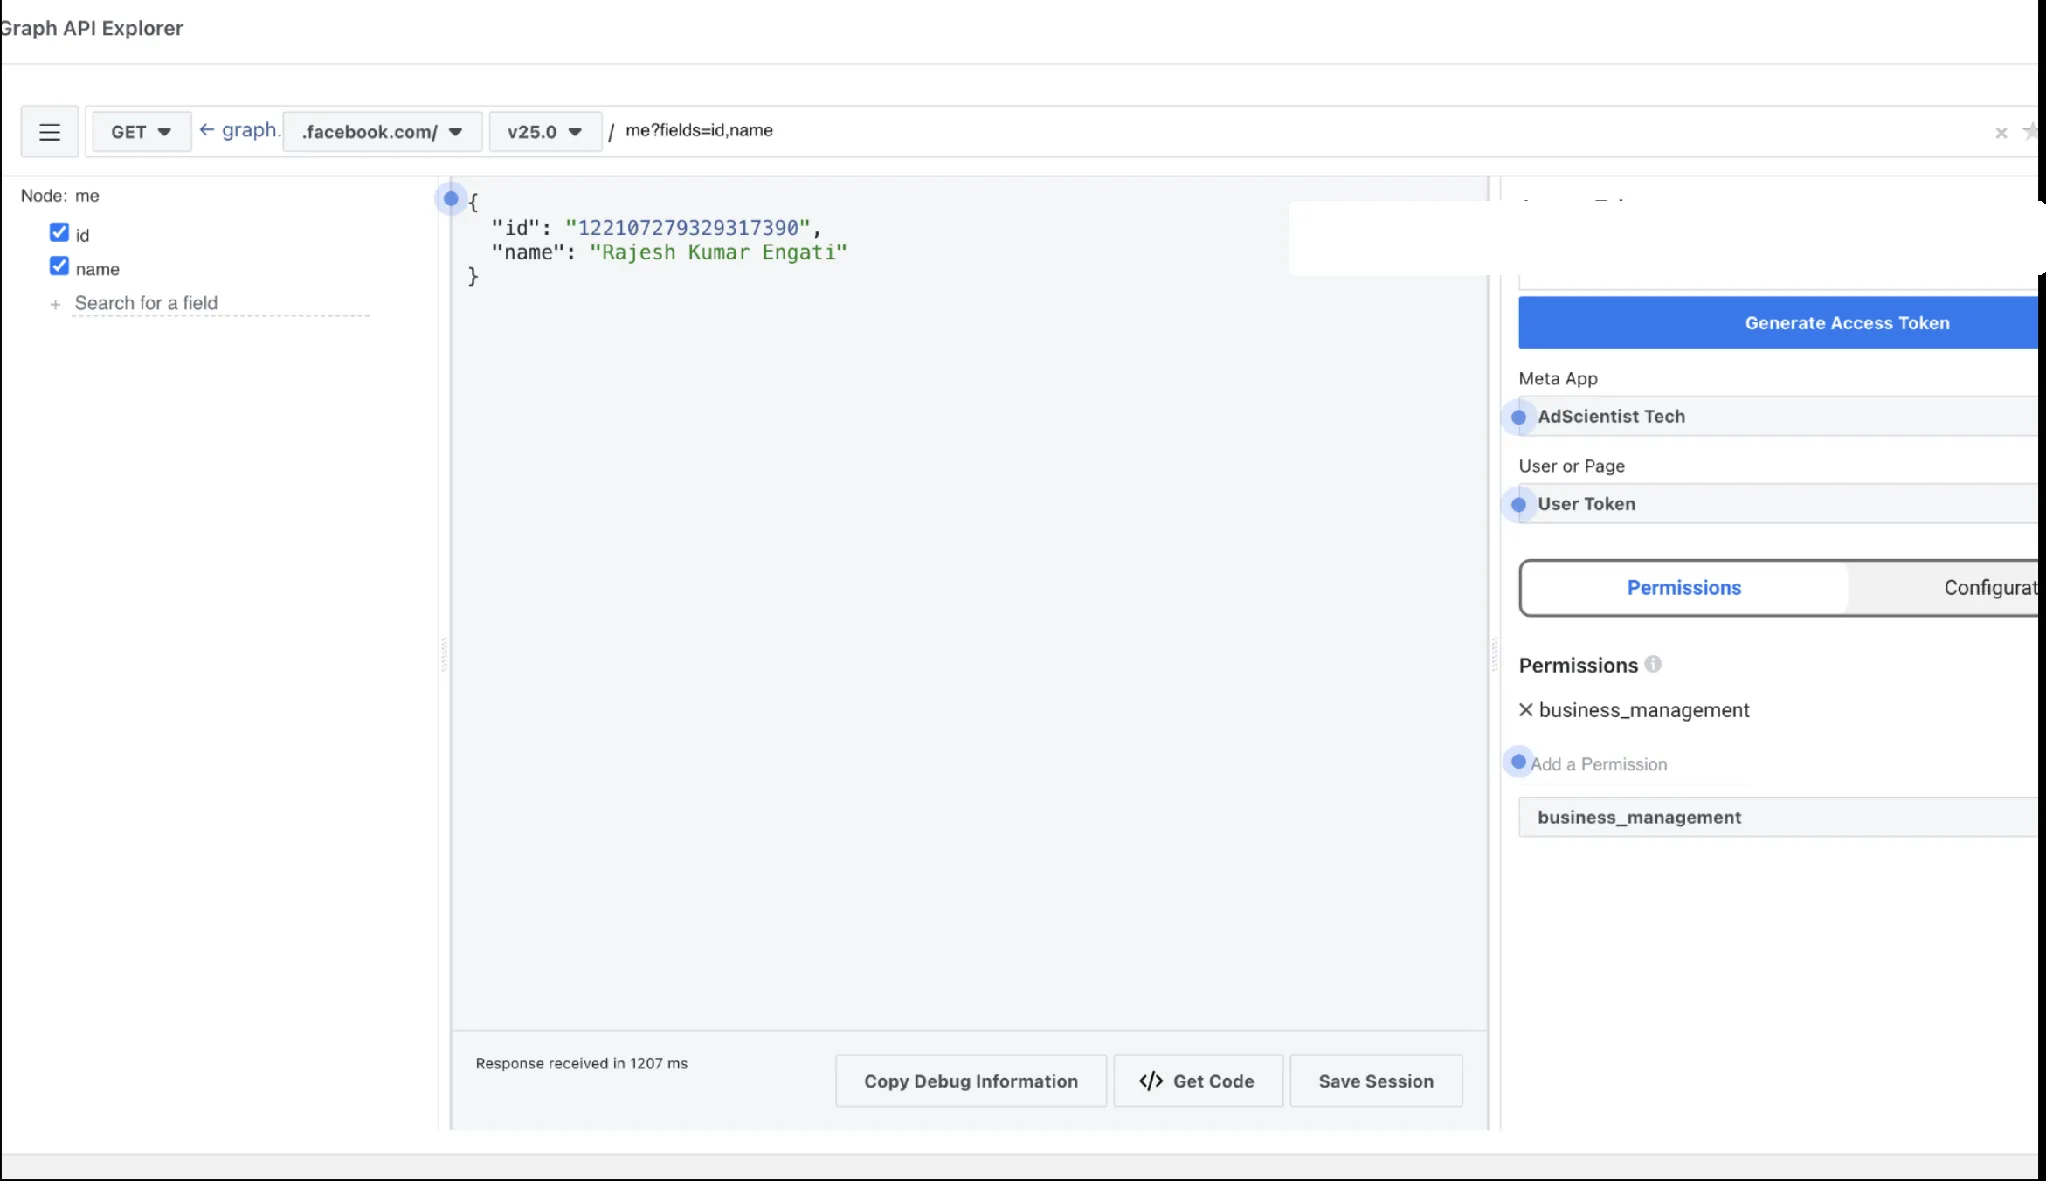
Use Graph API Explorer to complete the required API test call for the permission.
Steps:
- Open Graph API Explorer: https://developers.facebook.com/tools/explorer/
- Select the correct Meta App.
- Select User Token and click Add a Permission.
- Add the required permission, for example: business_management
- Click Generate Access Token.
- Run a simple test API call, such as: GET /me?fields=id,name
- If the response returns the user ID and name successfully, the API test call is completed.
- Go back to App Review → Allowed Usage and check if the API call count is updated.
Note: Meta may take some time to reflect the completed API test call in the App Review screen.
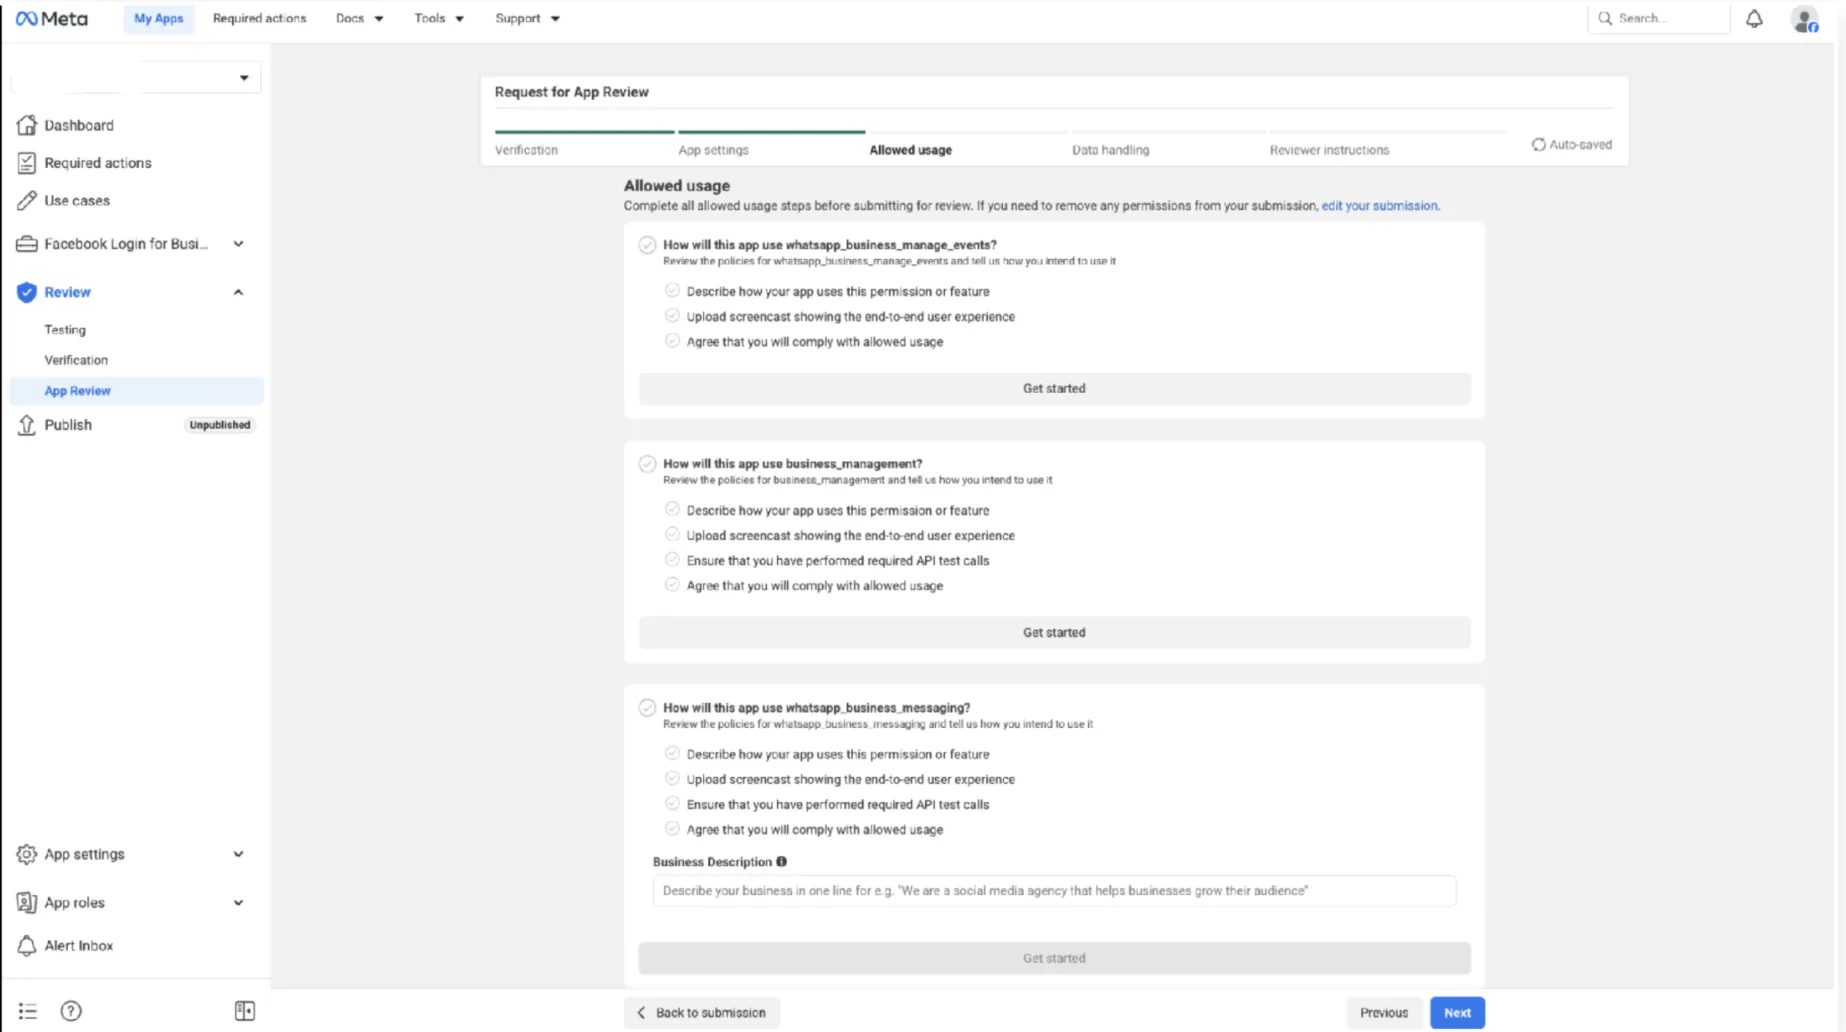
5.4 Fill Allowed Usage
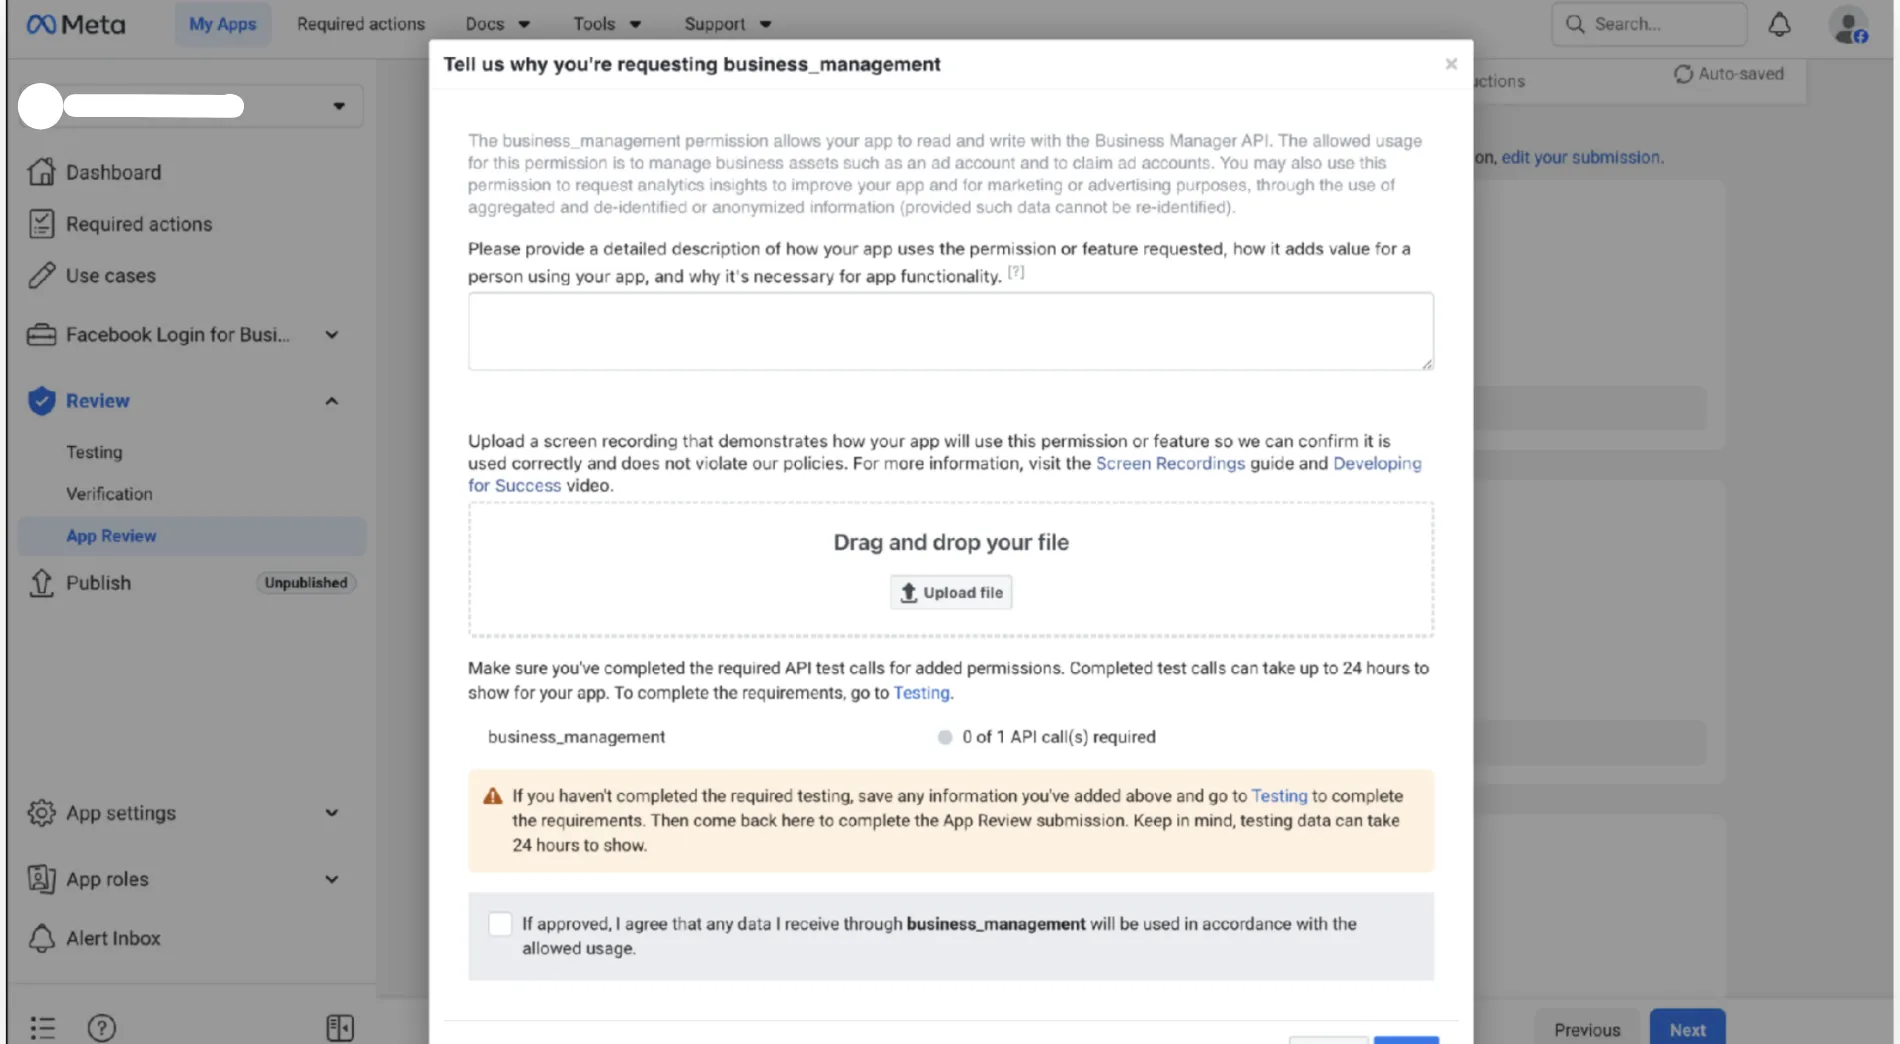
For each requested permission, explain why the app needs that permission.
Example:
- whatsapp_business_messaging is required to send WhatsApp messages on behalf of onboarded customer businesses.
- whatsapp_business_management is required to manage WhatsApp business assets such as WABA, phone number, and message templates.
- business_management is required to support business asset access and onboarding through Embedded Signup.
Upload the required screen recording for each permission and agree to the allowed usage.
5.4.1 App Review Description + Videos Submission
- whatsapp_business_messaging Description: Required to send WhatsApp messages for onboarded customer businesses. Video: Show a WhatsApp message sent from the app/API and received on WhatsApp.
- whatsapp_business_management Description: Required to manage WhatsApp business assets like WABA, phone numbers, and message templates. Video: Show template creation/management and template refresh/sync for the onboarded number.
- business_management Description: Required to access business assets and support Embedded Signup/customer onboarding. Video: Show Embedded Signup flow with business portfolio, WABA selection, and phone number connection.
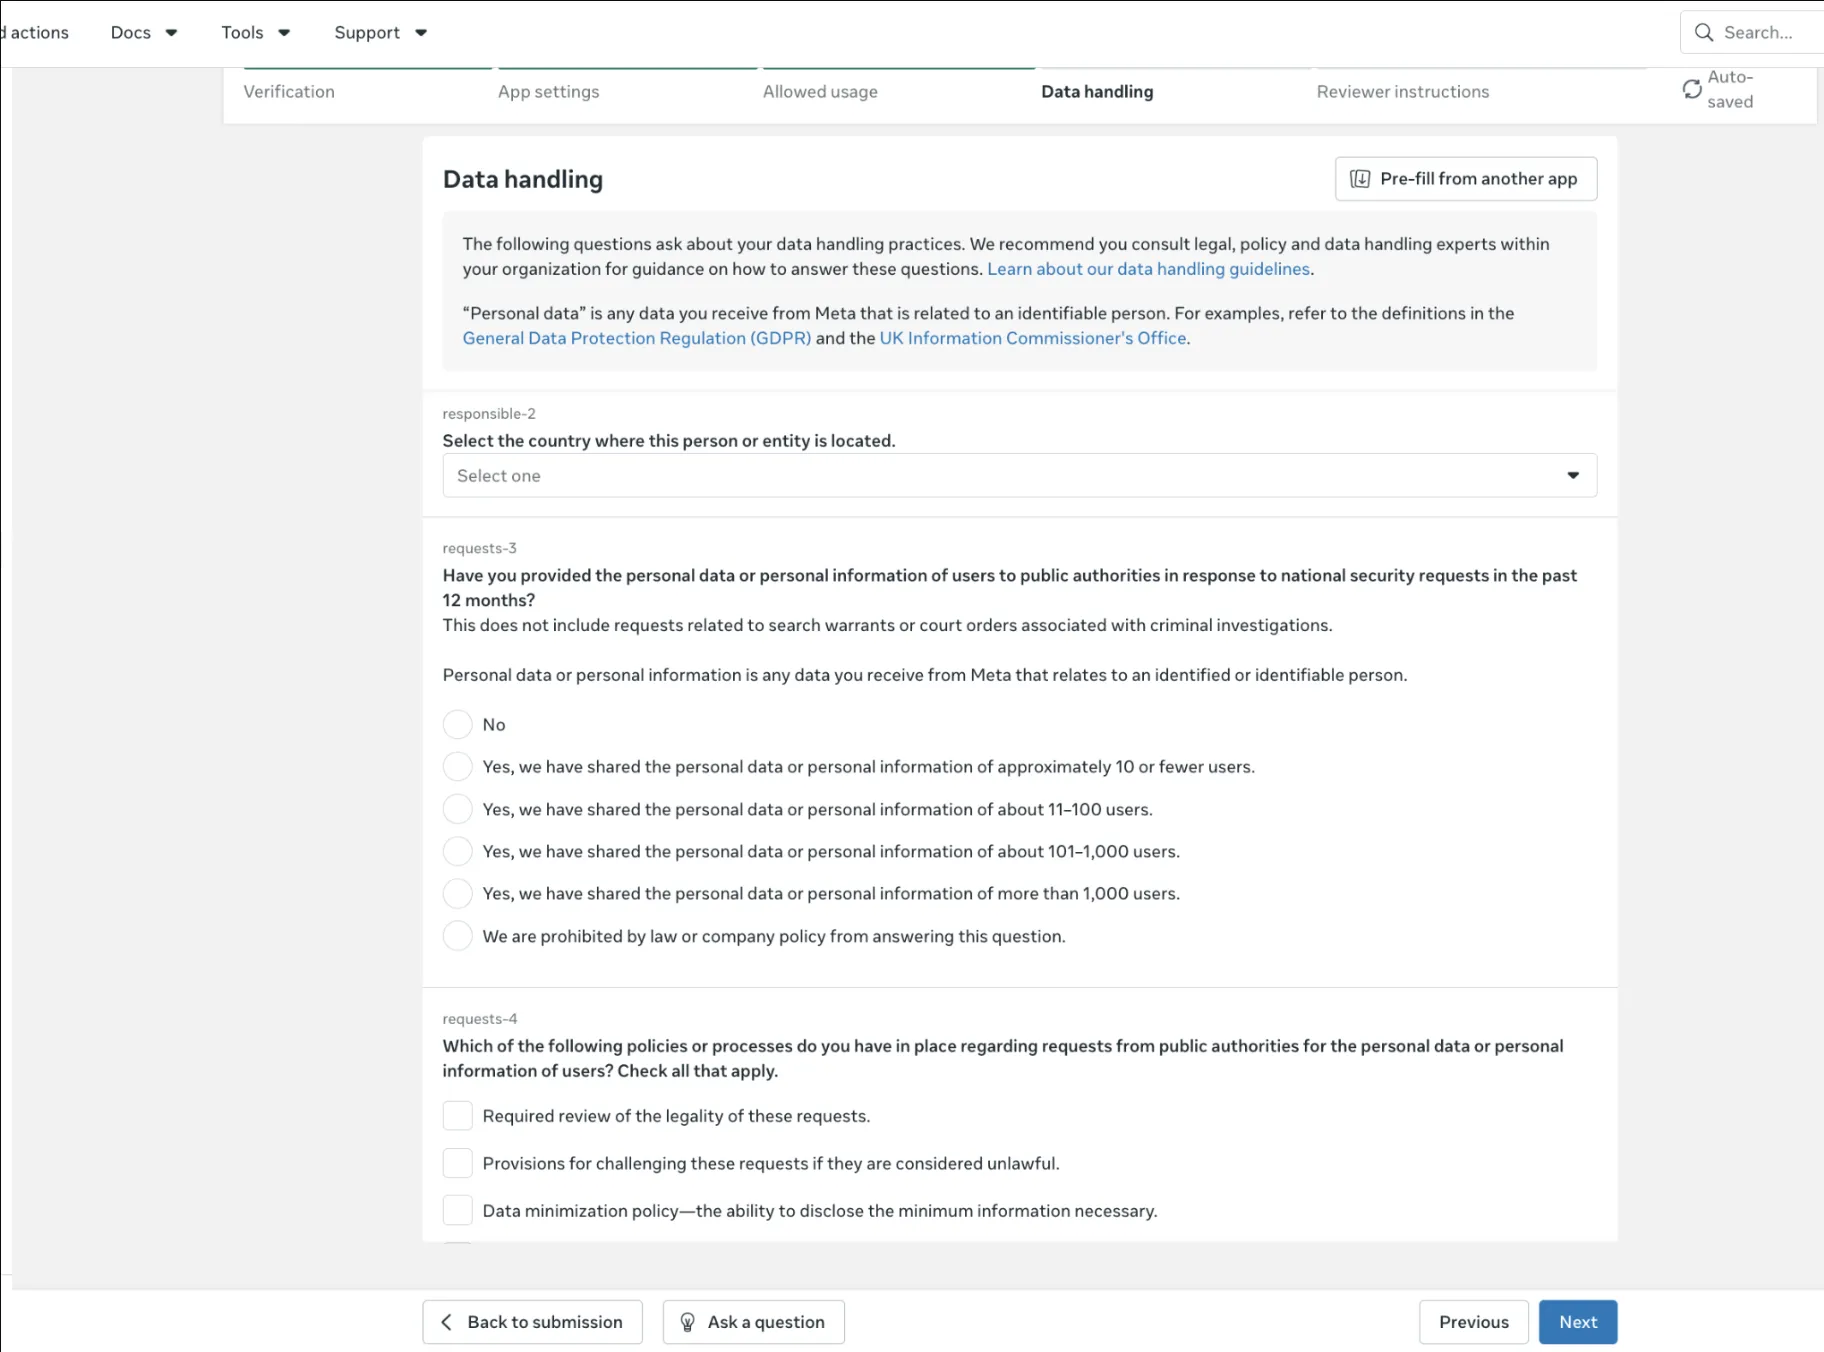
5.5 Complete Data Handling
Complete the Data Handling section based on your company’s actual data handling, privacy, and security practices. Do not select random options. If you are unsure about any question, confirm with your internal legal/security team before proceeding.
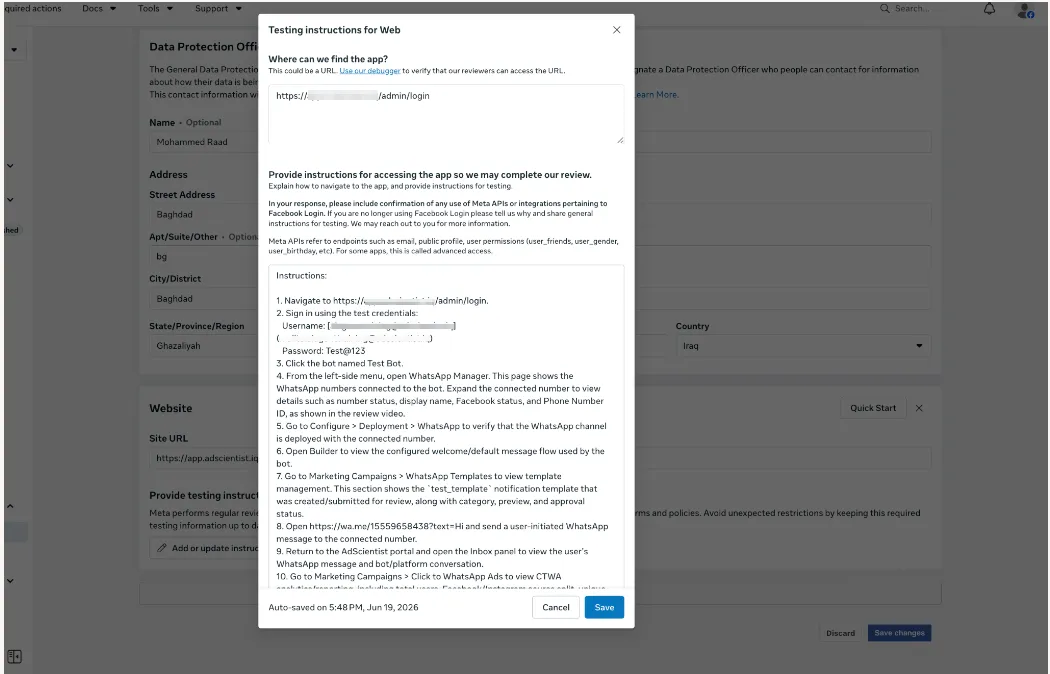
5.6 Add Reviewer Instructions
- Add clear instructions for Meta reviewers.
- Mention how the reviewer can check:
- Add the app URL and test login details for Meta review.
- App URL: <Portal URL>
- Login credentials: Email: <test_email> Password: <test_password>
Reviewer steps:
- Open the portal URL.
- Login using the test credentials.
- Check Embedded Signup for onboarding/business asset access.
- Check Templates for template creation/management.
- Check Messages/Conversations for WhatsApp message sending.
Submit for your App review.
After submission, the status will show Review in progress. Meta may take up to 20 days to manually review and update the verification status.
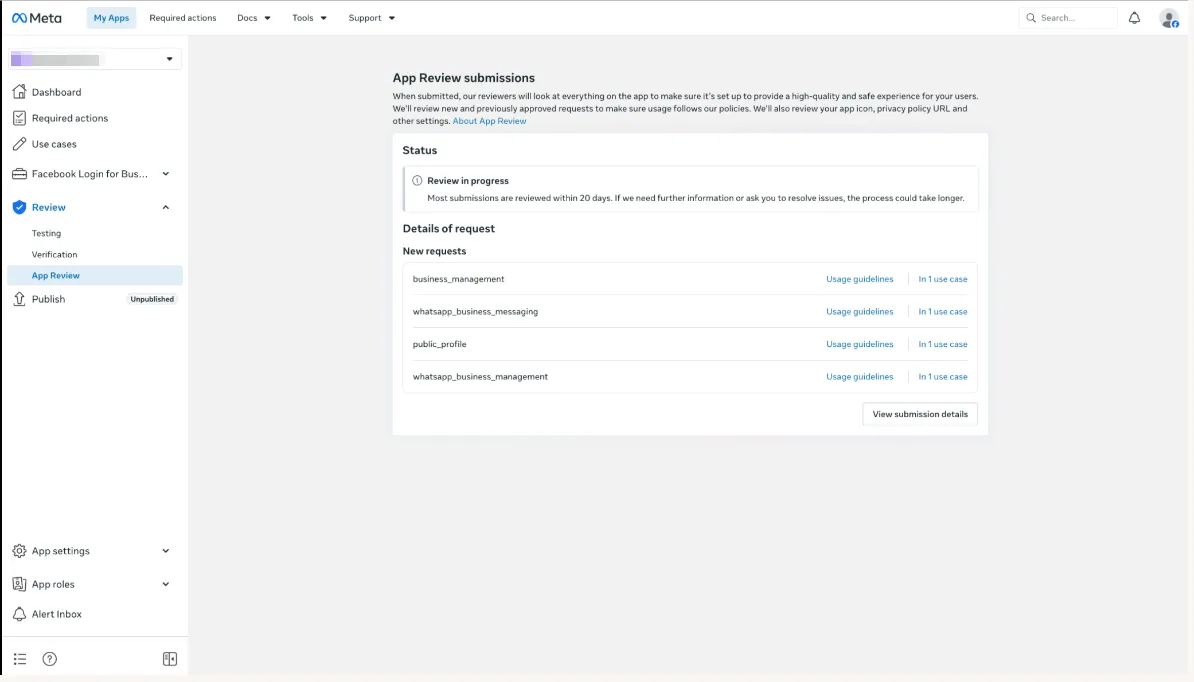
Step 6 : Wait for all approvals till your panel looks completed
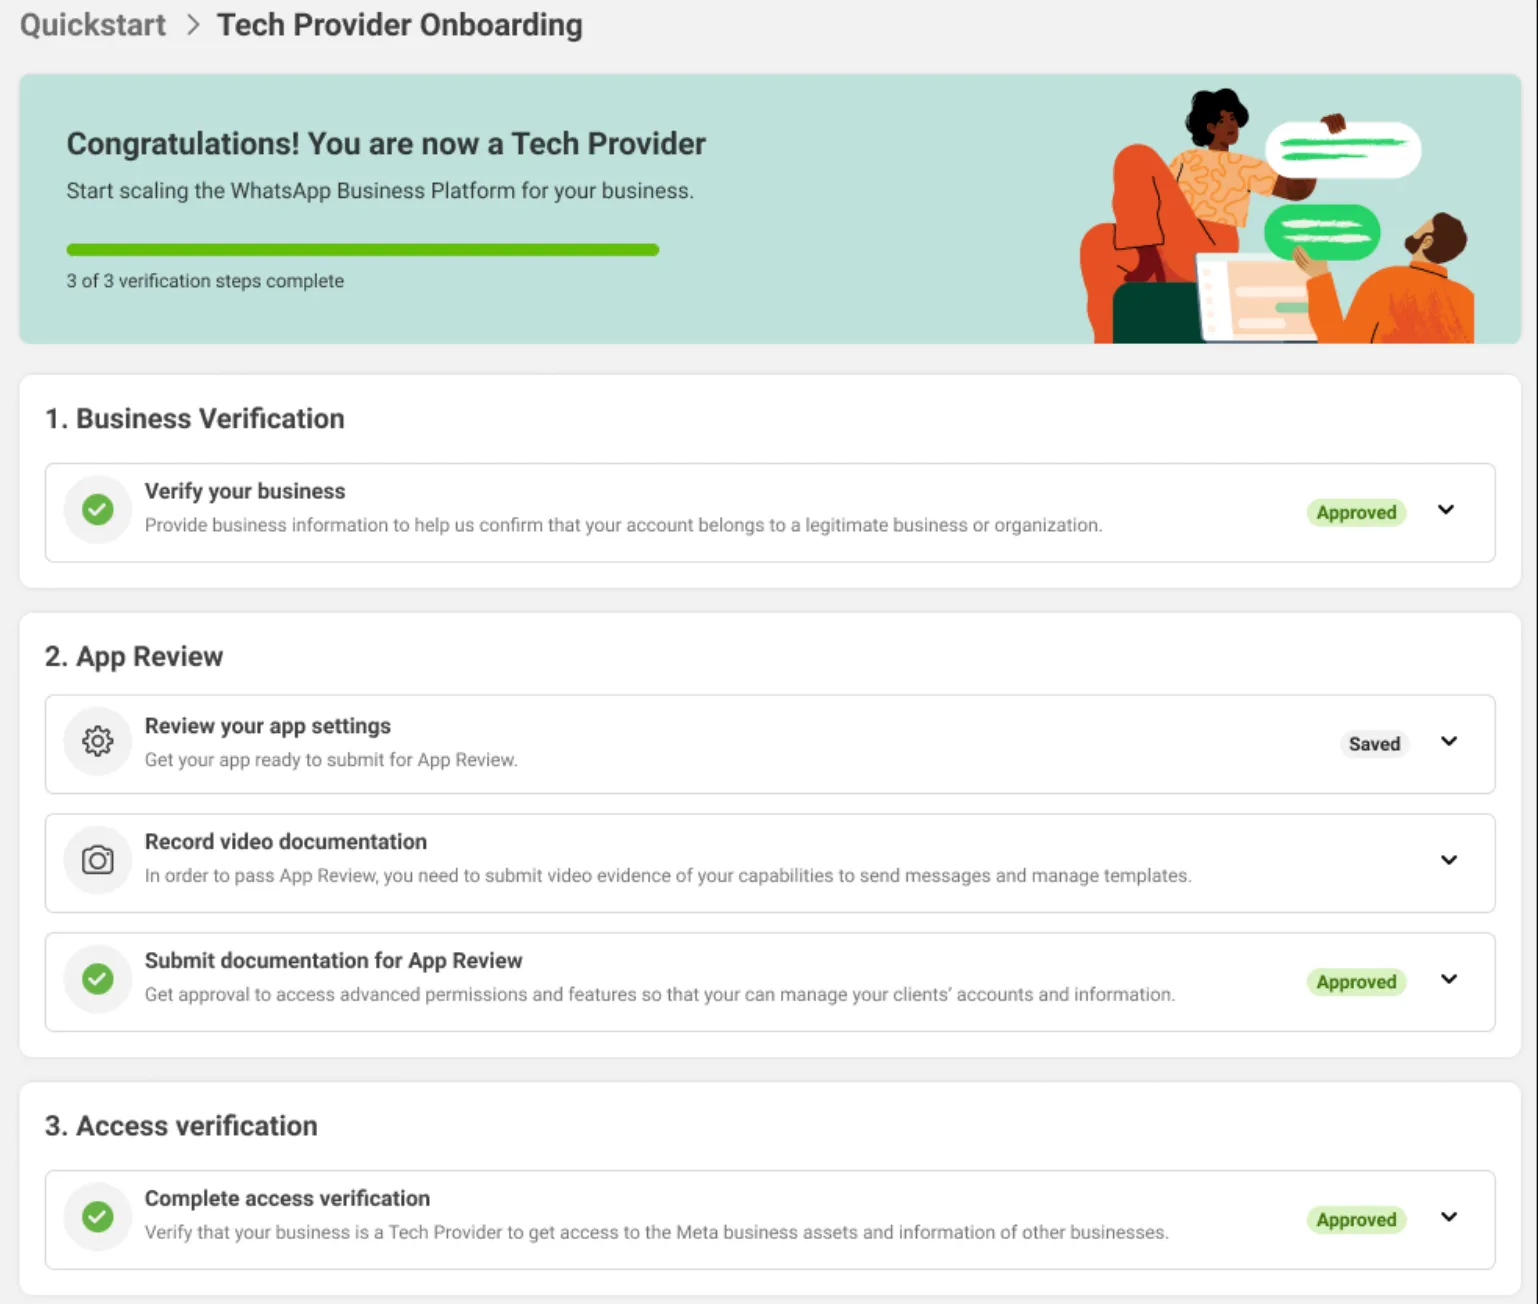
Step 7: Branding for Embedded Signup
Once the App Review is approved and the Partner Solution is accepted and shown as Active, the Embedded Signup page can be configured based on the partner’s preferred branding.
Please confirm which option you want to proceed with: Option 1: Partner Branding — Recommended Use your partner logo/branding on the Meta Embedded Signup page during customer onboarding.
Please share:
- Solution ID
- App ID
- App Secret
- Config ID
Option 2: Engati Branding Use Engati branding on the Meta Embedded Signup page during customer onboarding.
Please share:
- Solution ID
Once the required details are shared, Engati will configure the Embedded Signup setup and notify you. After the setup is completed, you will be ready to operate as a Meta Tech Provider partner with Engati.
If you face any issues or queries please reach out to us at [email protected].