Generative AI
Docusense with GPT allows you to upload knowledge base documents like PDFs and URLs to the Engati platform. The bot can then use these materials to answer user queries creatively by generating responses based on the content.
Note: Engati had previously supported Gemini models via Vertex AI. Gemini is an AI language model (similar to GPT-4o-mini or GPT-5) hosted on Google Cloud Platform via Vertex AI. However, please note that Gemini models are not currently supported on Engati for Generative AI; only OpenAI and Azure OpenAI can be used at this time.
Rather than picking statements directly from the documents, the bot reads and understands the content. When users ask questions, it provides new answers related to the information in an intelligent, conversational way.
This feature enables your bot to become knowledgeable about a topic by reading through documents you provide. The Generative AI then produces relevant, personalized responses to users' questions without needing extensive manual scripting. It allows your bot to dynamically answer a wide range of queries by learning from uploaded knowledge bases.
Setting Up
Step 1: Navigate to Integration > Cloud Integrations > eSenseGPT

Step 2: From the drop down menu select either OpenAI or Azure OpenAI and then click on "Authorize"

- OpenAI is an artificial intelligence research organization. They have developed very advanced AI systems like GPT-3 for generating human-like text.
- Azure OpenAI is Microsoft's offering that makes OpenAI's models easily accessible on the Azure cloud platform.
So OpenAI does the research and creates the AI models. Azure OpenAI takes those models and provides easy access to them through Microsoft Azure.
This allows developers to integrate OpenAI's powerful models like GPT-3 into their own applications using Azure's tools and services. They don't have to build the AI models from scratch.
Step 3: Give an account name as desired and then add OpenAI generated API Key.

Step 4: Once your OpenAI key is successfully added to the bot, navigate to Configure > Integrations > eSenseGPT

Step 5: From the dropdown menu select the your OpenAI account.

Step 6: The basic setup for Docusense with GPT is done. Now , you can upload the required documents. Navigate to Train > Generative AI > Documents tab > click on Upload Document
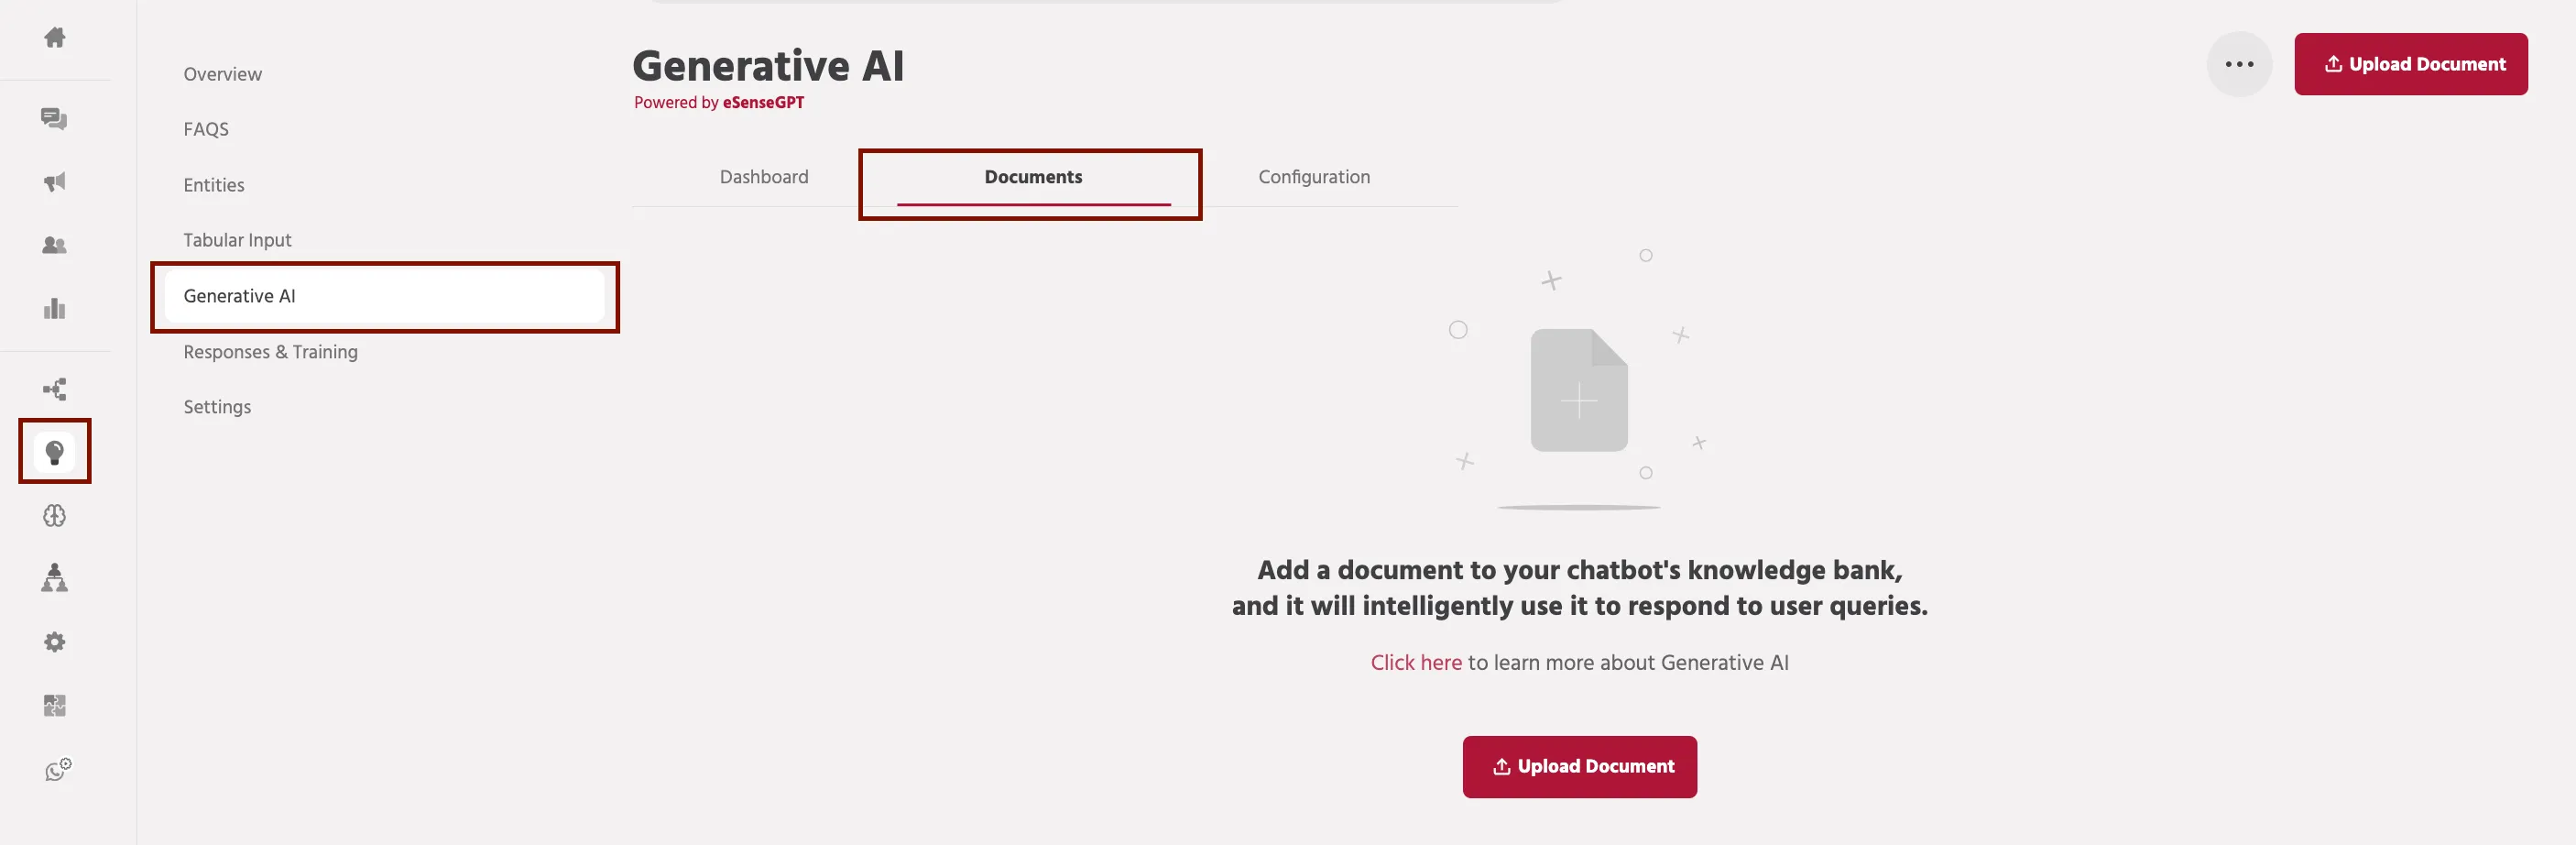
Step 7: Upload your documents using a method of your choice.
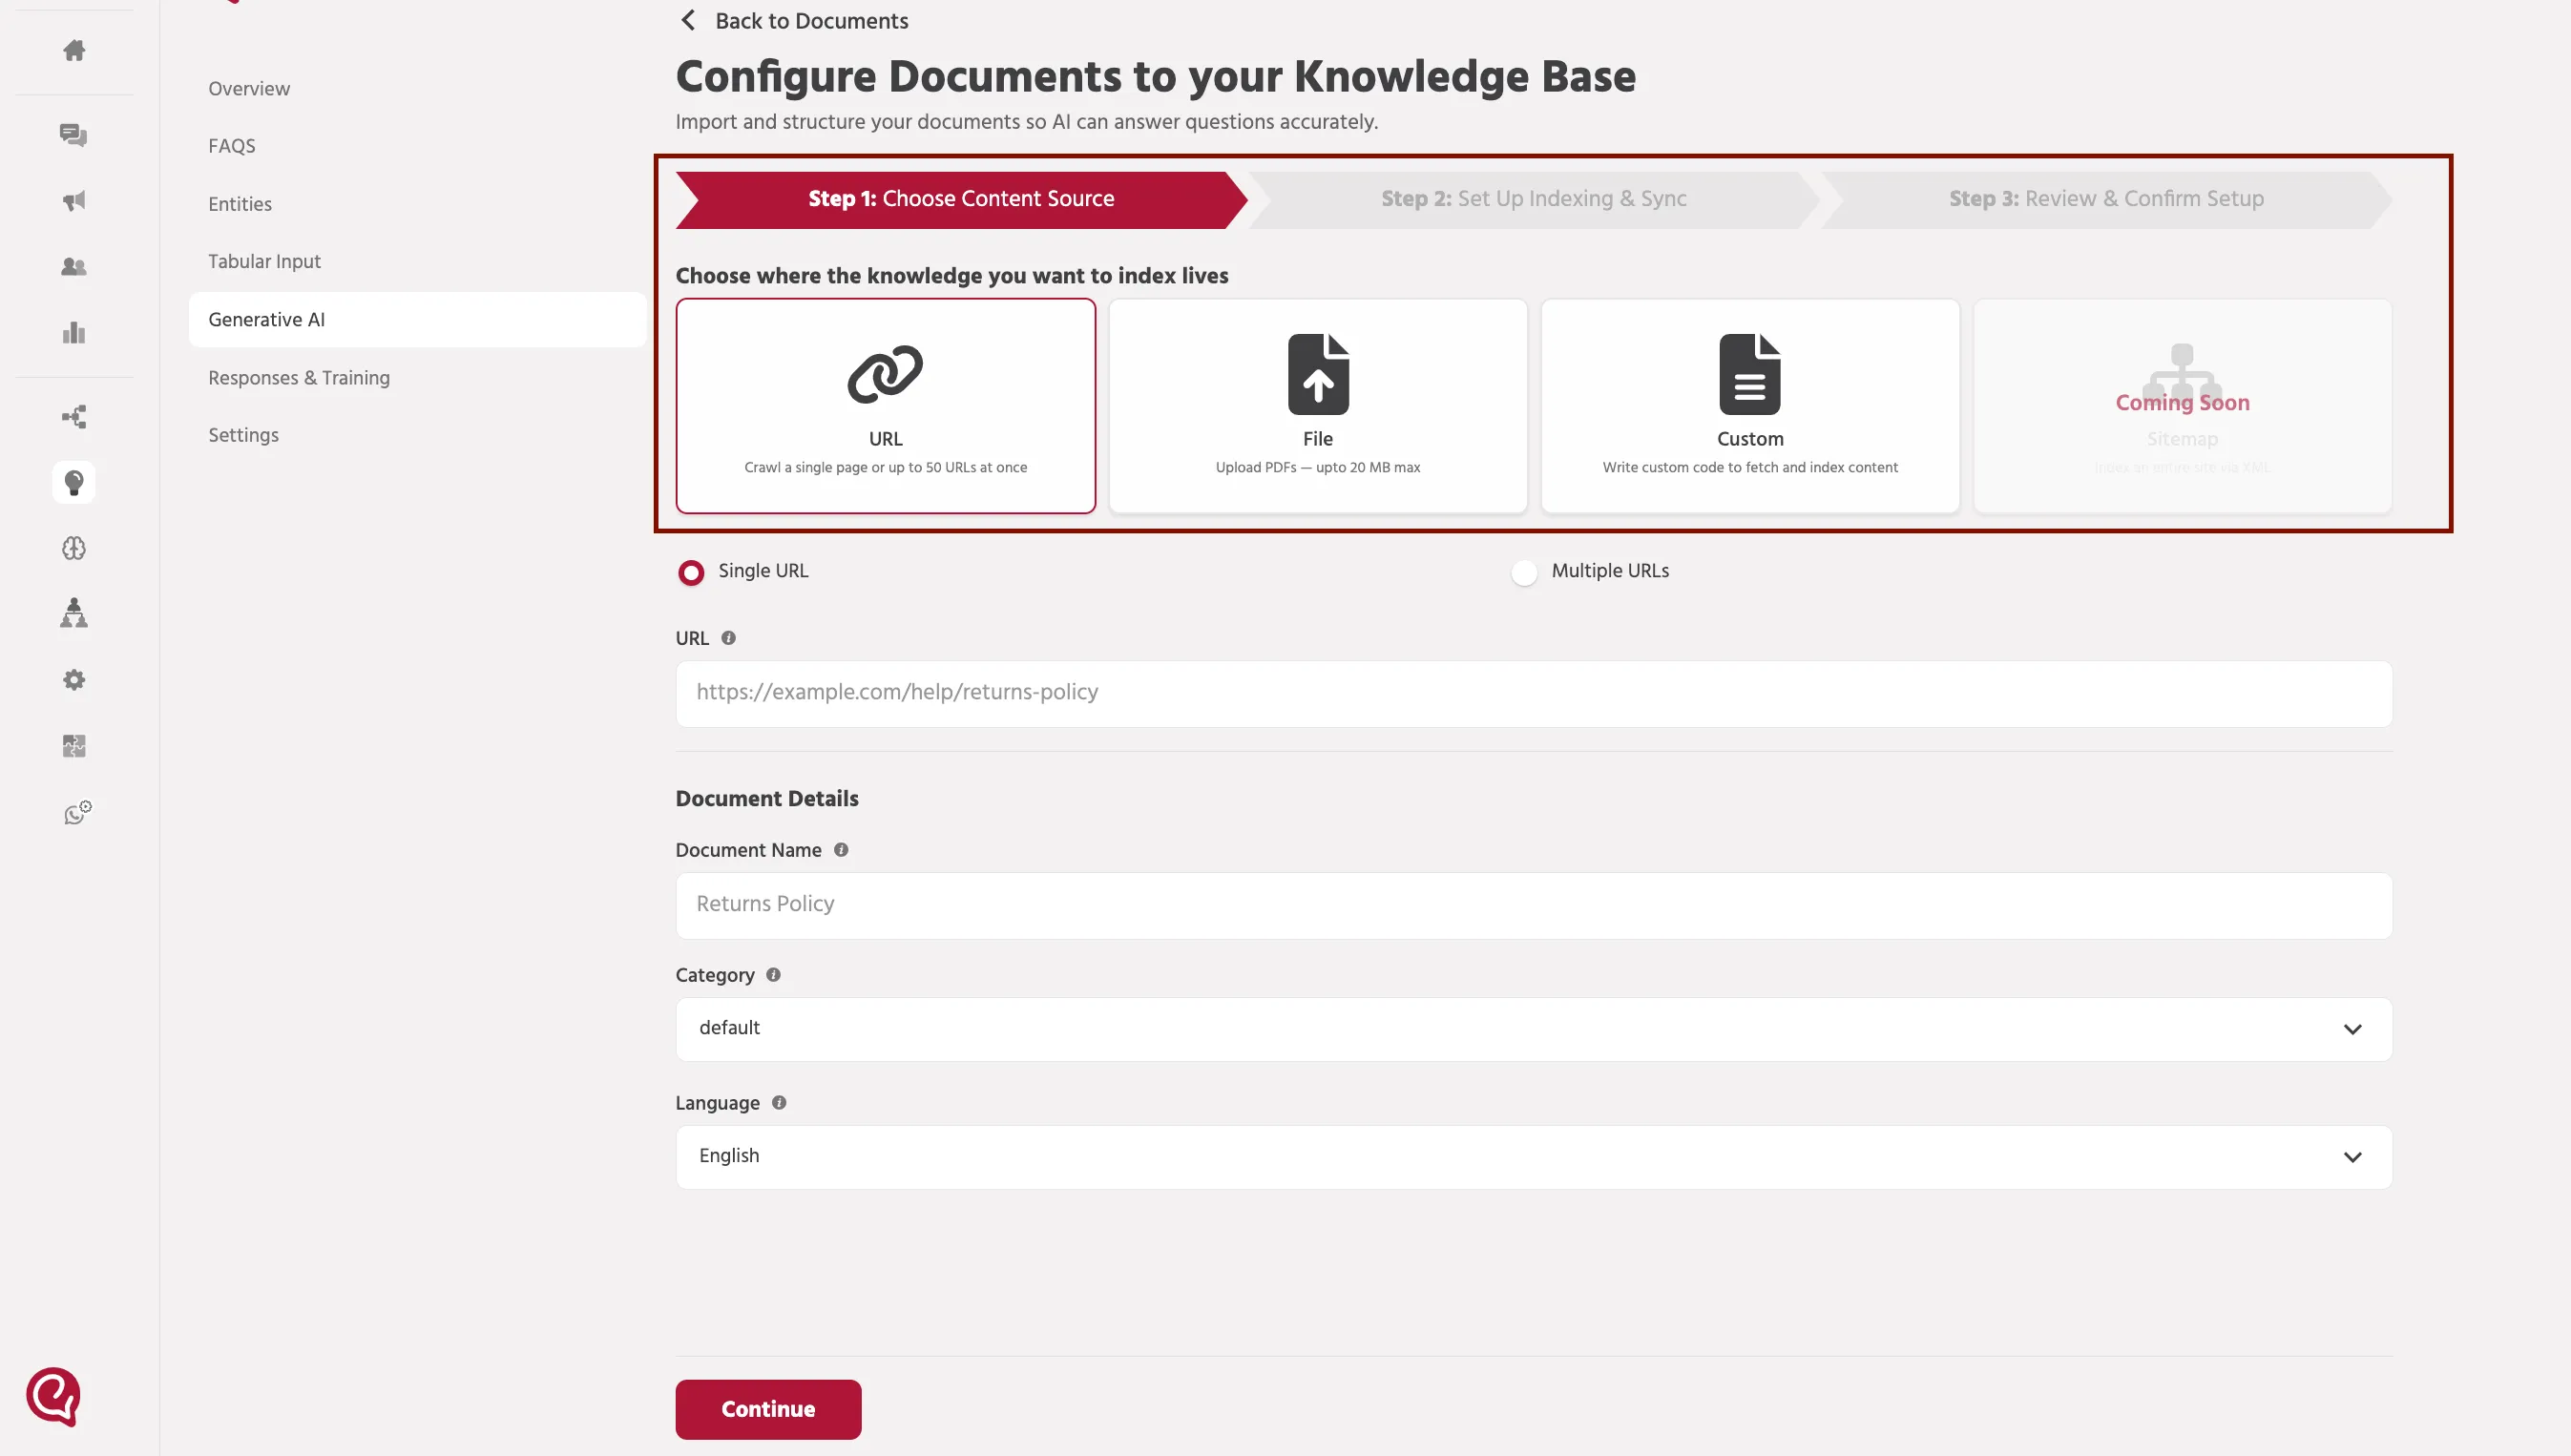
- Upload Single URL
To upload a single URL, select the ‘Single URL’ option. Add the URL/link for the web page in the 'URL' field.
In the ‘Document Name’ field, enter a name for the document. This name will help you identify the document later.
Next, select the ‘Category’ from the dropdown menu. The ‘Category’ field allows you to categorize the document for better organization and retrieval. As a next step, select the 'Language' from the dropdown menu for which this document is being added for.
Finally, click on 'Continue'
- Upload Multiple URLs
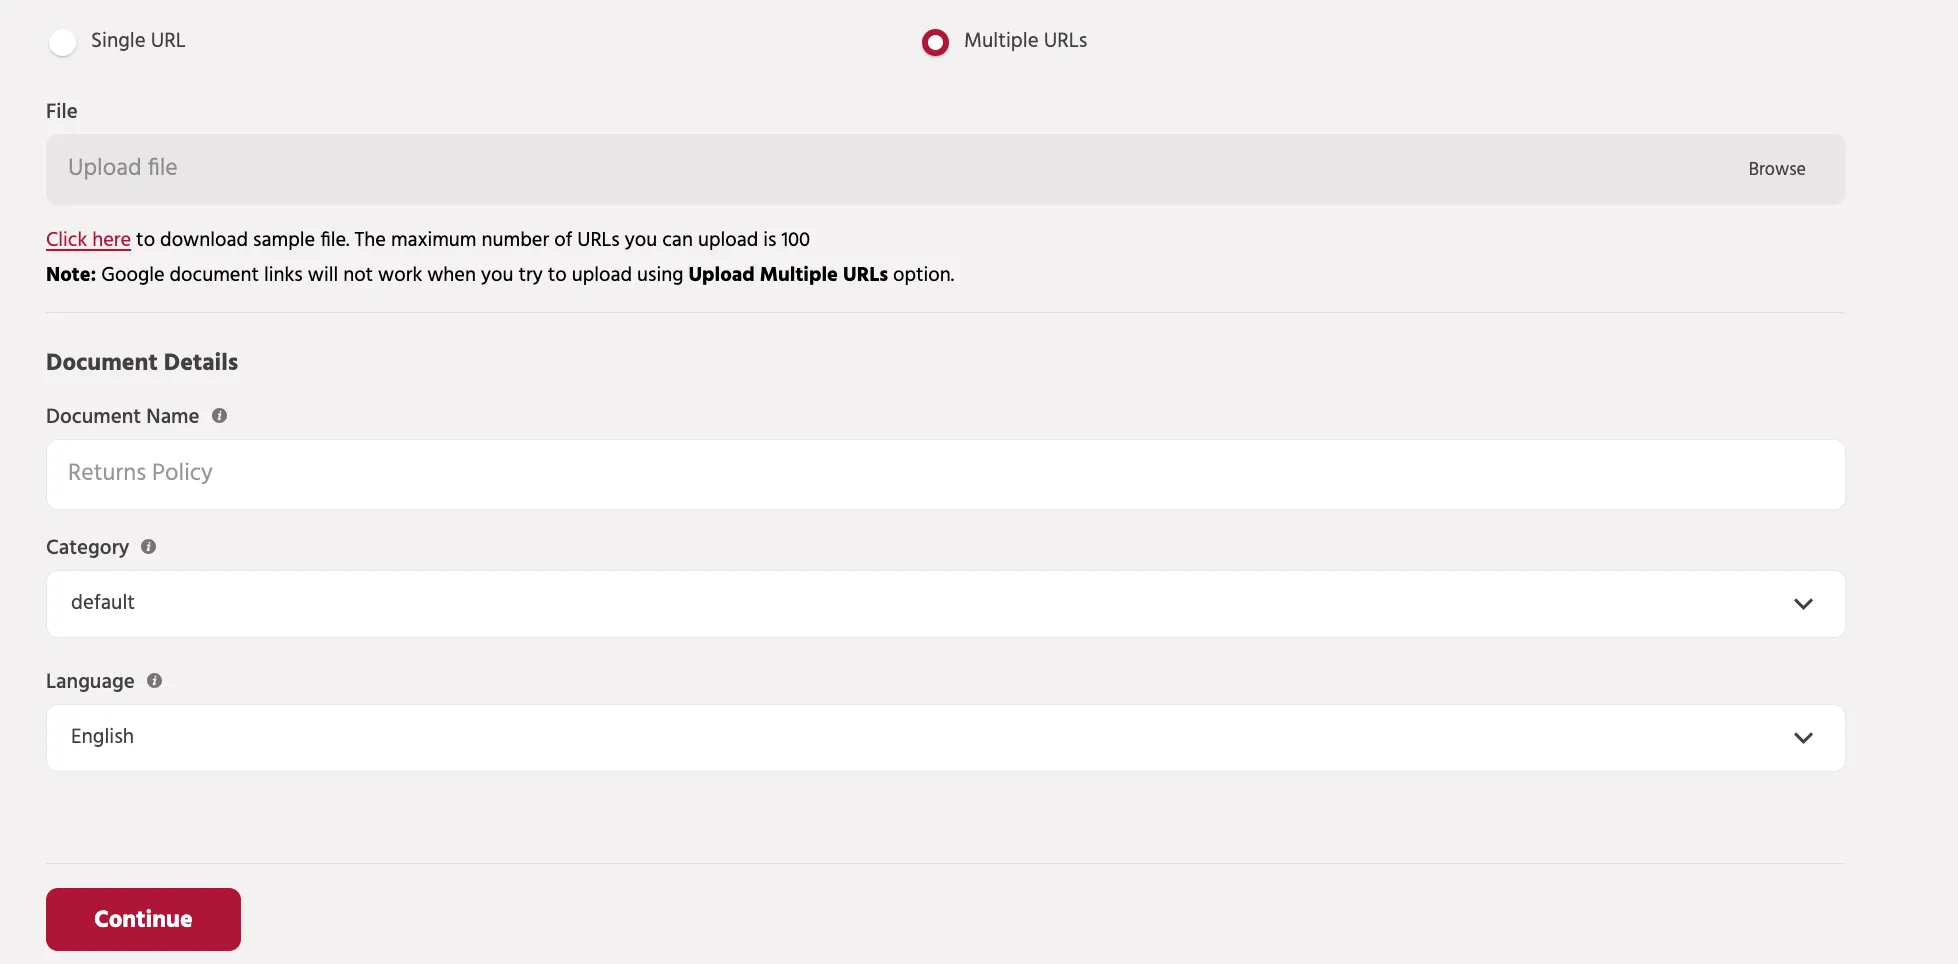
To upload multiple URLs, select the ‘Multiple URLs’ option. Click the ‘Browse’ button to select the file you want to upload.
In the ‘Document Name’ field, enter a name for the document. This name will help you identify the document later.
Next, select the ‘Category’ from the dropdown menu. The ‘Category’ field allows you to categorize the document for better organization and retrieval. As a next step, select the 'Language' from the dropdown menu for which this document is being added for.
Finally, click on 'Continue'
Note: If uploading a home page URL , it should not have more than 100 embedded URLs.
- Upload Single File
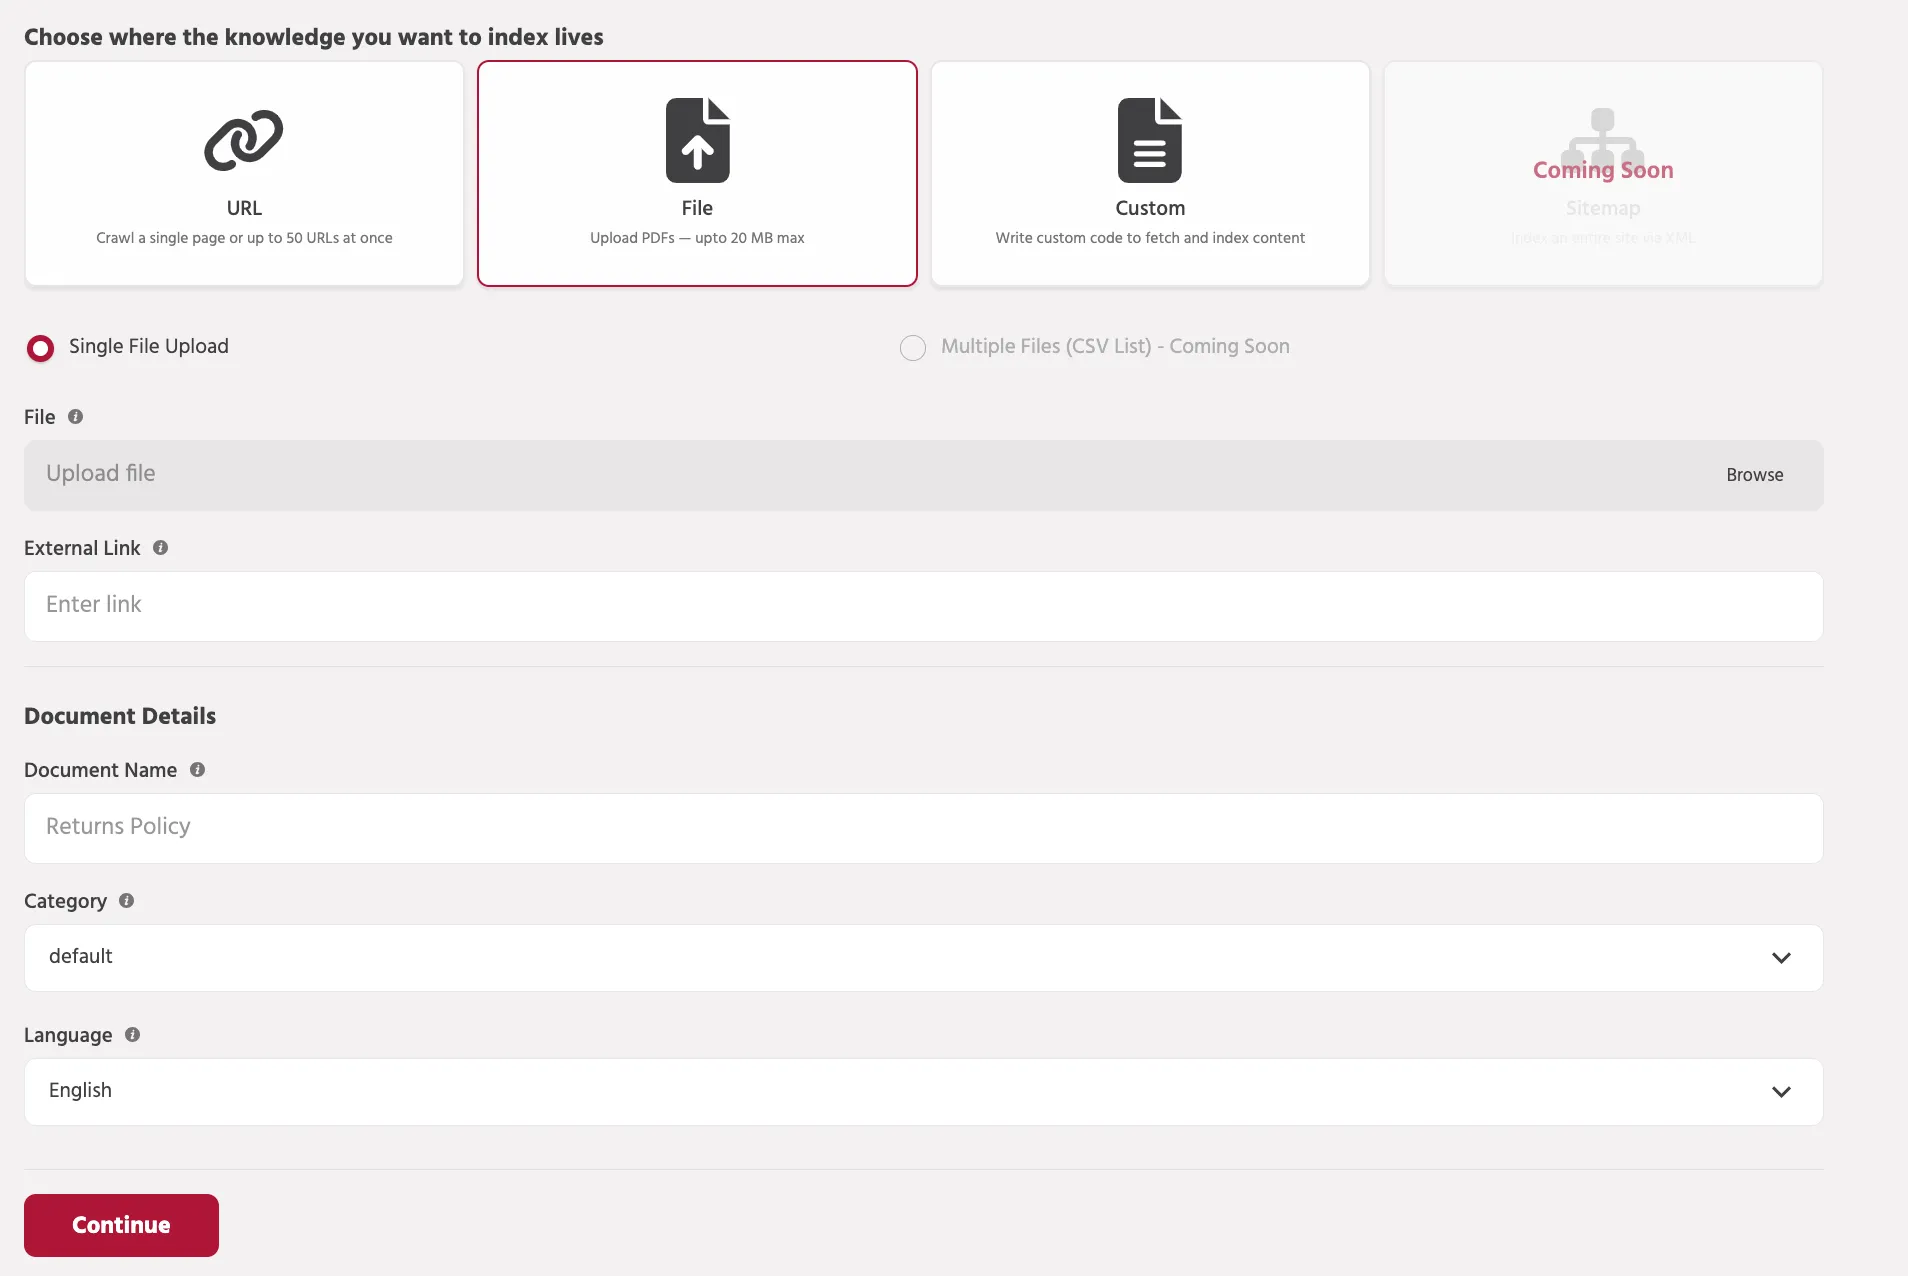
To upload a single File, select the ‘Single File Upload’ option. Click the ‘Browse’ button to select the file you want to upload.
In the 'External Link' field, provide a link/URL to the document source if it resides online. User will get an option to navigate to the link from the Document Viewer.
In the ‘Document Name’ field, enter a name for the document. This name will help you identify the document later.
Next, select the ‘Category’ from the dropdown menu. The ‘Category’ field allows you to categorize the document for better organization and retrieval. As a next step, select the 'Language' from the dropdown menu for which this document is being added for.
Finally, click on 'Continue'
- Custom
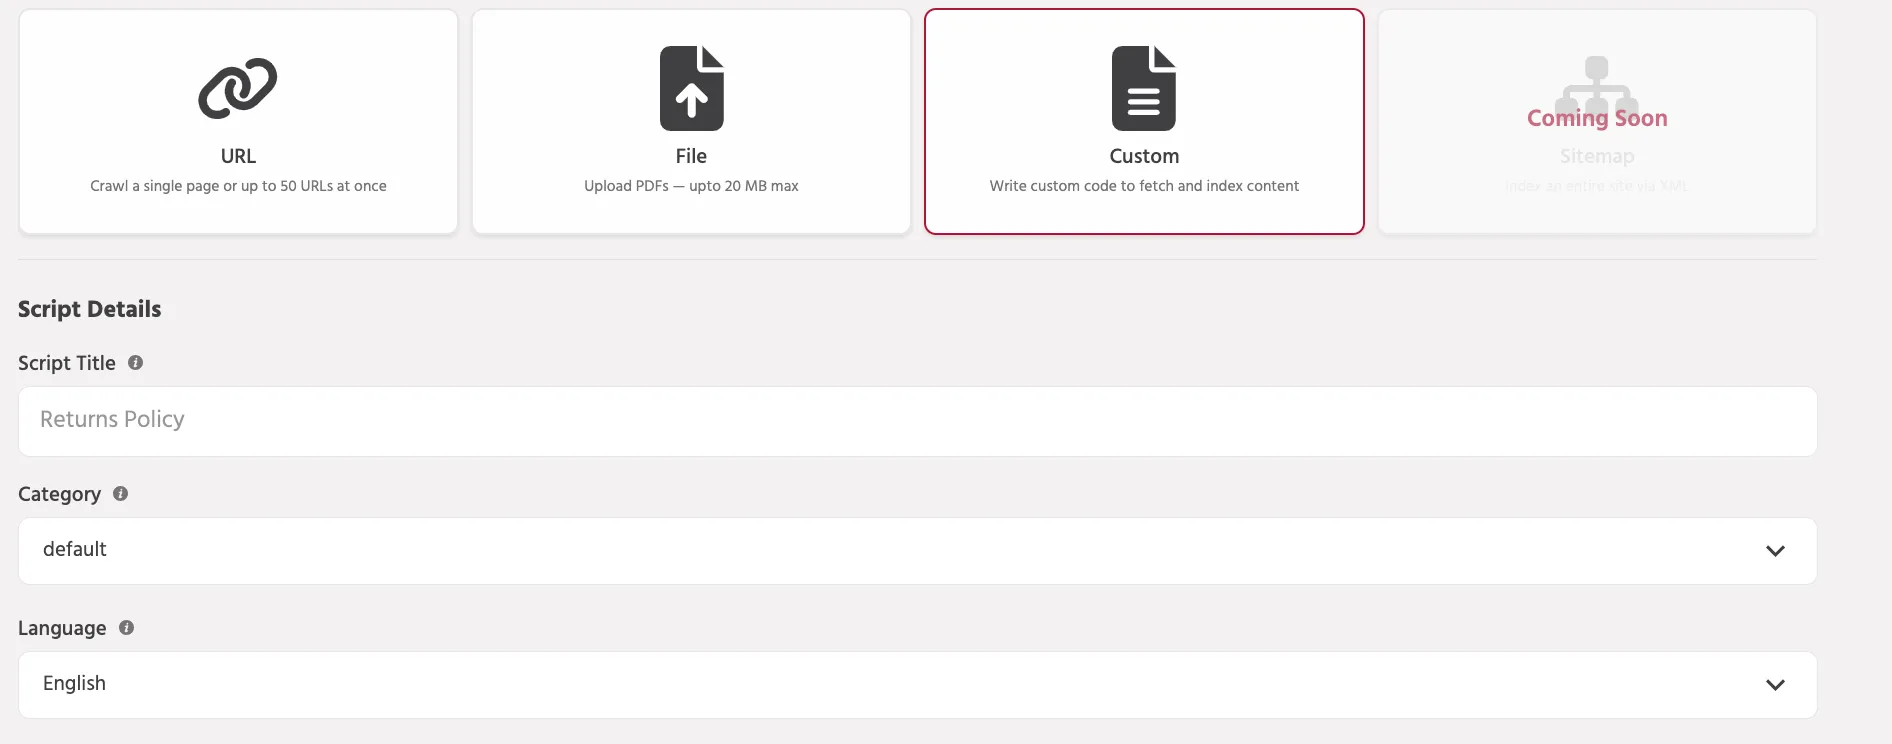
Use this option if you would prefer writing custom code to fetch and index content. Enabled flexible and scalable indexing for dynamic websites, solving limitations of static-only URL handling.
Assign a title to the document for reference in the 'Script Title' field.
Next, select the ‘Category’ from the dropdown menu. The ‘Category’ field allows you to categorize the document for better organization and retrieval. As a next step, select the 'Language' from the dropdown menu for which this document is being added for.
Finally, click on 'Continue'
Step 8: Set Up Indexing and Sync - Define how the content should be processed and kept up to date.
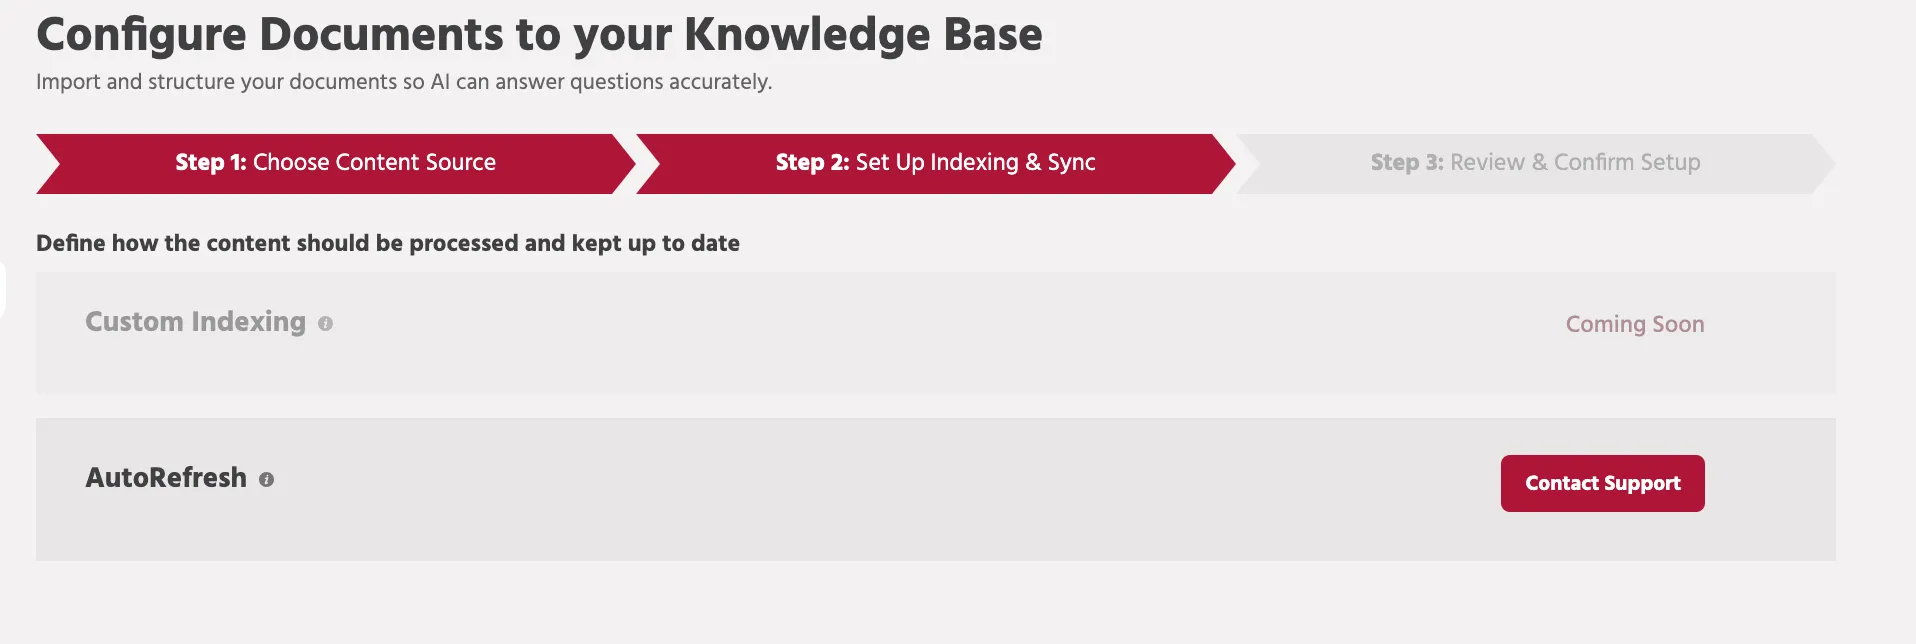
Step 9: Review and Confirm your set-up. Save and start indexing.
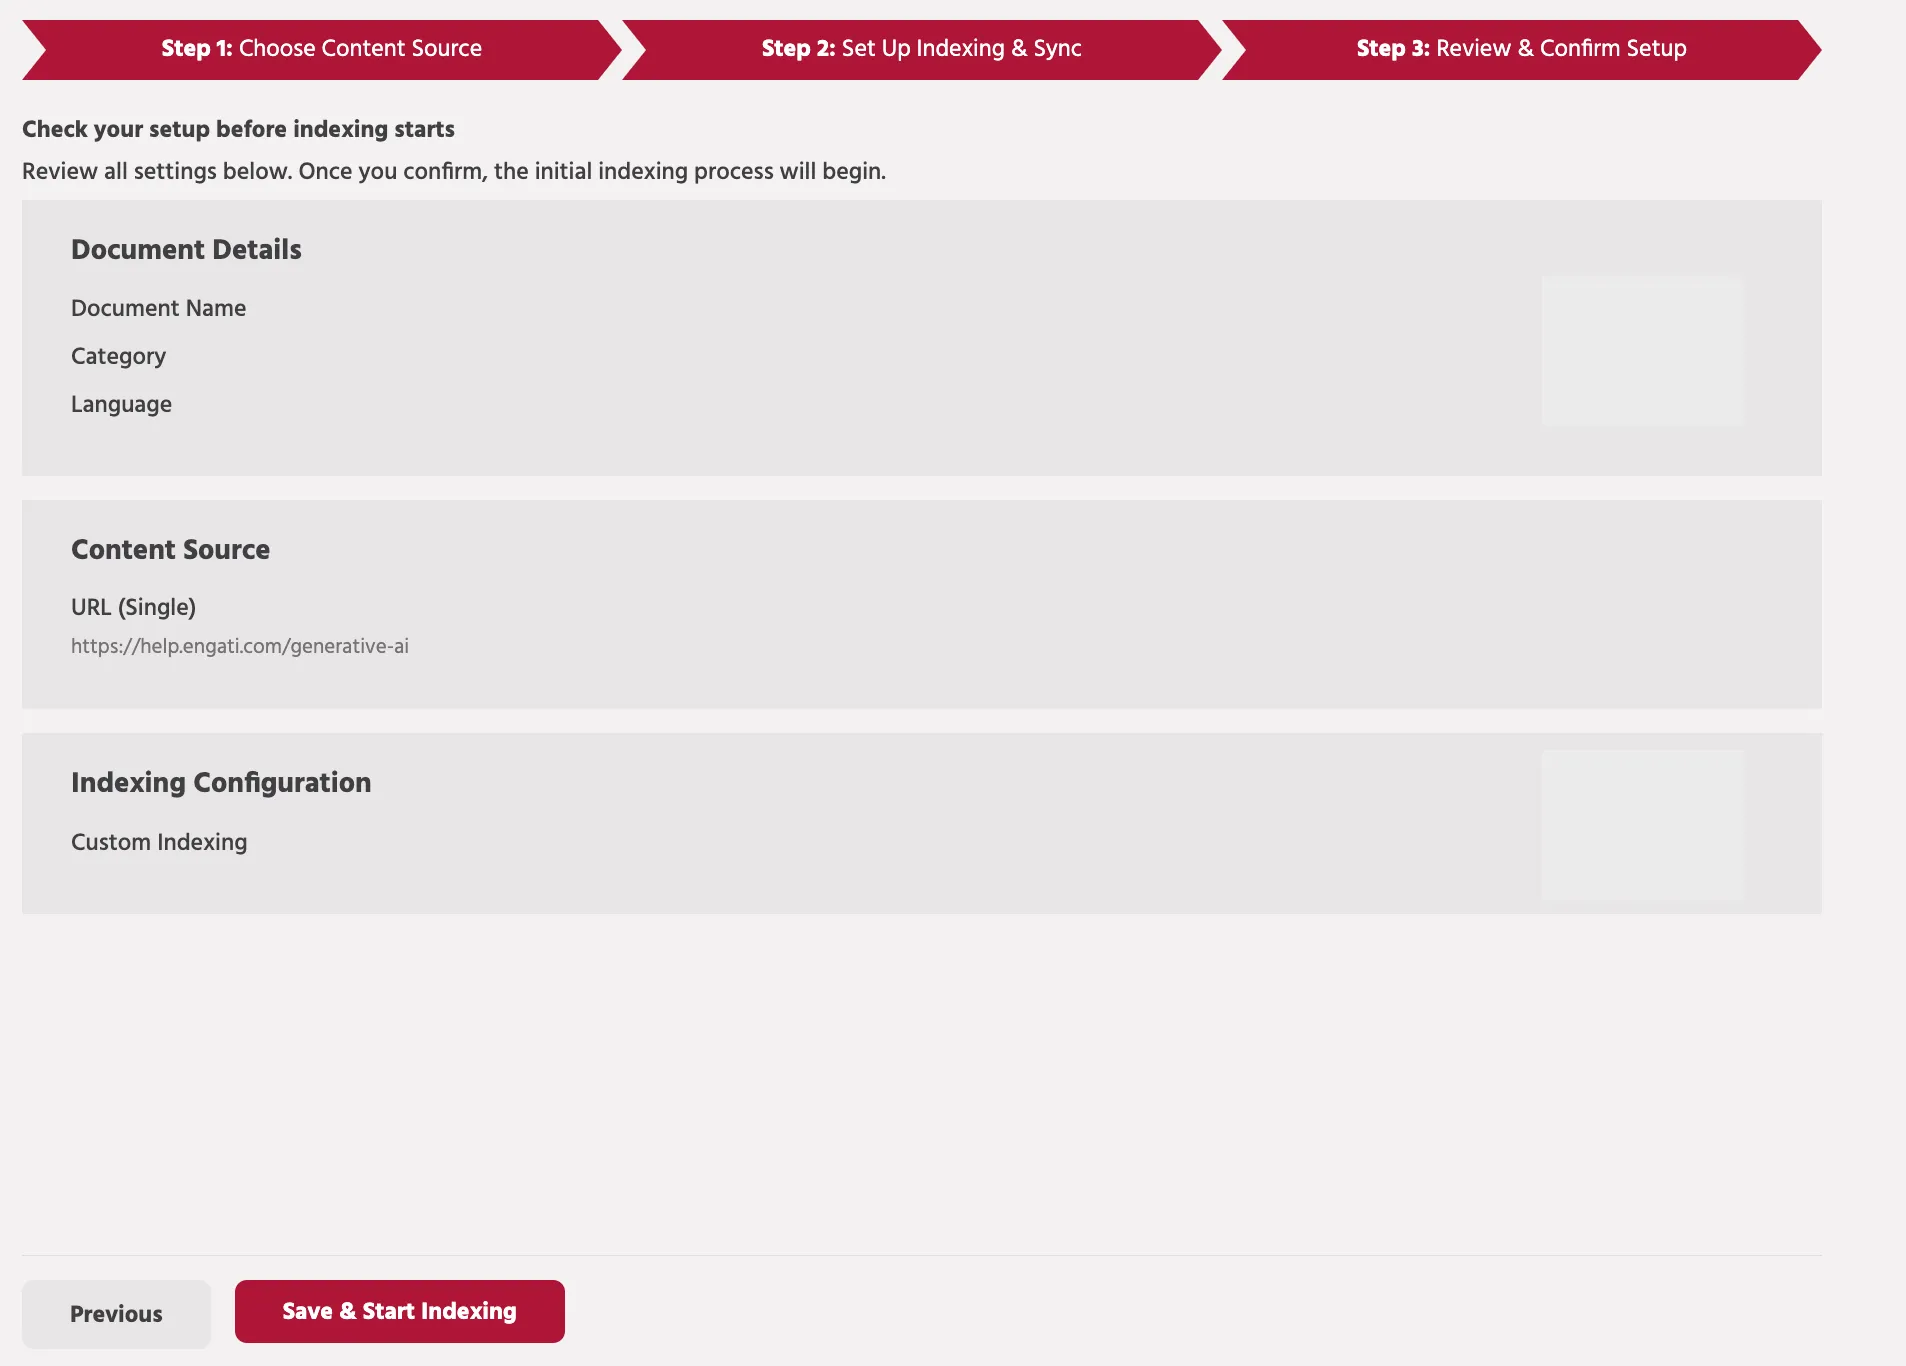
Step 10: Once done , it takes around 5 minutes to process the document .

New Feature Addition: Previously, documents uploaded for training in eSenseGPT remained static, requiring manual updates to reflect changes. An auto-refresh mechanism now updates all previously uploaded documents after a set time period, keeping the training data current.
Step 11: Once the document is processed successfully , we can see the status as Ready to Search .

Step 12: If we see status as error, please check the previous steps of setup is not missed.

Step 13: Ask any query to the bot and bot should be able to return a response if the answer to the query asked is present in the documents uploaded.

Generative AI takes your bot's language comprehension and ability to handle conversations to the next level. Your bot becomes smarter over time with minimal training. It's an easy way to create extremely natural and capable conversational experiences.
If you face any issues or queries please reach out to us at [email protected].