1. Text Agent Deployment
7 min
After creating the Text Agent, the next step is to deploy the agent and configure routing so it can start responding to user messages.
Deployment Demo
The following video demonstrates how to deploy the agent, configure routing, and test the agent.
After watching the video, follow the steps below to deploy and test your agent.
Agent deployment.mp4
Follow the steps below to deploy and test the agent.
Step 1: Deploy the Agent
- Go to Build under the Agents section.
- Locate the agent you created.
- Click the three-dot menu (⋮) on the agent card.
- Select Deploy.
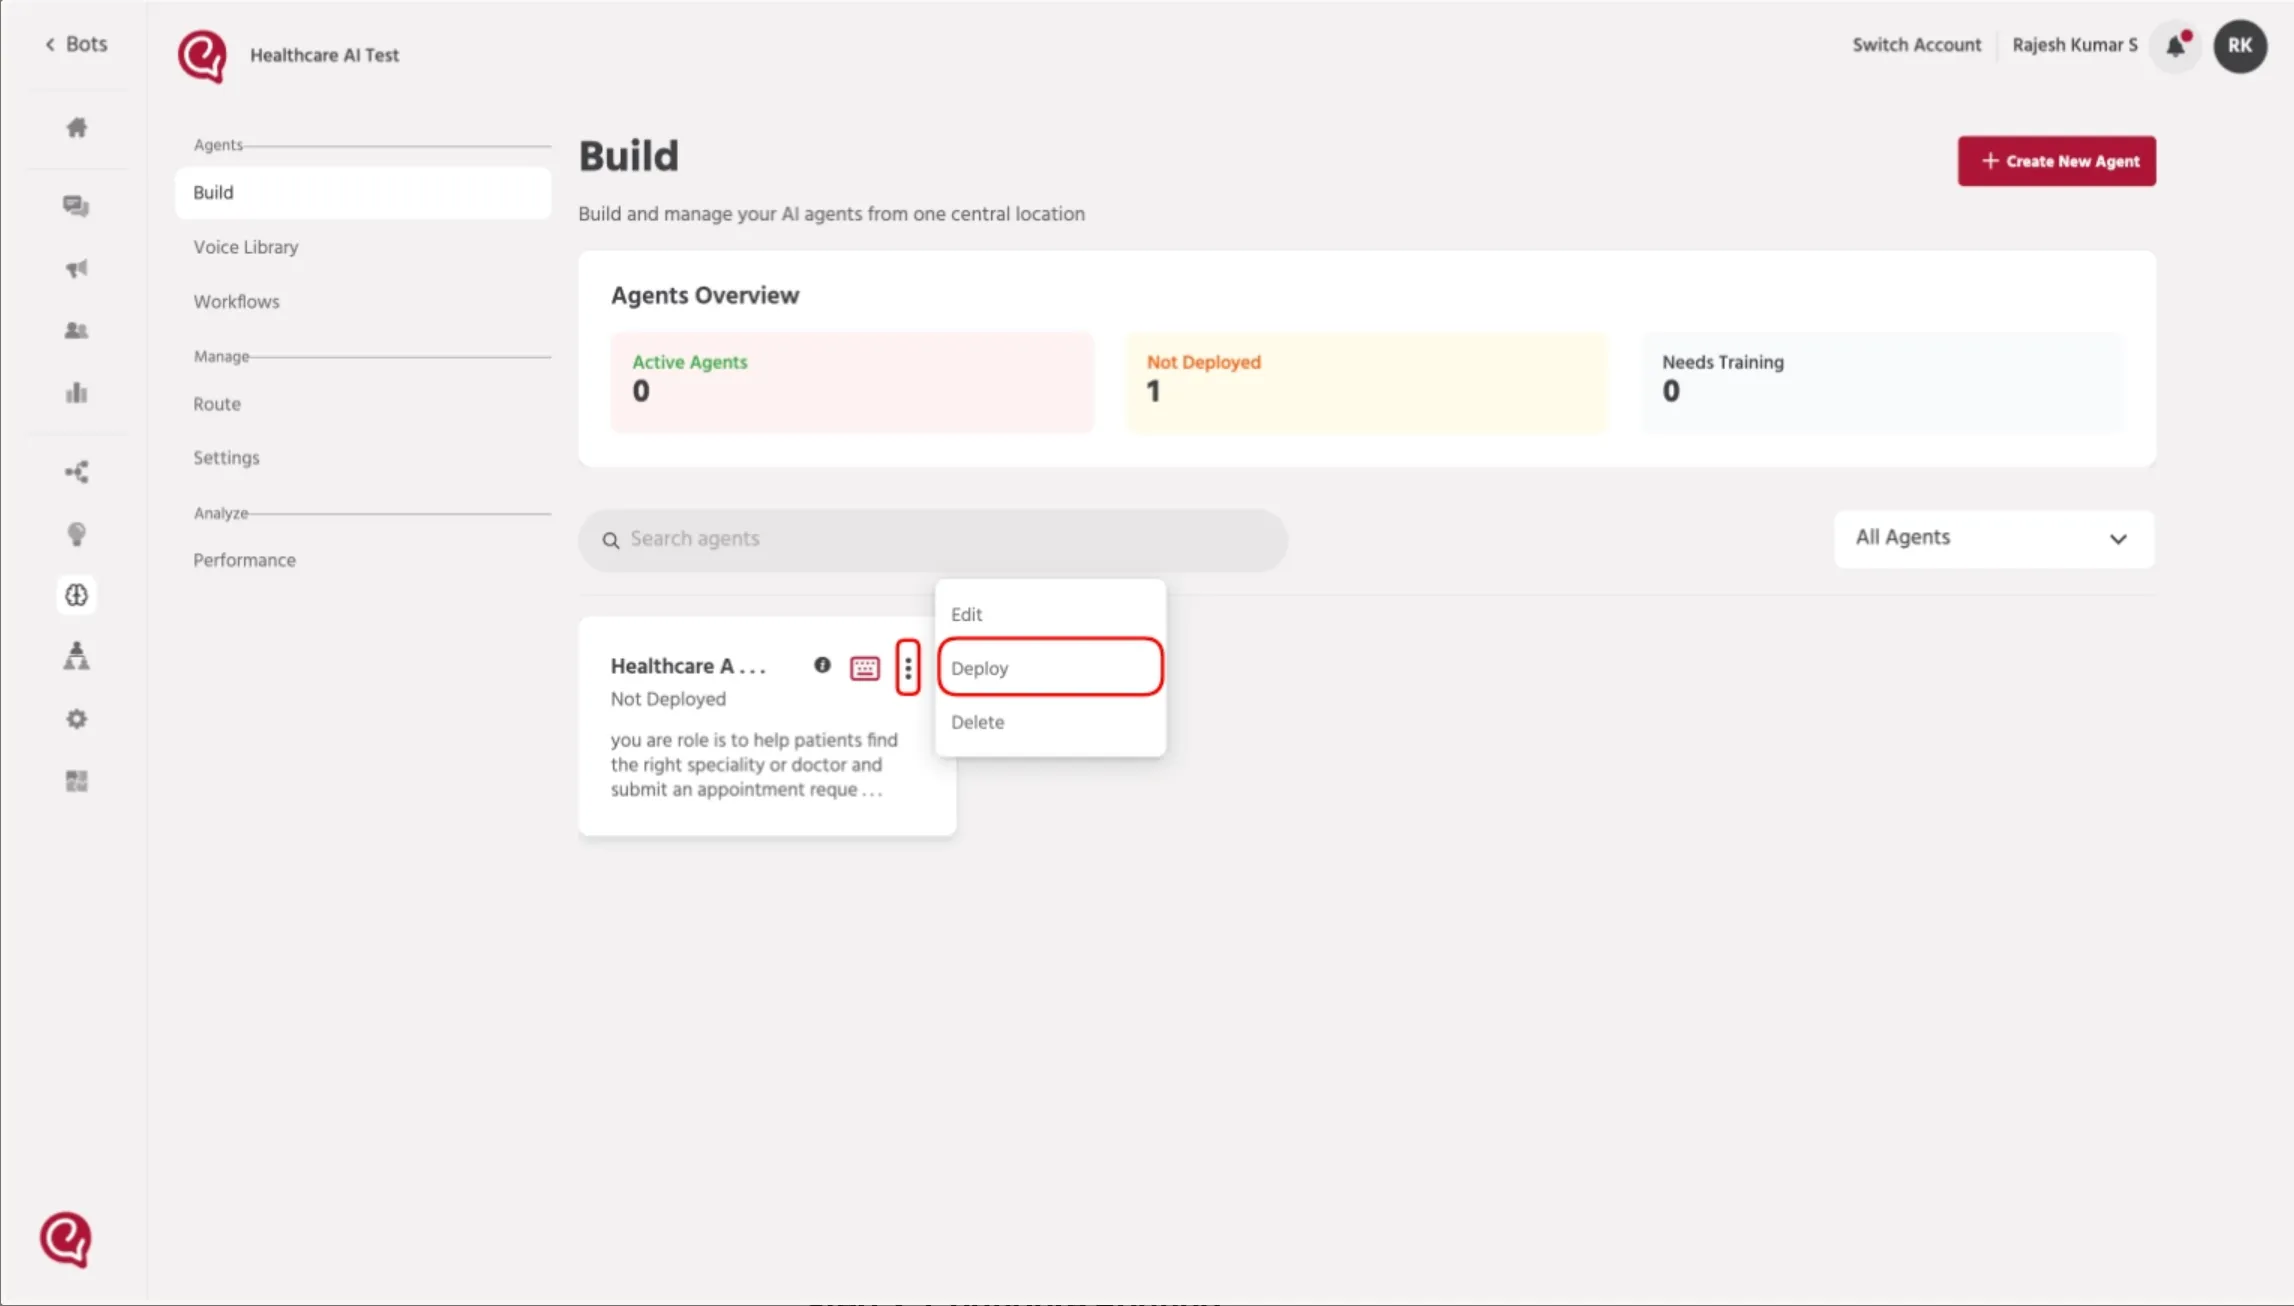
Once deployed, the agent will become available for routing.
Step 2: Configure Routing
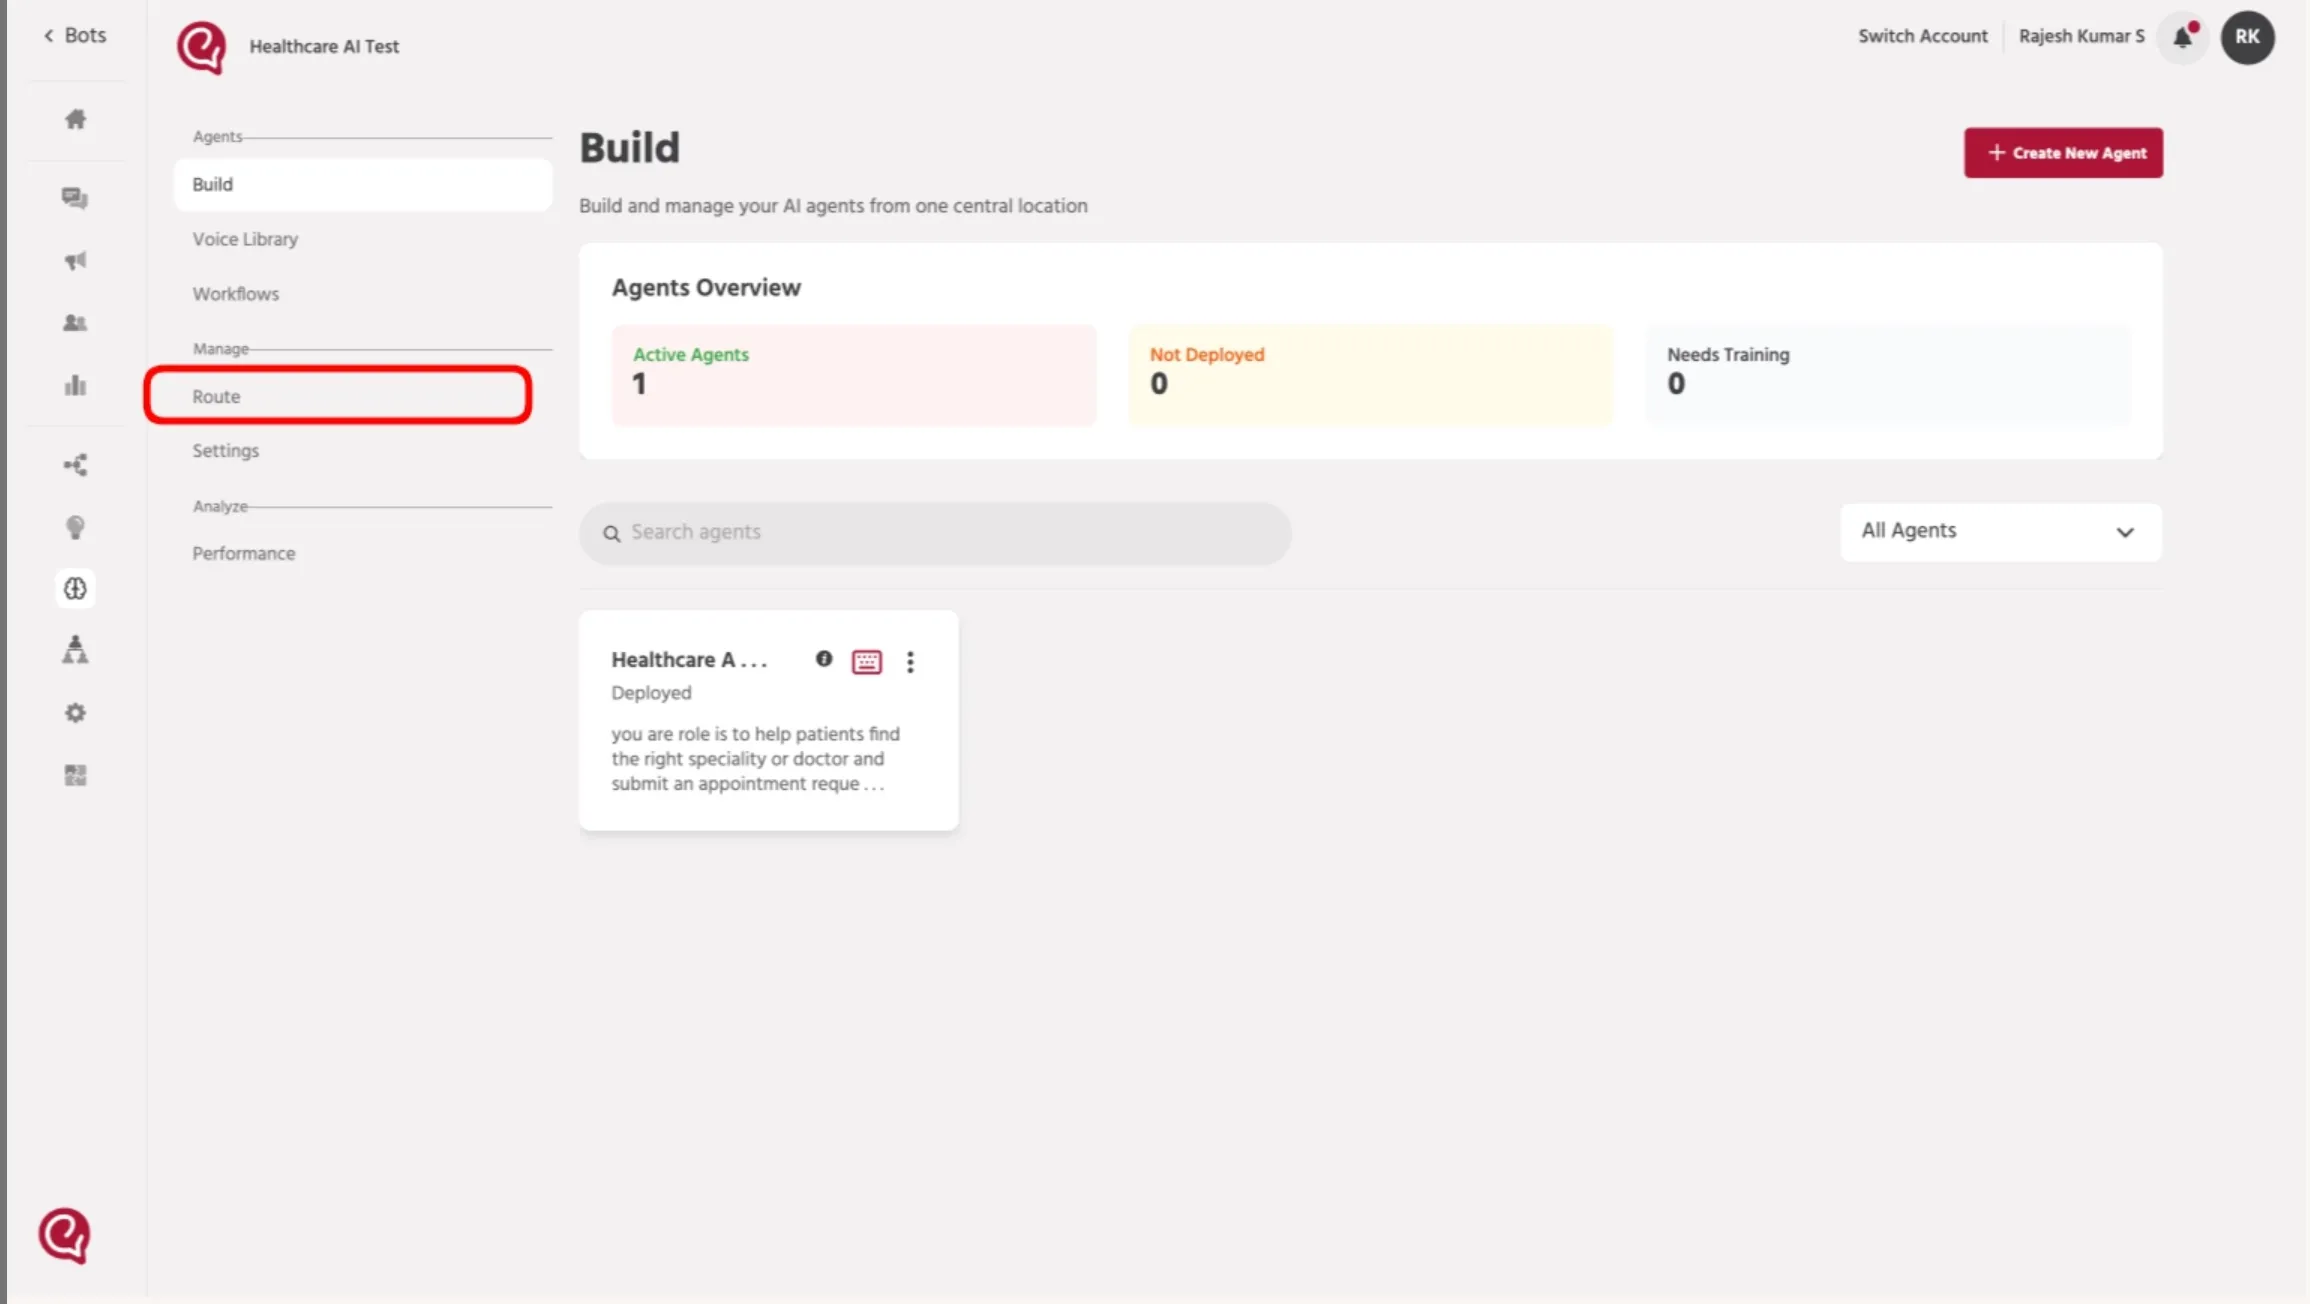
- Go to Manage → Route.
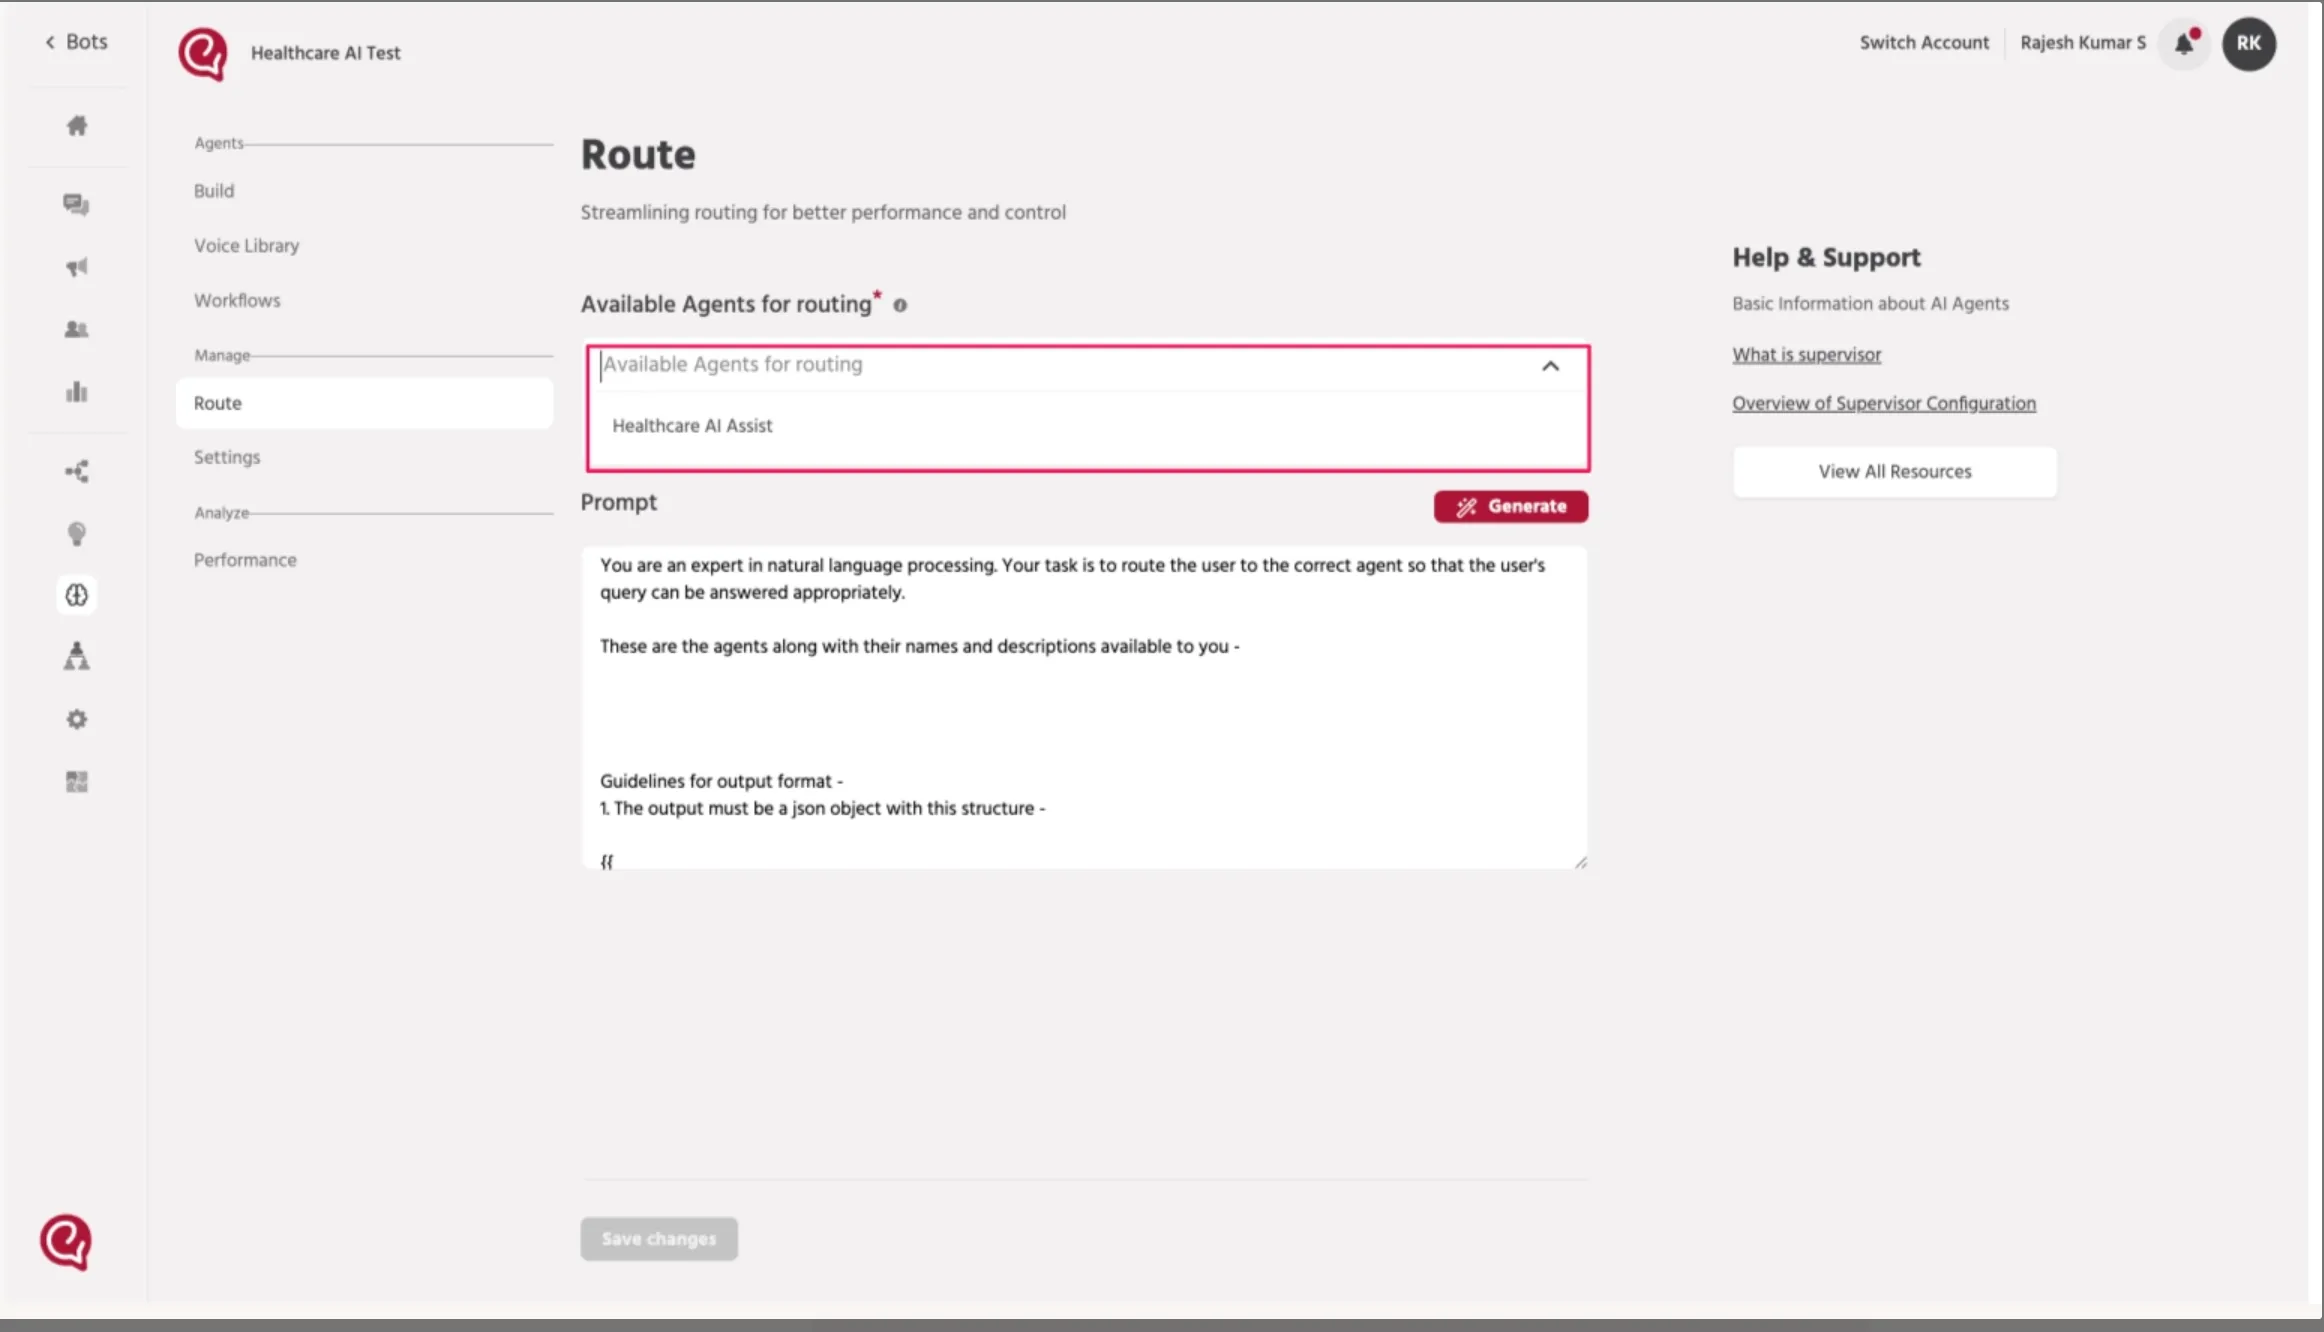
- Under Available Agents for Routing, select your deployed agent.
Step 3: Generate Routing Prompt
- Click Generate to create the routing prompt automatically.
- The system will generate a prompt describing how queries should be routed to the agent.
- Click Save Changes.
Step 4: Test the Agent
After saving the routing configuration:
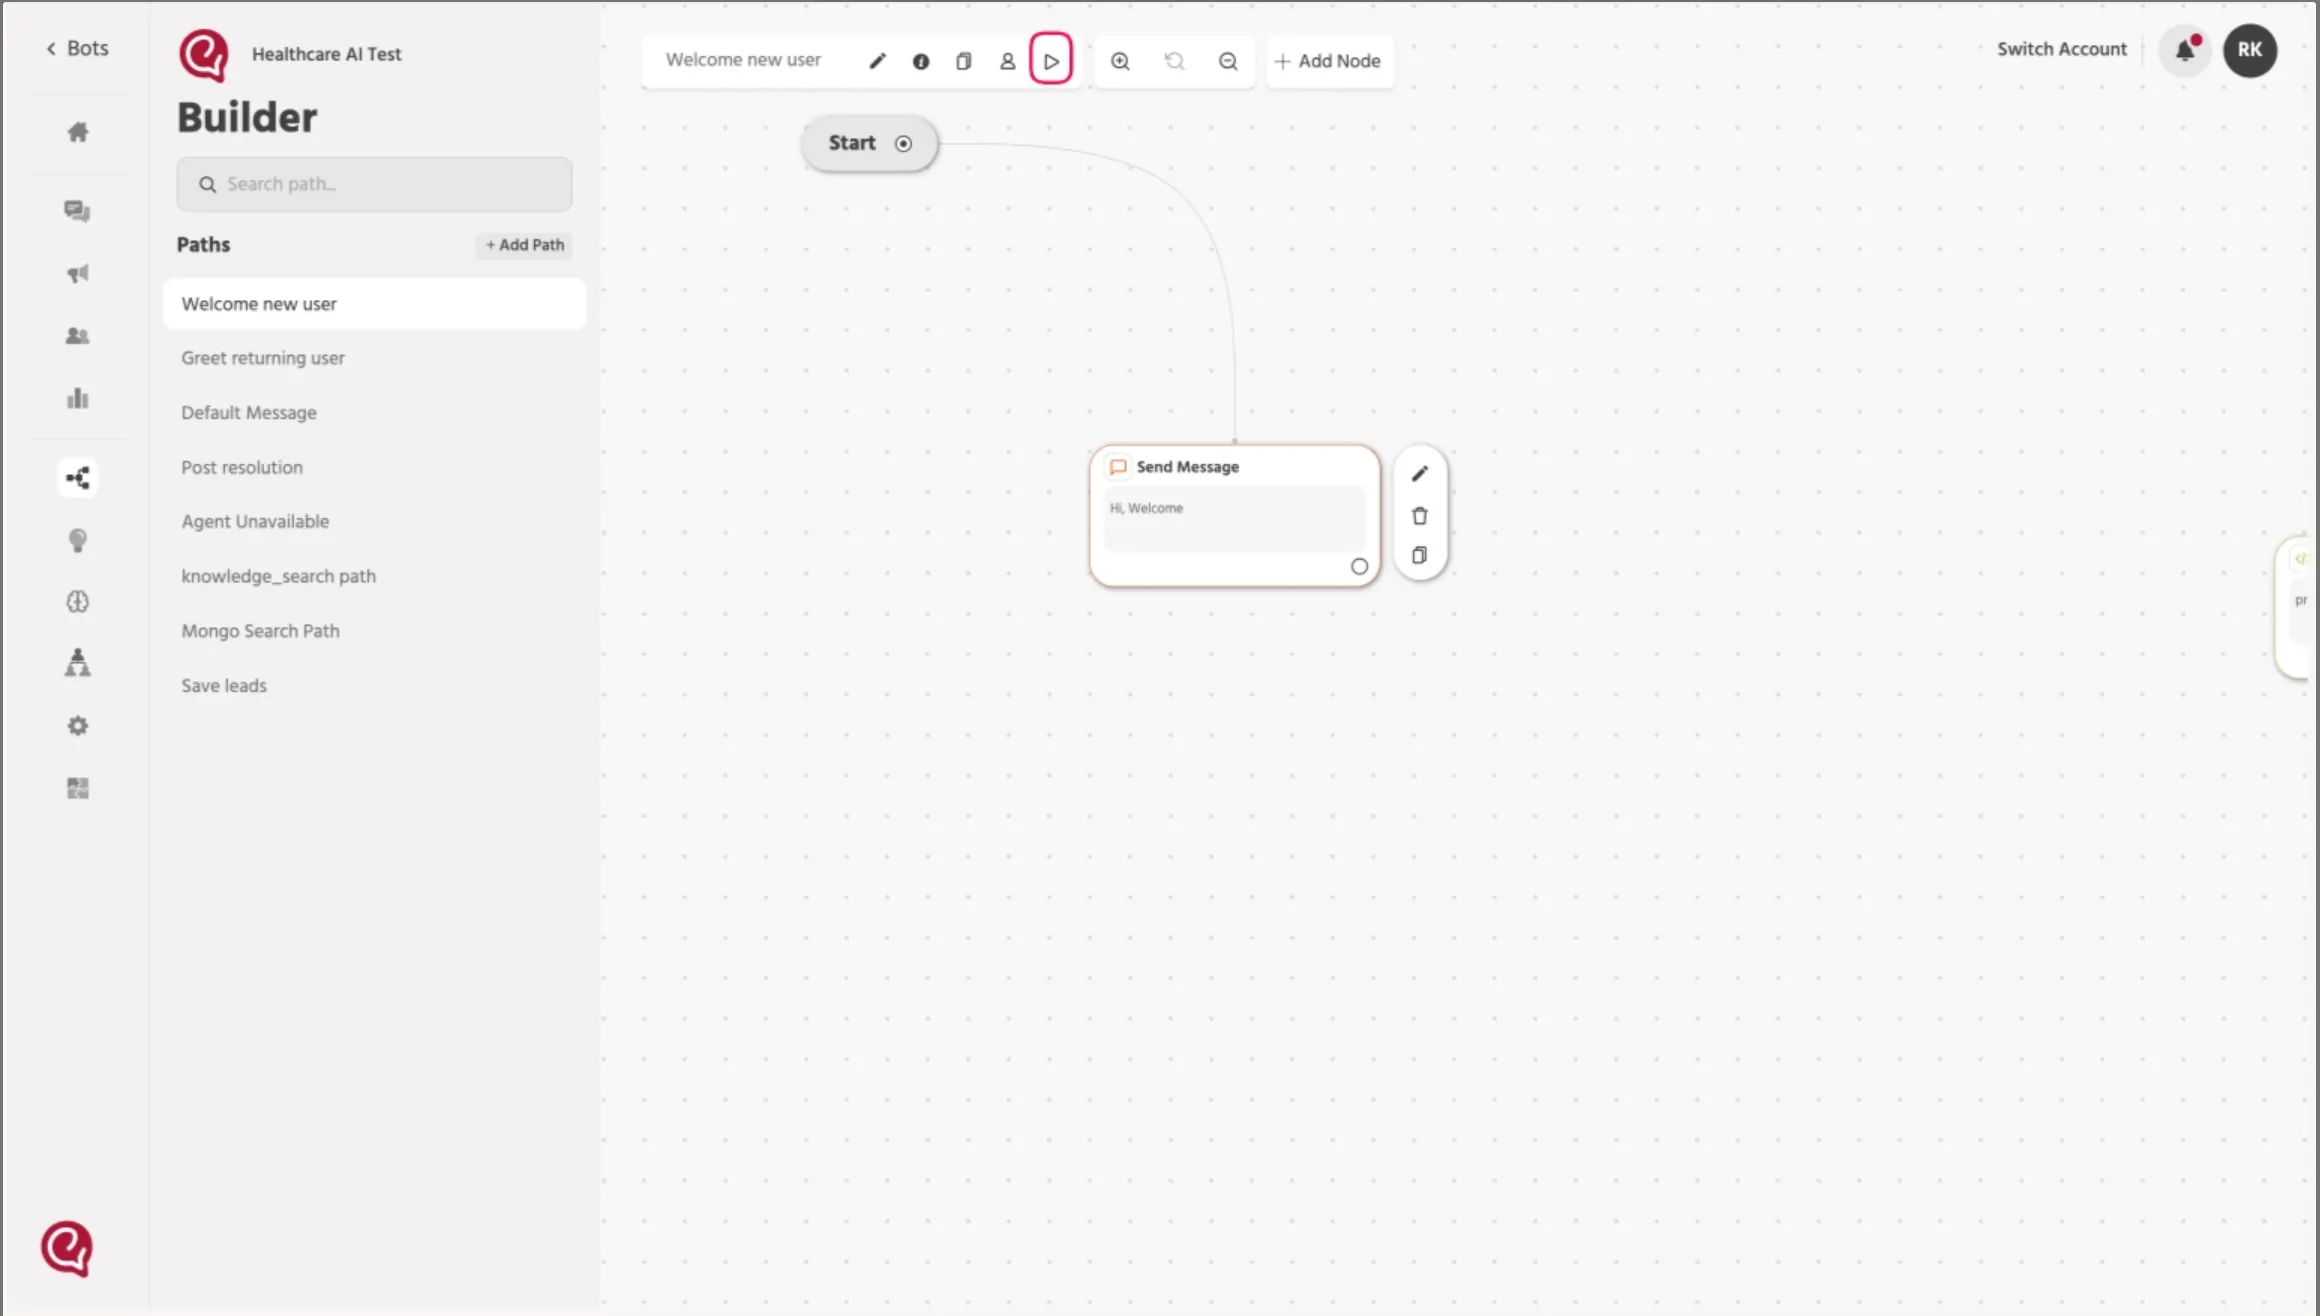
- Go to the Welcome / User Testing interface.
- Send a message such as:
hi
The system will route the message to the deployed agent, and the agent will respond based on the configured workflow.
Result
If the setup is completed correctly:
- The routing system will detect the user query.
- The query will be routed to the correct agent.
- The agent will generate a response based on its configuration.