1. Configure Generative AI
Text Agents rely on Generative AI models to produce responses during conversations. Before you proceed, ensure Generative AI is enabled and configured for your account.
What you’ll need
- Access to the Engati workspace/account where the agent is being built
- A supported provider account (OpenAI or Azure OpenAI)
- A valid API key / credentials for the provider
Setup guide
Follow the step-by-step setup here:
Text Agents use Generative AI to understand user queries and generate intelligent responses.
With eSenseGPT, you can connect a supported AI provider and upload knowledge sources (such as PDFs or URLs) so the agent can read them and answer questions conversationally.
Supported AI providers
- OpenAI
- Azure OpenAI
Before you start
- You need access to the Engati bot you want to configure.
- Keep your provider credentials ready (for example, an OpenAI API key).
Steps to Enable eSenseGPT
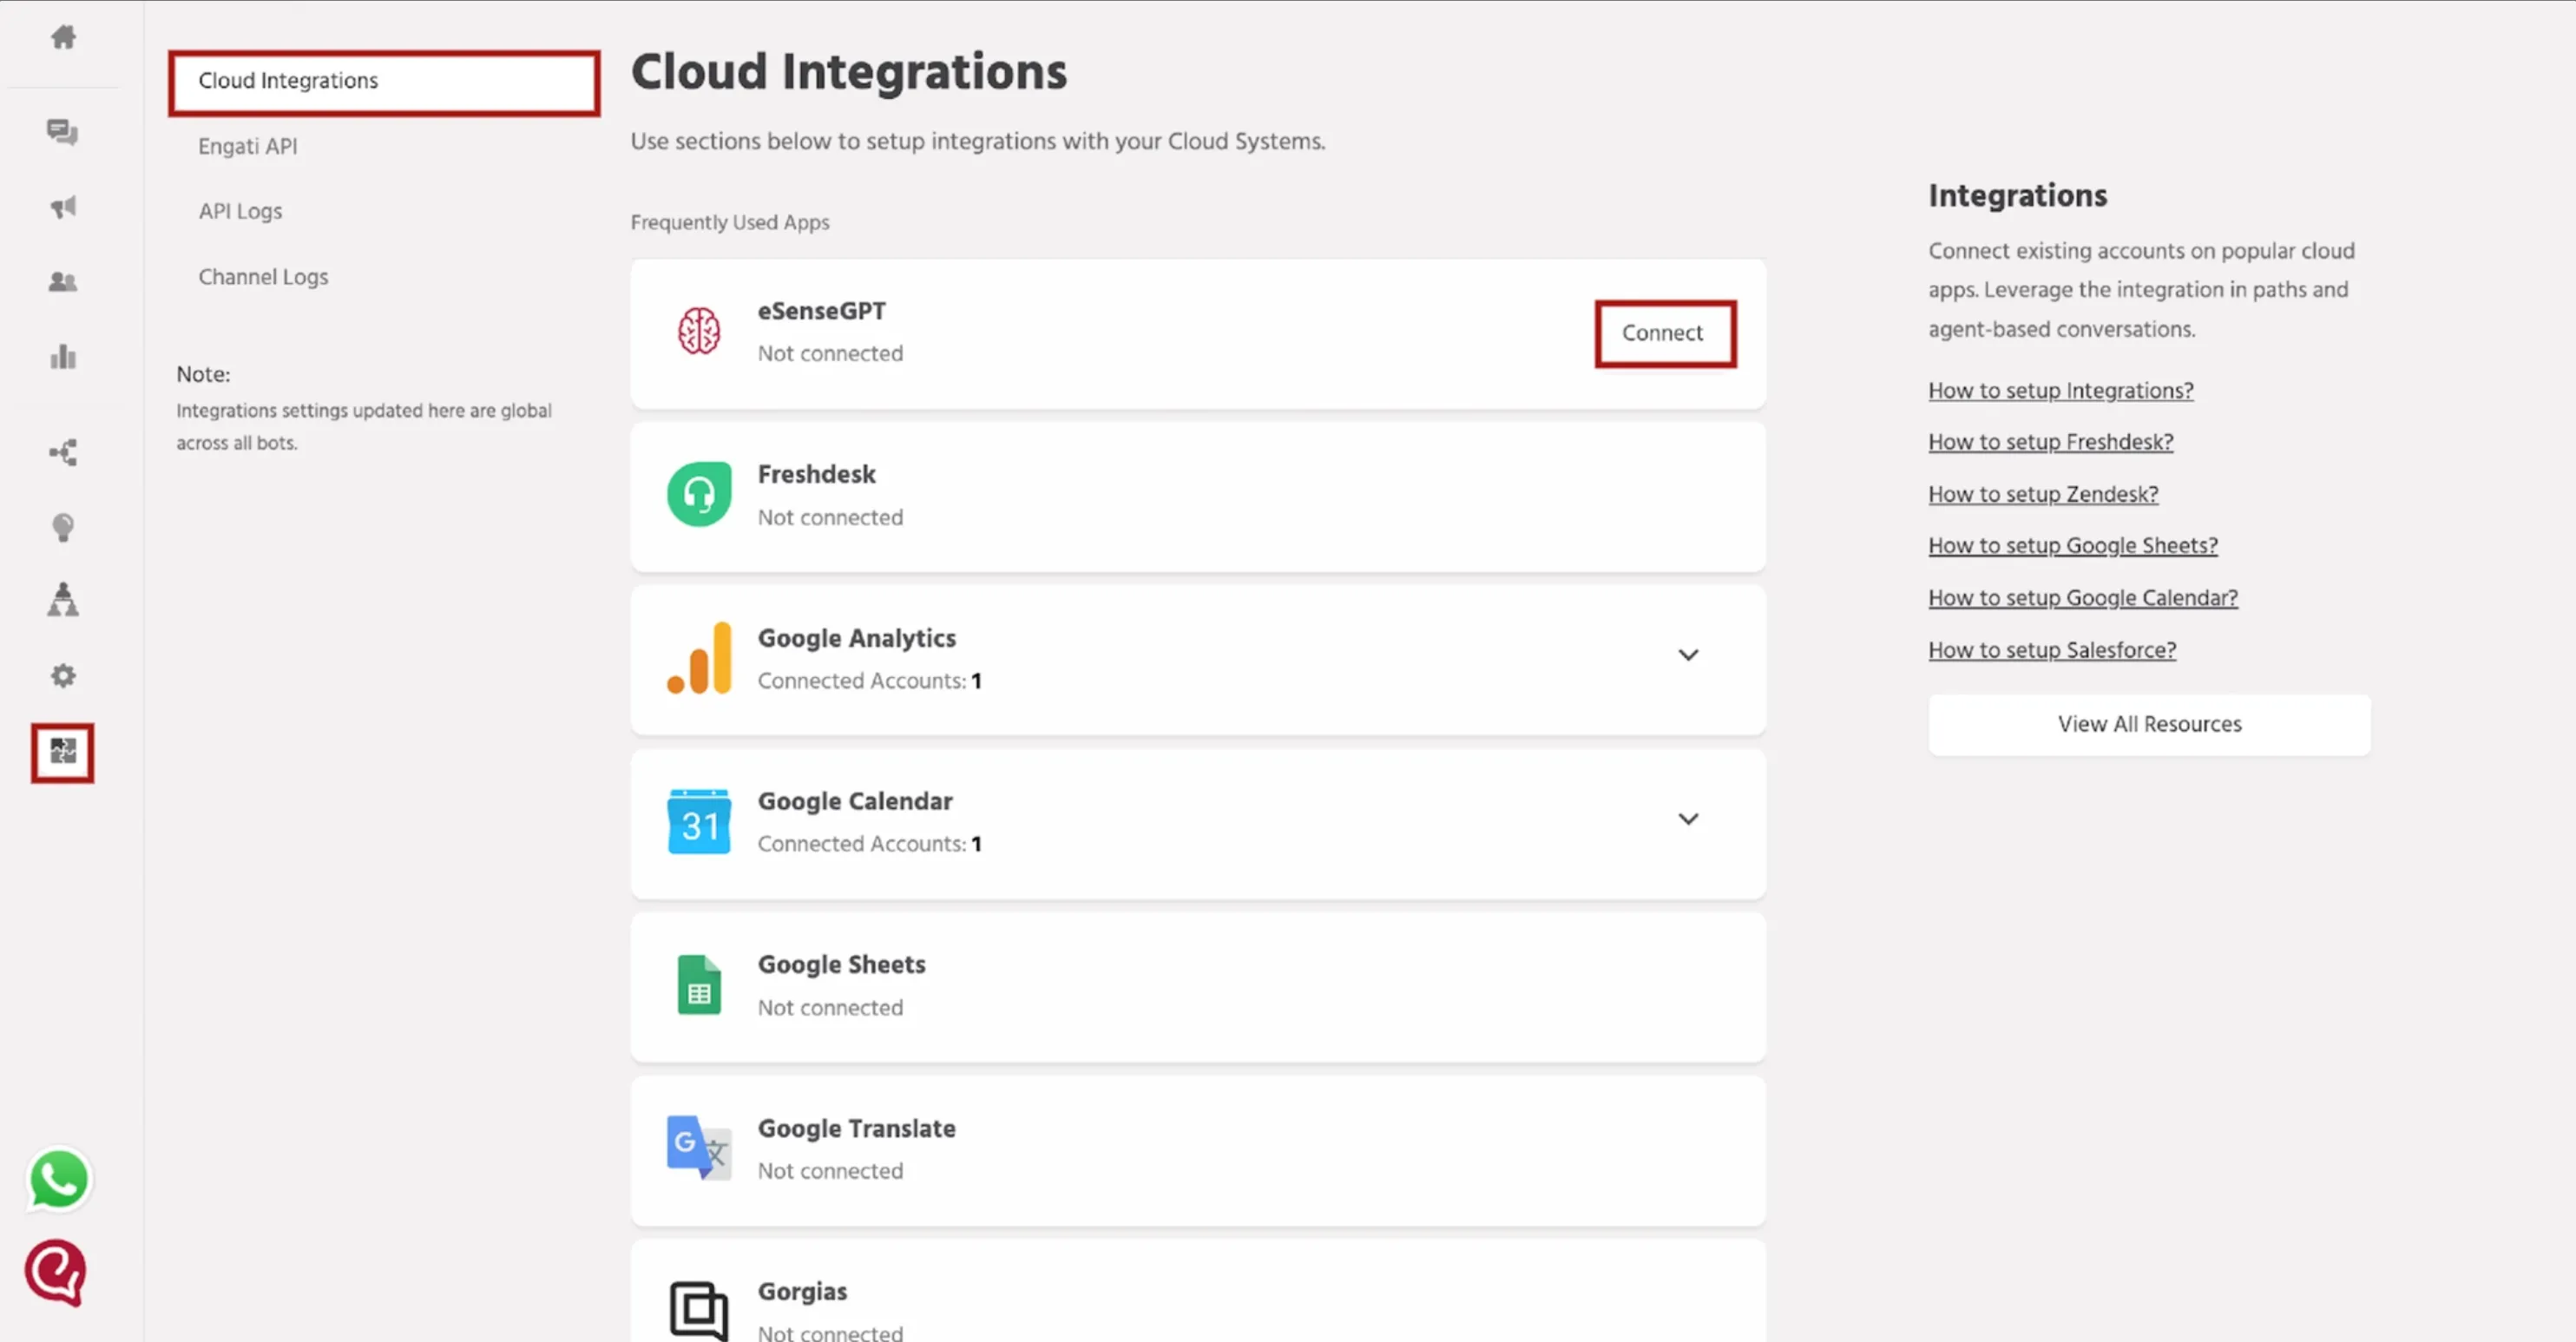
Step 1 — Navigate to Cloud Integrations
Go to: Integrations → Cloud Integrations → eSenseGPT
Step 2 — Select AI Provider
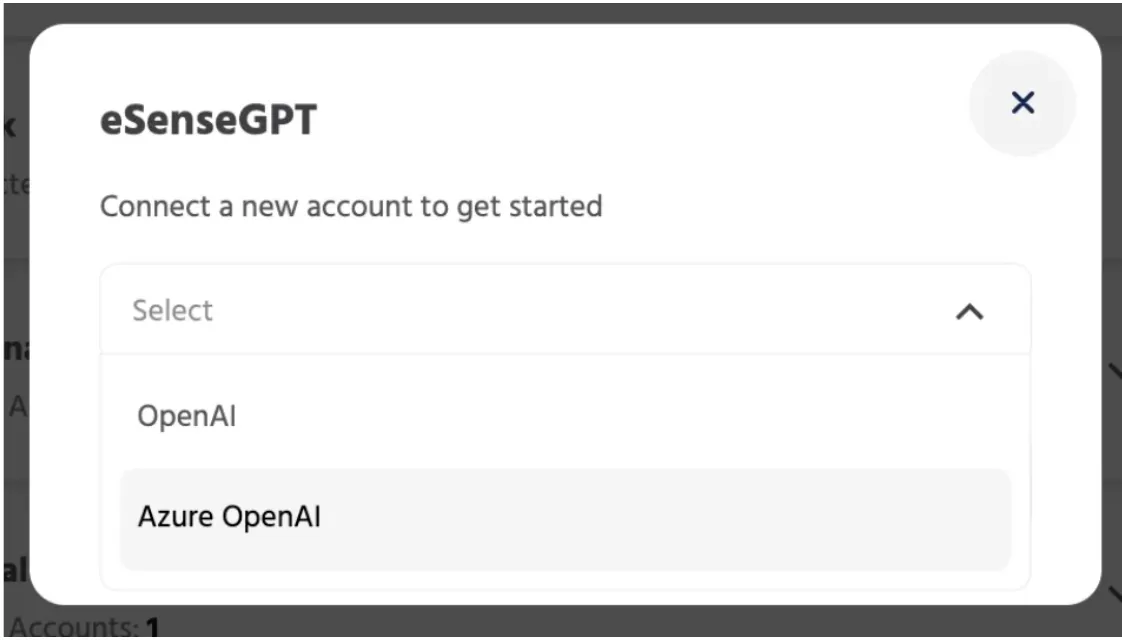
Choose OpenAI or Azure OpenAI from the dropdown and click Authorize.
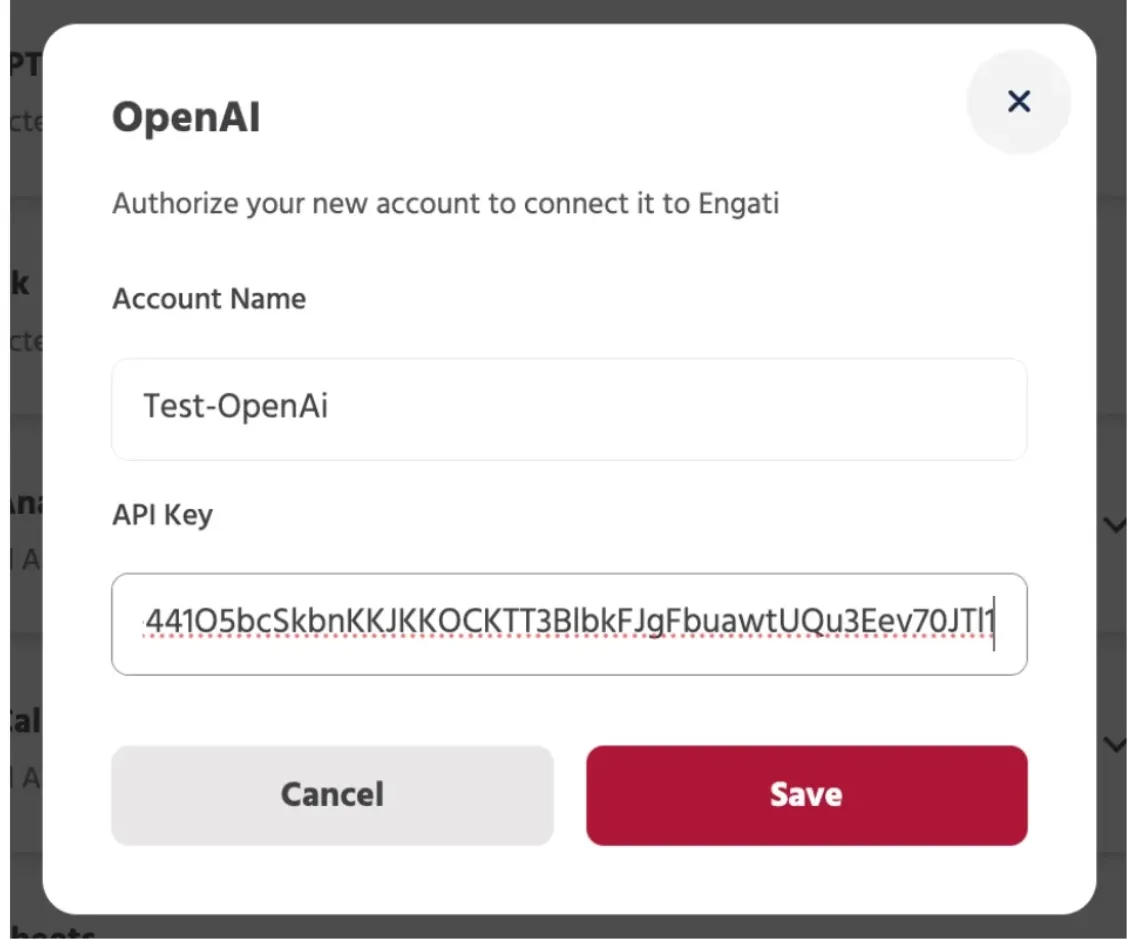
Step 3 — Add API Key
Enter an Account Name and add your provider credentials (for example, your OpenAI API Key), then save.
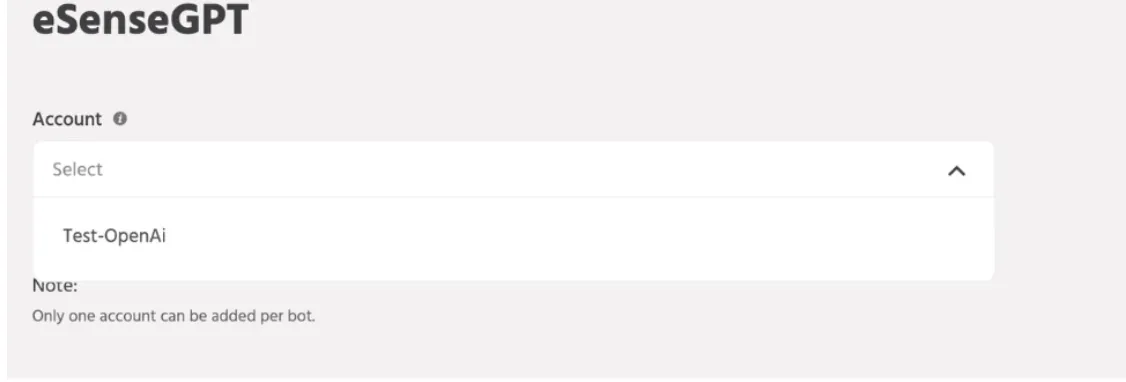
Step 4 — Configure for the Bot
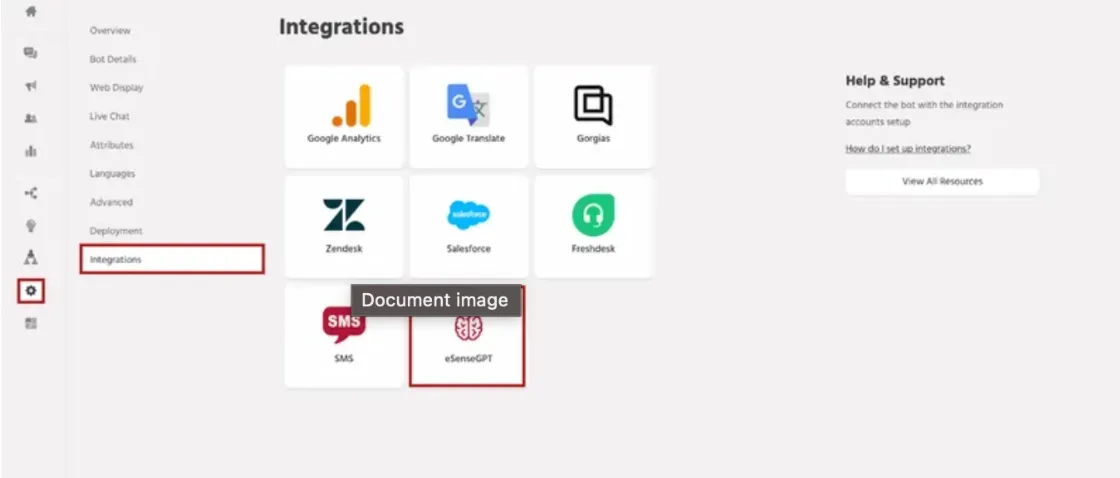
Go to: Configure → Integrations → eSenseGPT
Select the OpenAI account you added.
After configuration
Once configured, the bot can generate responses using Generative AI models.
Troubleshooting
- Authorize button is disabled or fails: confirm you selected a provider and your account has permission to add integrations.
- Invalid API key / authentication failed: re-check the key, billing status, and any IP/network restrictions.
- Bot is not generating answers: confirm the integration is selected under Configure → Integrations → eSenseGPT, and that knowledge sources have been uploaded.